p3-insta485-clientside
End-to-End Testing
To test a website that uses client-side dynamic pages, we need to mimic a user interacting with a web browser. We will use an end-to-end testing framework called Cypress that controls an internet browser like a user. When testing your project, be sure to read about starting the server before running tests.
Path
Make sure your entire project path contains no spaces. Your path may be different. See the instructions to Create a folder.
$ pwd
/Users/awdeorio/src/eecs485/p3-insta485-clientside
WSL
If you’re running the Windows Subsystem for Linux (WSL), check your version. Cypress works correctly on WSL 2, but not WSL 1.
Start a Windows PowerShell. Verify that you are using WSL 2. Follow the WSL Tutorial if you need to install or upgrade. Your Ubuntu version may be different.
$ wsl -l -v
  NAME                   STATE           VERSION
*  Ubuntu-24.04           Running         2
Install Linux dependencies for Cypress.
$ sudo apt install libgtk2.0-0t64 libgtk-3-0t64 libgbm-dev libnotify-dev libnss3 libxss1 libasound2t64 libxtst6 xauth xvfb
Pitfall: Make sure you are a non-root user.
$ whoami
awdeorio  # Good
root      # Bad
Pitfall: We strongly recommend Windows 11 (update instructions).
Pitfall: WSL 2 is required (update instructions).
Check the WSL version in the Windows PowerShell:
$ wsl -l -v
  NAME                   STATE           VERSION
*  Ubuntu-24.04           Running         2
Make sure to update WSL even if you have WSL 2.
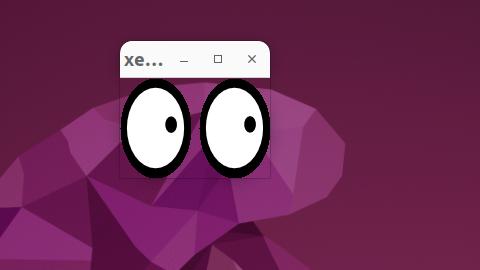
Start xeyes from Linux and verify that an xeyes window pops up. If you have trouble, see the test a GUI app section.
$ xeyes
Cypress
Cypress allows us to automate finding elements in the DOM and navigating the web page under test. It can programmatically click, scroll, and type.
Make sure Cypress is installed. In EECS 485, this is just a sanity check: Cypress is included as a dependency in the provided package.json. If you’re working on a side project, you might need to do npm i cypress. Your version may be different.
$ npm list cypress
insta485@1.0.0 /home/noah/eecs485/p3-insta485-clientside
├─┬ @cypress/grep@3.1.3
│ └── cypress@10.9.0 deduped
└── cypress@10.9.0
Run a test
Run a simple test which visits eecs485.org and then both opens and closes the sidebar. First download an example test and open Cypress.
$ wget https://eecs485staff.github.io/p3-insta485-clientside/test_cypress_hello.cy.js
$ mv test_cypress_hello.cy.js tests/cypress/e2e
$ npx cypress open
You’ll see a screen like this:
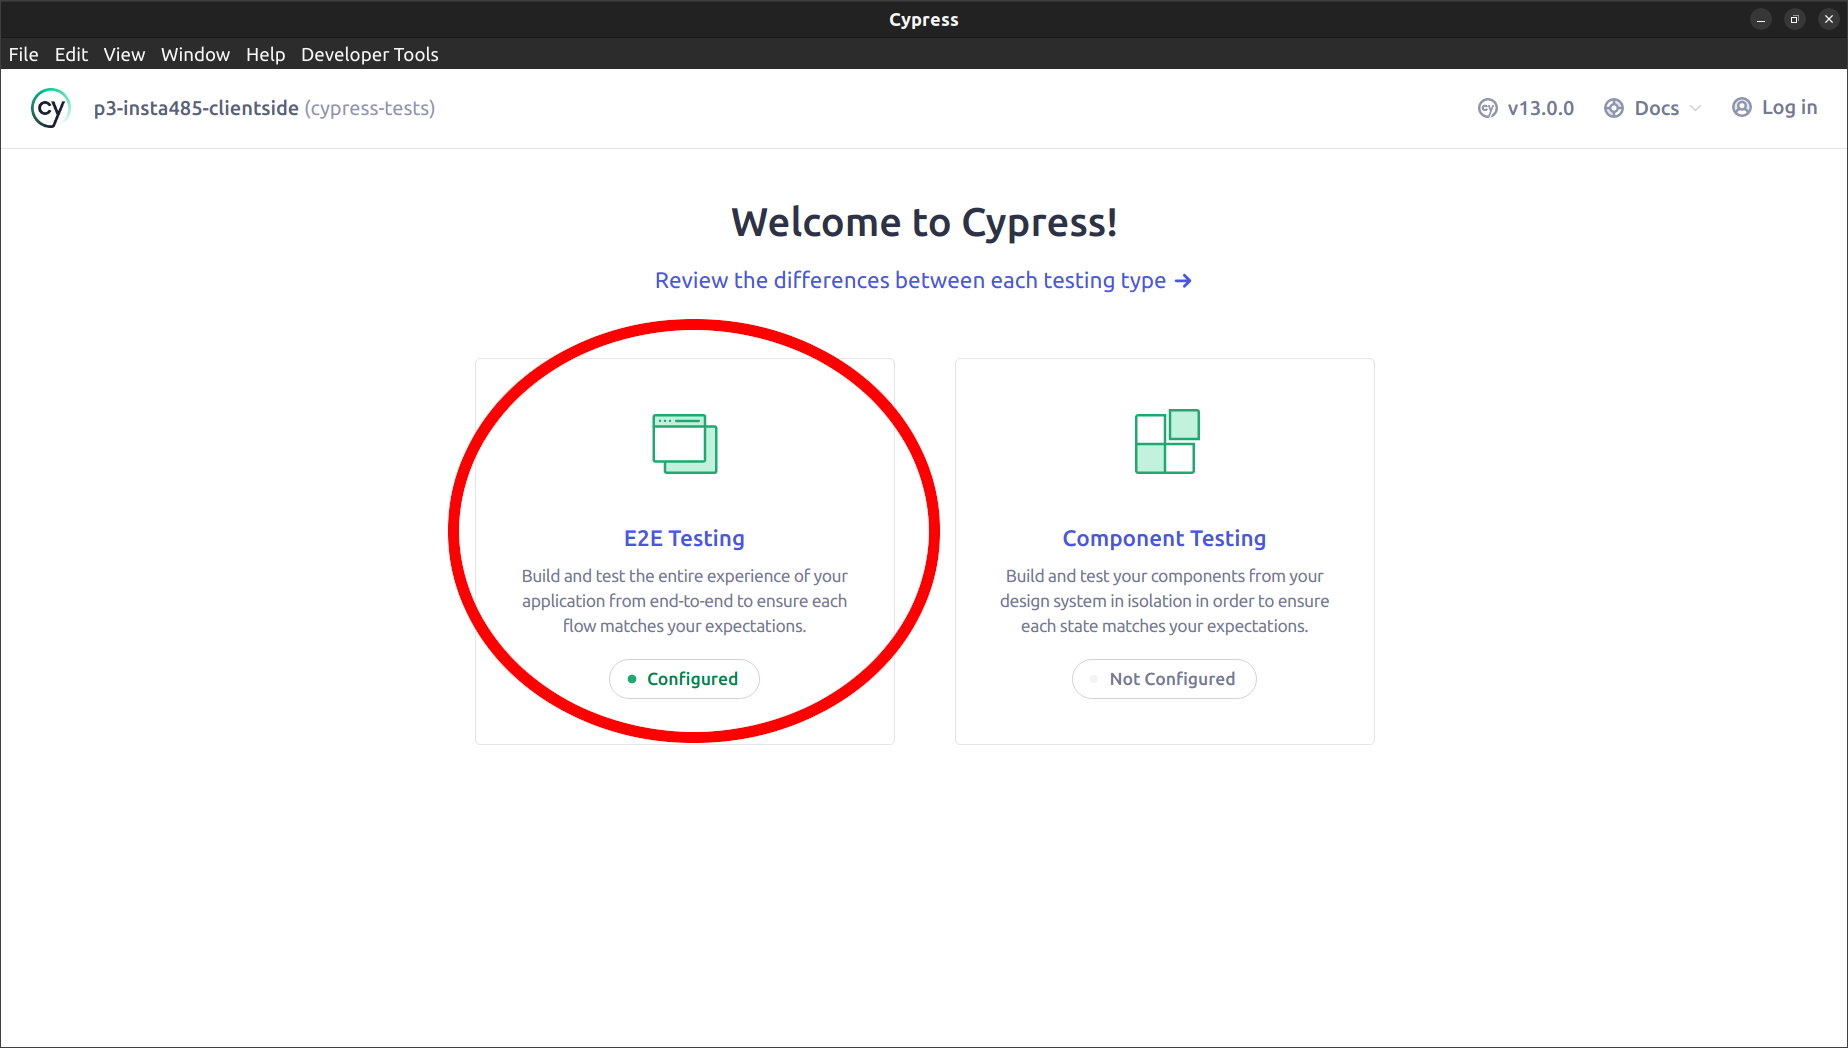
Click E2E testing. Now you’ll be able to select a browser.
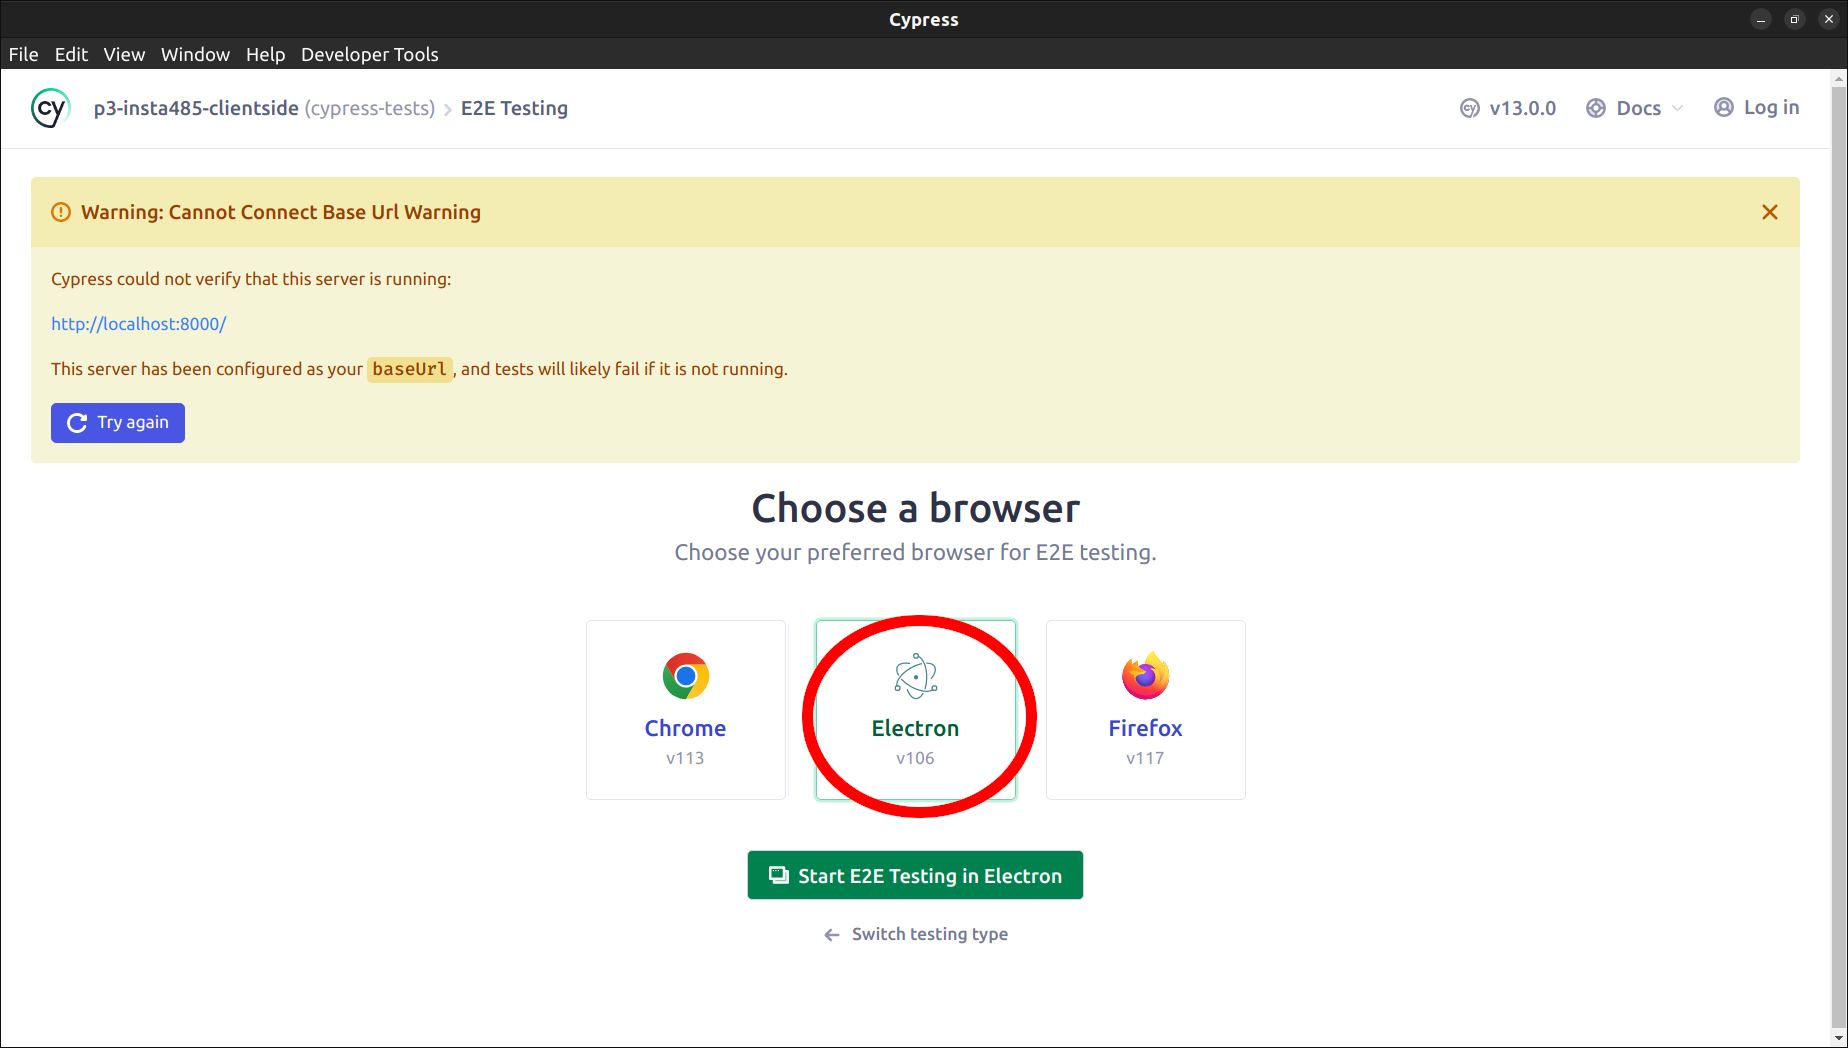
Choose Electron. You can test with any browser you have installed, but the autograder will use Electron (which is packaged with Cypress), so get into the habit of testing with Electron. For now, don’t worry about the “Cannot Connect Base Url” warning. When you’re testing your project, you’ll need to have your Flask server running, but this test doesn’t use your project code.
You should see a list of files like this:
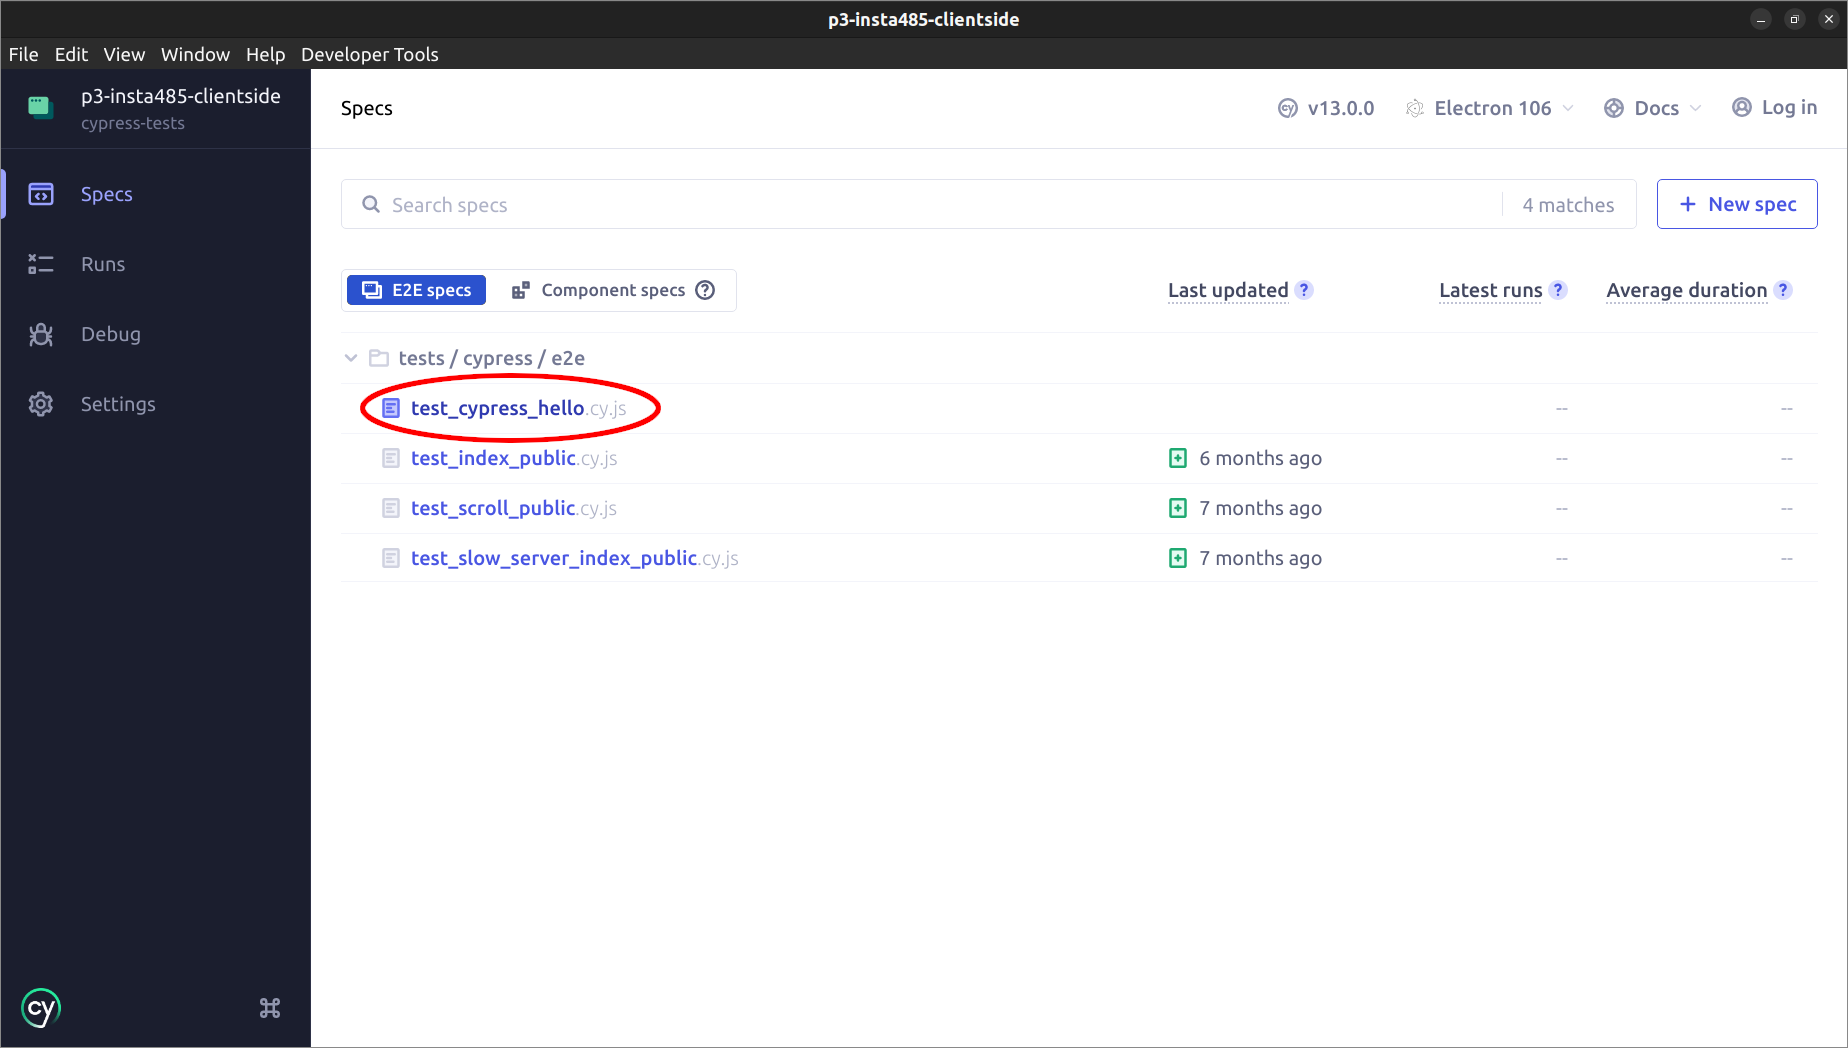
Click test_cypress_hello. The test inside that file will automatically run.
At this point, we recommend you read the source code of the test so that you know what it does. You can open the test file manually in your code editor, or click the name of the file at the top of the middle section of the screen and it will automatically open in your editor.
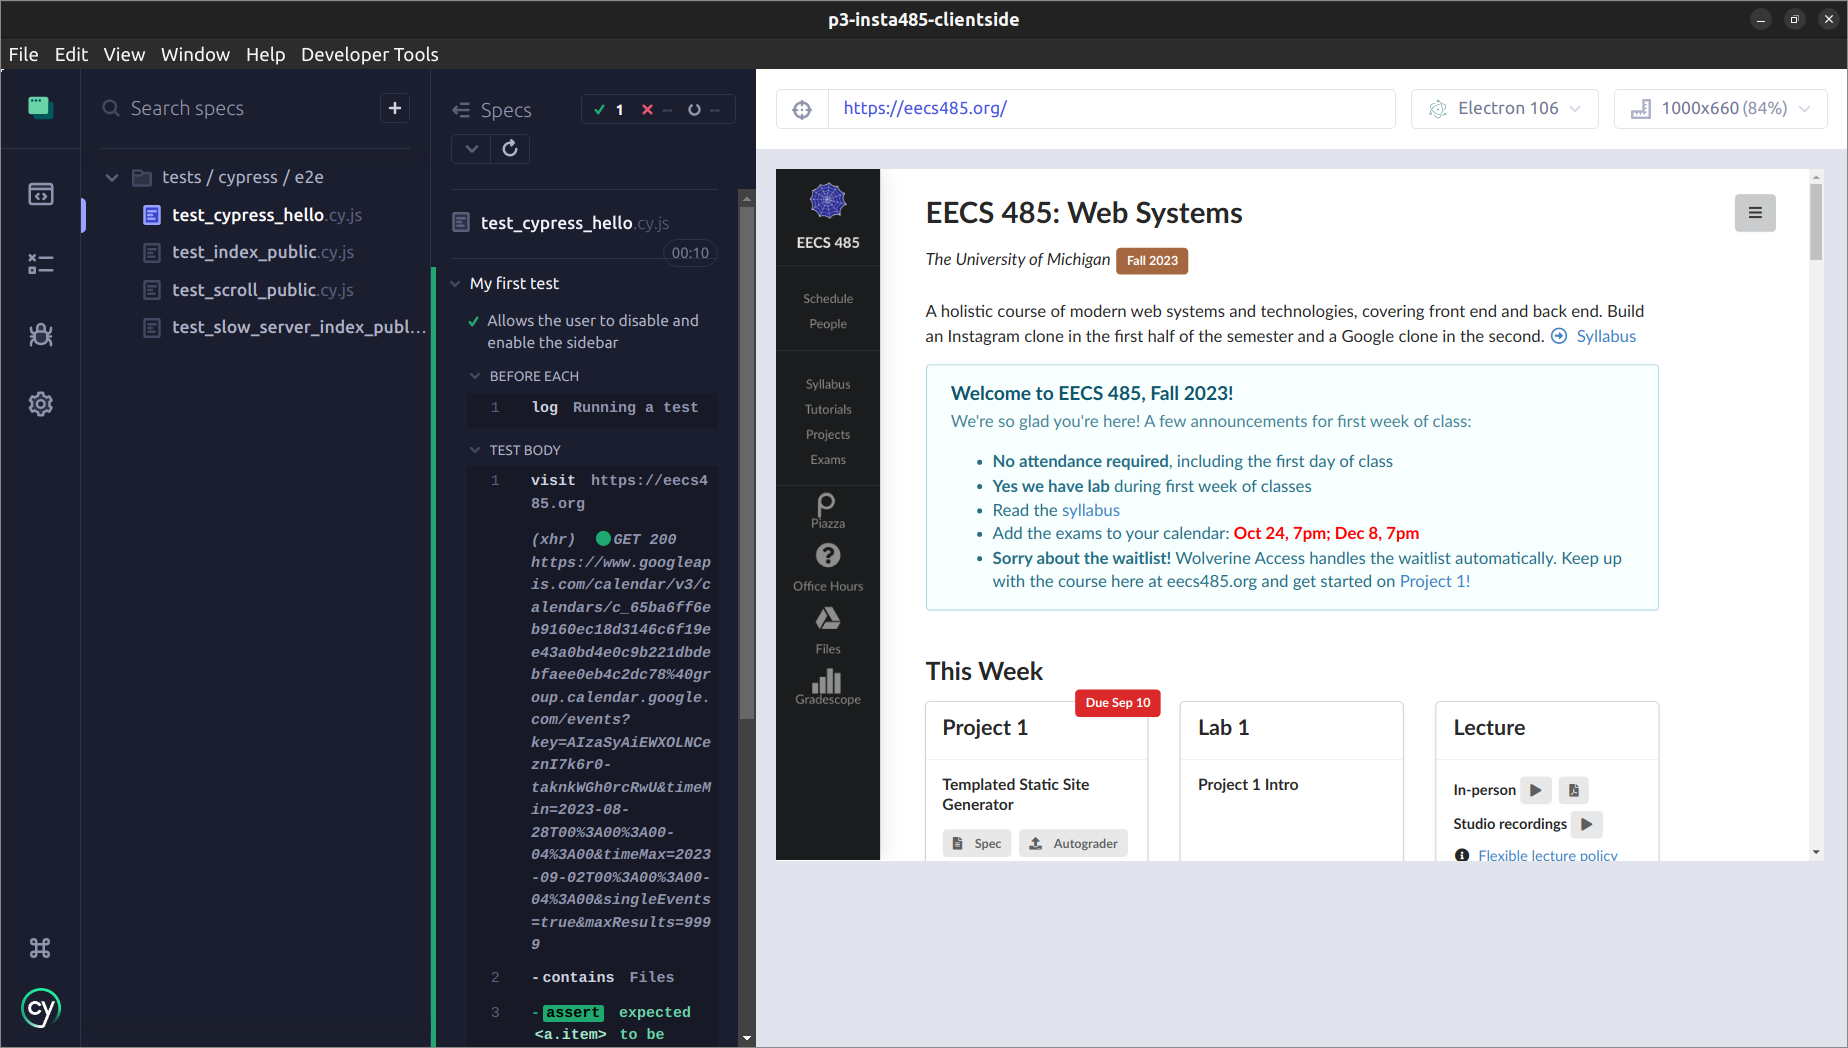
Now we’ll explore some of Cypress’s features. Hover your cursor over one of the lines in the Command Log (middle portion of the screen). This is called time traveling.
In the above screenshot, we’re hovering over line 3 in the Command Log, which asserts that “Files” is visible. At the same time, we see in the preview pane at the right that Cypress is highlighting the element which contains “Files” and scrolled it into view. This shows what the website looked like at the exact moment in time when that command ran in the test. If you hover over a different line, the view will change. Move your cursor out of the Command Log to stop time traveling.
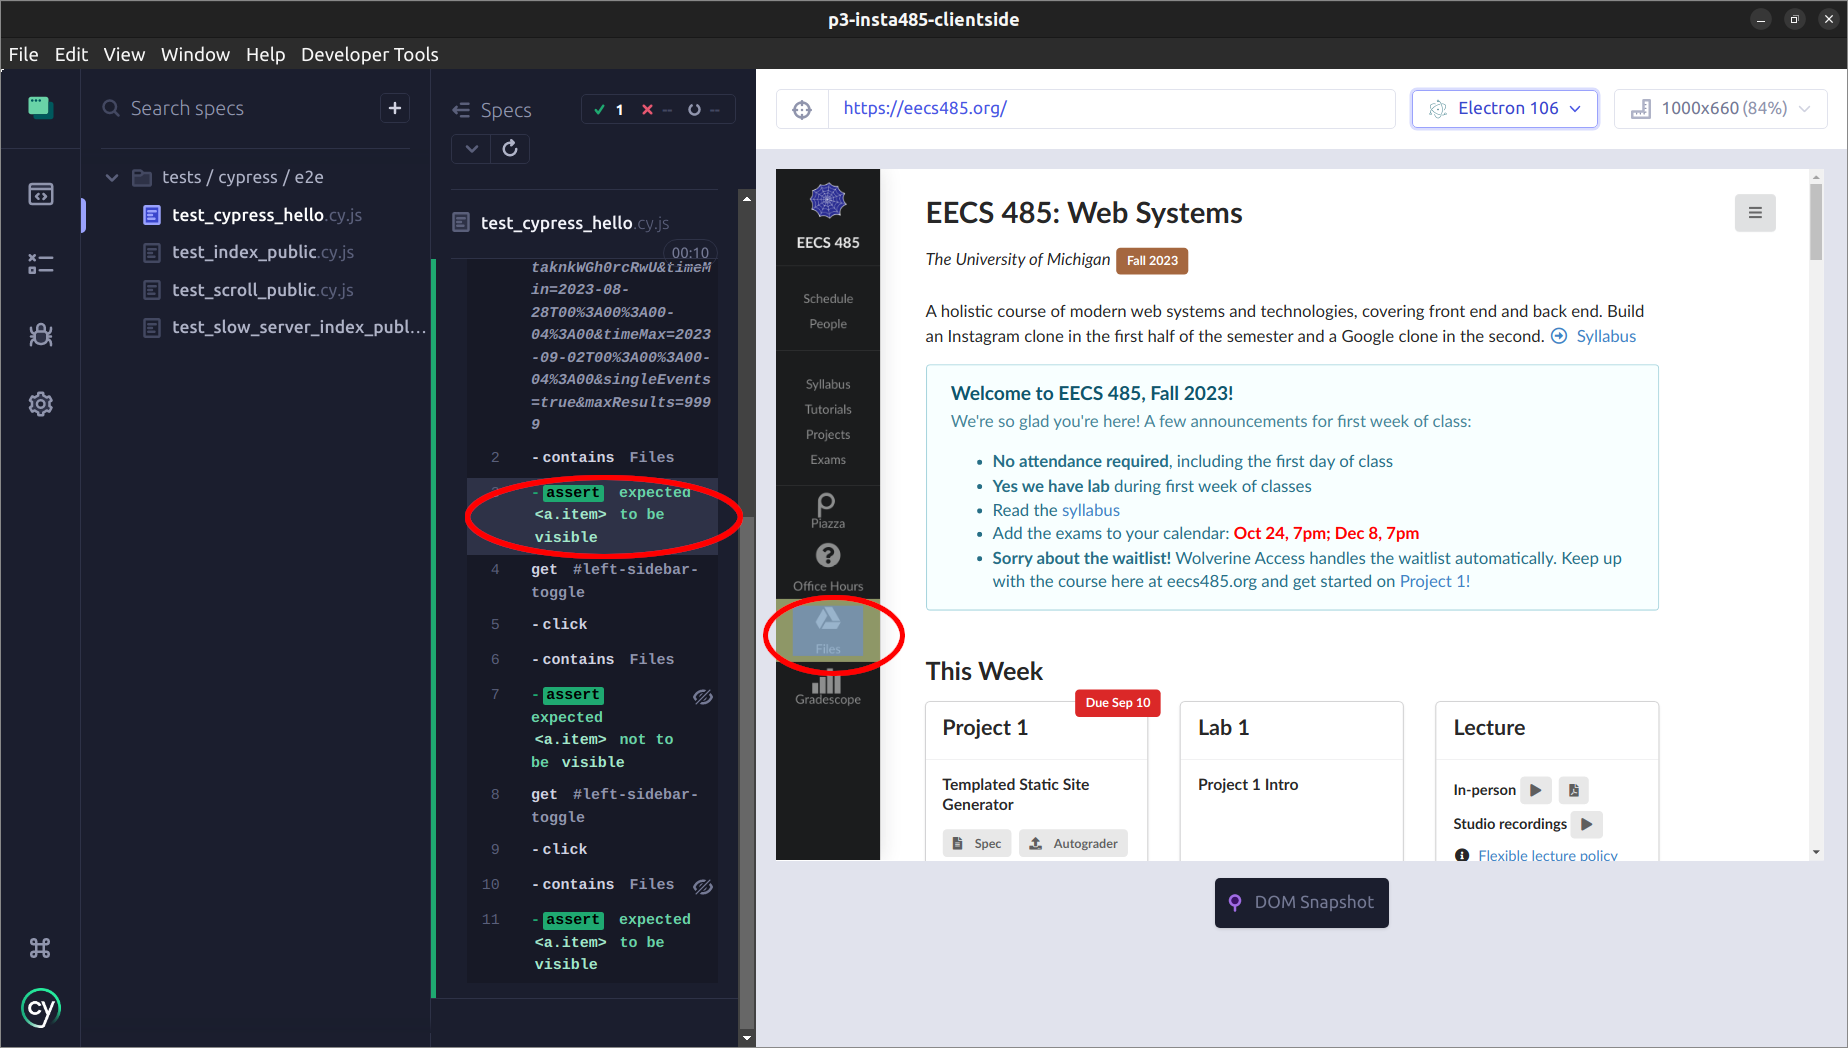
Next, click one of the lines in the Command Log.
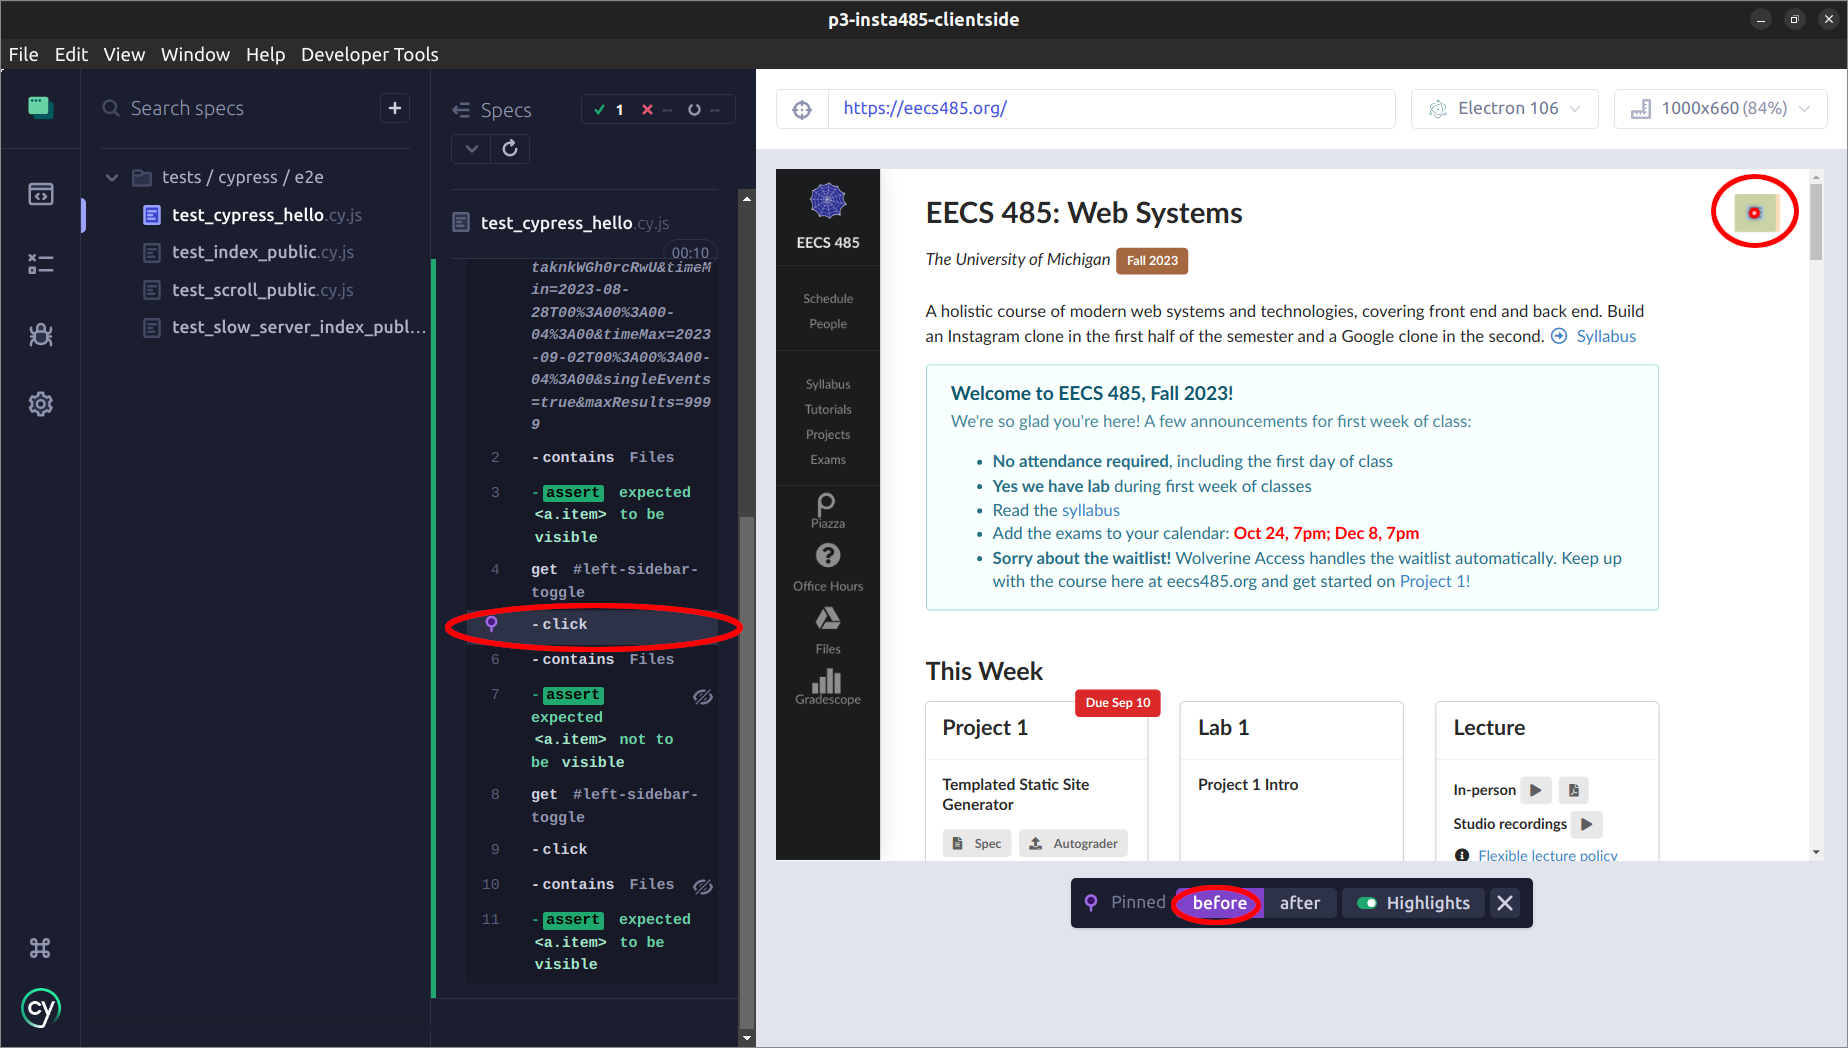
In the above screenshot, we clicked the first line in the Command Log which says “- click”. This pinned a snapshot to the screen, so that hovering over other commands won’t travel back in time to them. Notice on the right that you can choose “Before” or “After.” This is possible for certain actions like clicking a button, allowing you to see how the website changed after the button was clicked. With “Before” selected, the sidebar is visible. After clicking “After,” you should see this:
Now the sidebar is hidden.
When a command is pinned, you can inspect the DOM with your developer tools at specific points in time. Pinning a command will also copy extra information about that command to the browser console. After clicking one of the “contains” commands, the browser console will display this:
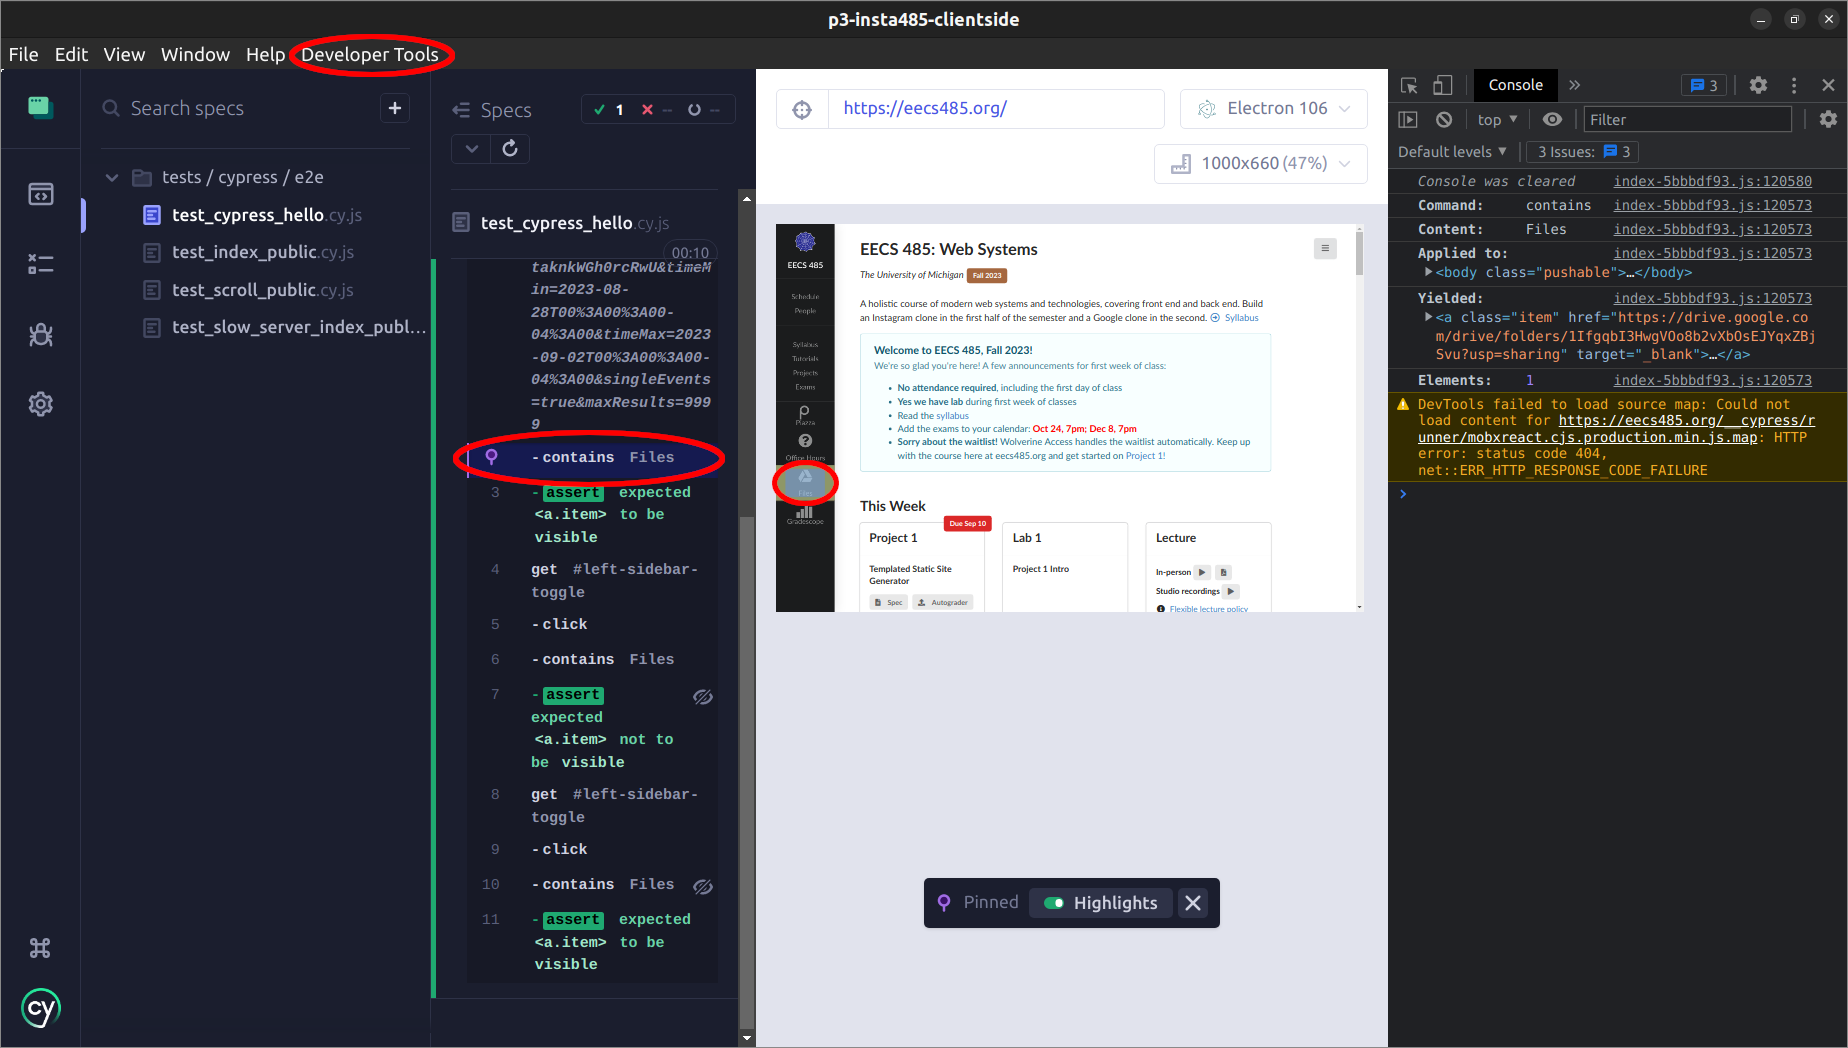
The console tells you specific details about the “contains” command yielded, including the DOM element. Other commands will give you different information. You can see the console by clicking the “Developer Tools” tab at the top. You can also right-click anywhere on the preview pane and click “Inspect Element.”
To help with debugging, you might sometimes want to step through the test one command at a time. Open the test file and add cy.pause() in a test you want to step through right before you want to take control over the test. In the Cypress UI, you should see something like this:
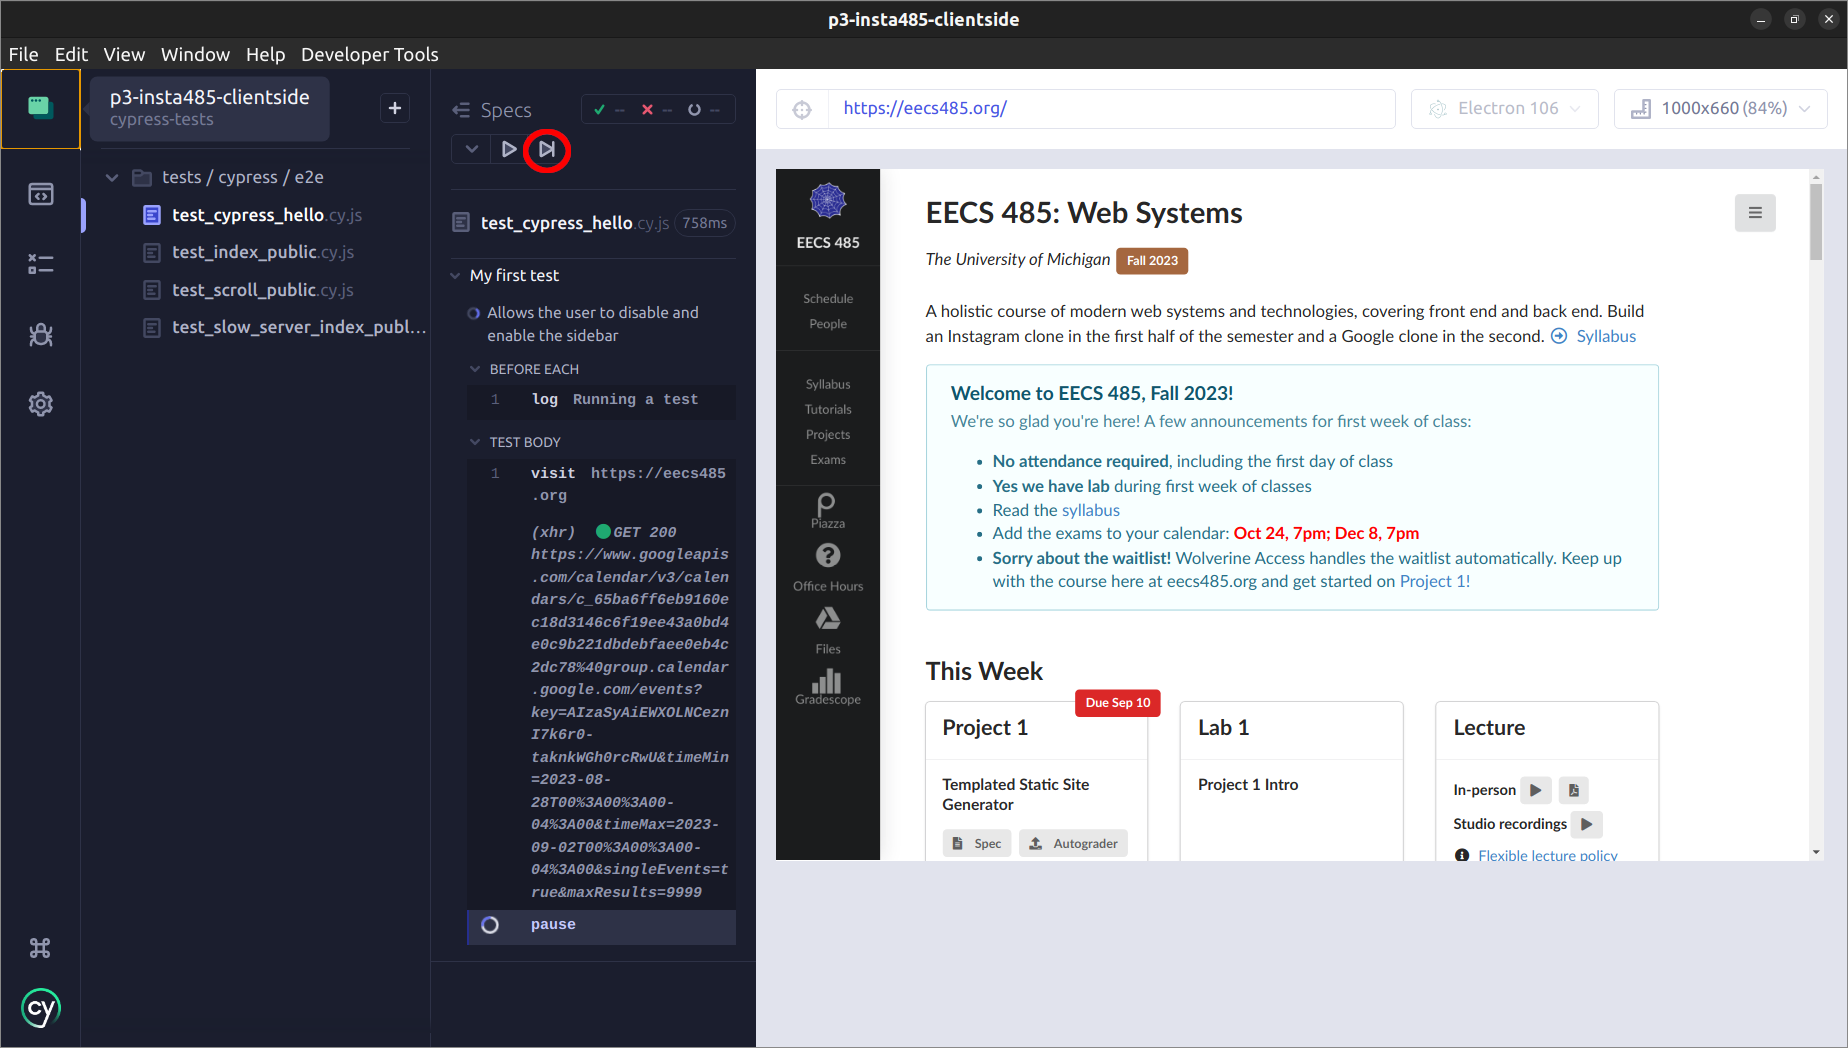
Press N on your keyboard or click the button to the right of the play button at the top-middle of the screen. This will run a single command. Keep pressing it to proceed throughout the test. Press C or click the play button to unpause and let the test resume at its normal speed.
You might only want to run a single test. Open the test file and change it() to it.only() for the test you want to run. You can also change describe() to describe.only() if you want to run just a single describe block in a test file that has multiple.
Before you run Cypress on Insta485 for Project 3, read the Testing section of the spec.
Pitfall: Don’t use features that require the database while debugging a test that uses mock data.
Some tests (not the above demo) intercept API requests and respond with mock posts. When you run a test with mock posts, you won’t be able to successfully perform database operations that aren’t also mocked. For example, don’t try clicking “unlike” after running test_scroll_public.cy.js: that will send an API request that doesn’t get intercepted, and your REST API will get a request for a post that doesn’t exist. Instead, you should test like/unlike behavior in a test with real posts, like most of the tests in test_index_public.cy.js.
Acknowledgments
Original document written by Andrew DeOrio awdeorio@umich.edu and Noah Weingarden nwein@umich.edu.
This document is licensed under a Creative Commons Attribution-NonCommercial 4.0 License. You’re free to copy and share this document, but not to sell it. You may not share source code provided with this document.