EECS 485 Lab
Lab 5: Project 3 Setup
Note: Lab 5 has been combined with Lab 6.
This lab involves going through the entirety of the setup for Project 3. Part 1 explores the REST API portion of the project while Part 2 deals with setting up and debugging a React program.
Part 1 - Project 3 Setup: Flask + REST APIs
Goals
- Set up AWS account, version control, python virtual environment, and utilities
- Set up some of the skeleton code for project 3: Client-side Dynamic Pages
- Understand the basics of how to use Flask to develop a REST API
- Be able to utilize command line tools to interact with a REST API
Setup
Part 1 is a portion of the Project 3 setup tutorial. Complete all sections up to and including REST API Tools.
Completion Criteria
- Have a clean remote and local git repo with a
.gitignore, starter files, copied project 2 code, and initial REST API codeCheck
$ pwd /Users/awdeorio/src/eecs485/p3-insta485-clientside $ cat .gitignore # This is a sample .gitignore file that's useful for EECS 485 projects. # # Add this file to the root of your git repo. Name it .gitignore # # A .gitignore file will tell git which files and directories to ignore and # not add to version control. ... $ git status On branch main Your branch is up to date with 'origin/main'. nothing to commit, working tree clean $ tree --matchdirs -I 'env|__pycache__' . ├── bin │ ├── insta485db │ ├── insta485run │ └── insta485test ├── insta485 │ ├── __init__.py │ ├── api │ │ ├── __init__.py │ │ ├── likes.py ... │ ├── config.py │ ├── model.py │ ├── static │ │ ├── css │ │ │ └── style.css │ │ ├── images │ │ │ └── logo.png │ │ └── js │ │ └── bundle.js │ ├── templates ... │ │ └── index.html │ └── views │ ├── __init__.py │ ├── index.py ... ├── package-lock.json ├── package.json ├── setup.py ├── sql │ ├── data.sql │ ├── schema.sql │ └── uploads ... │ └── e1a7c5c32973862ee15173b0259e3efdb6a391af.jpg ├── tests ... │ └── util.py └── webpack.config.js - Have an activated python virtual environment
Check
$ pwd /Users/awdeorio/src/eecs485/p3-insta485-clientside $ source env/bin/activate $ which python /Users/awdeorio/src/eecs485/p3-insta485-clientside/env/bin/python - Have the appropriate utilities installed
Check
$ sqlite3 --version -- Loading resources from /Users/aditya/.sqliterc 3.28.0 2019-04-15 14:49:49 378230ae7f4b721c8b8d83c8ceb891449685cd23b1702a57841f1be40b5daapl $ http --version 2.2.0 $ curl --version curl 7.64.1 (x86_64-apple-darwin19.0) libcurl/7.64.1 (SecureTransport) LibreSSL/2.8.3 zlib/1.2.11 nghttp2/1.39.2 ... - Be able to locally run your server-side dynamic version of Insta 485 from project 2
Check
$ pwd /Users/awdeorio/src/eecs485/p3-insta485-clientside $ ./bin/insta485db reset && ./bin/insta485run # Verify code works by navigating to localhost:8000 ... - Be able to see a JSON response associated with test “Posts” API route
Check
  $ ./bin/insta485run
  ...
Navigate to http://localhost:8000/api/v1/p/1/ and you should see:
{ "age": "2017-09-28 04:33:28", "img_url": "/uploads/122a7d27ca1d7420a1072f695d9290fad4501a41.jpg", "owner": "awdeorio", "owner_img_url": "/uploads/e1a7c5c32973862ee15173b0259e3efdb6a391af.jpg", "owner_show_url": "/u/awdeorio/", "post_show_url": "/p/1/", "url": "/api/v1/p/1/" } - Be able to log in and make a REST API call via the command line
Check
$ http \ --session=./session.json \ --form POST \ "http://localhost:8000/accounts/login/" \ username=awdeorio \ password=password \ submit=login HTTP/1.0 302 FOUND ... $ http \ --session=./session.json \ "http://localhost:8000/api/v1/p/1/" HTTP/1.0 200 OK ... { "age": "2017-09-28 04:33:28", "img_url": "/uploads/122a7d27ca1d7420a1072f695d9290fad4501a41.jpg", "owner": "awdeorio", "owner_img_url": "/uploads/e1a7c5c32973862ee15173b0259e3efdb6a391af.jpg", "owner_show_url": "/u/awdeorio/", "post_show_url": "/p/1/", "url": "/api/v1/p/1/" } - Register your group on the project 3 autograder.
Part 2 - Project 3 Setup: React Debugging Tutorial
Goals
- Have a virtual environment set up with both back end and front end tools
- Understand the basics of React and JavaScript
- Be able to debug JavaScript without having to include
console.log()statements with browser tools - Be able to debug React code with React Dev Tools
Finish P3 Setup
This part involved completing the project 3 setup tutorial, starting from the React/JS section.
JavaScript Debugger
The next part of this lab is learning how to debug JavaScript. In this next JavaScript debugger tutorial, we’ll discuss how to use browser tools to debug without having to add console.log() statements everywhere.
Remember that static pages and server-side dynamic pages tools still apply!
React Debugging
Debugging React code can be tricky if you try to apply the JavaScript debugging tools on the JavaScript code that was transpiled from your React code. Instead, we can use the React Dev Tools browser extension, which allows you to view your React components as HTML DOM elements in the Developer Tools and see the props and state for each component. In the following section, we will walk through how to debug code for a React component. While the following tutorial is for a basic Likes widget, you should walk through the debugging process at a high level using your Posts widget to get more comfortable using this browser extension.
Note: The following debugging tutorial is meant to serve as a general guide on how to use the basics of the React Dev Tools browser extension to debug React code
First, add the React Dev Tools Extension to Chrome or Firefox.
Pro-tip: Use Webpack’s --watch option in a separate terminal to automatically update your bundle.js when a file changes.
$ npx webpack --watch
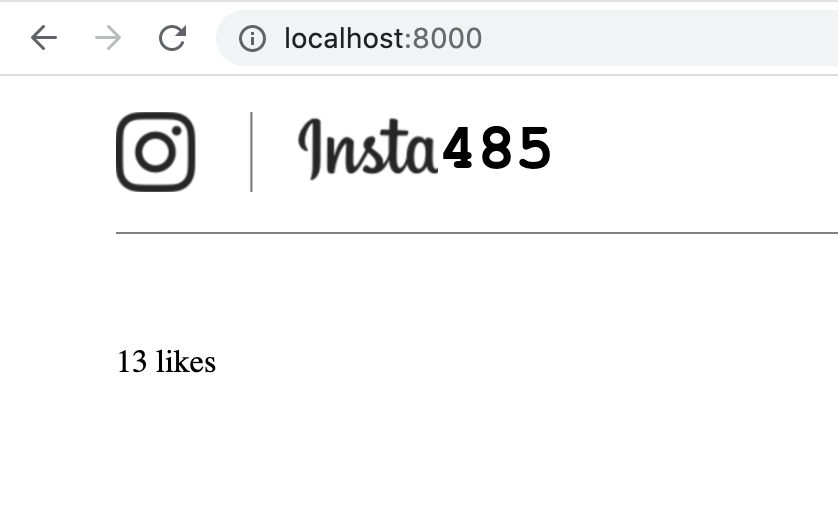
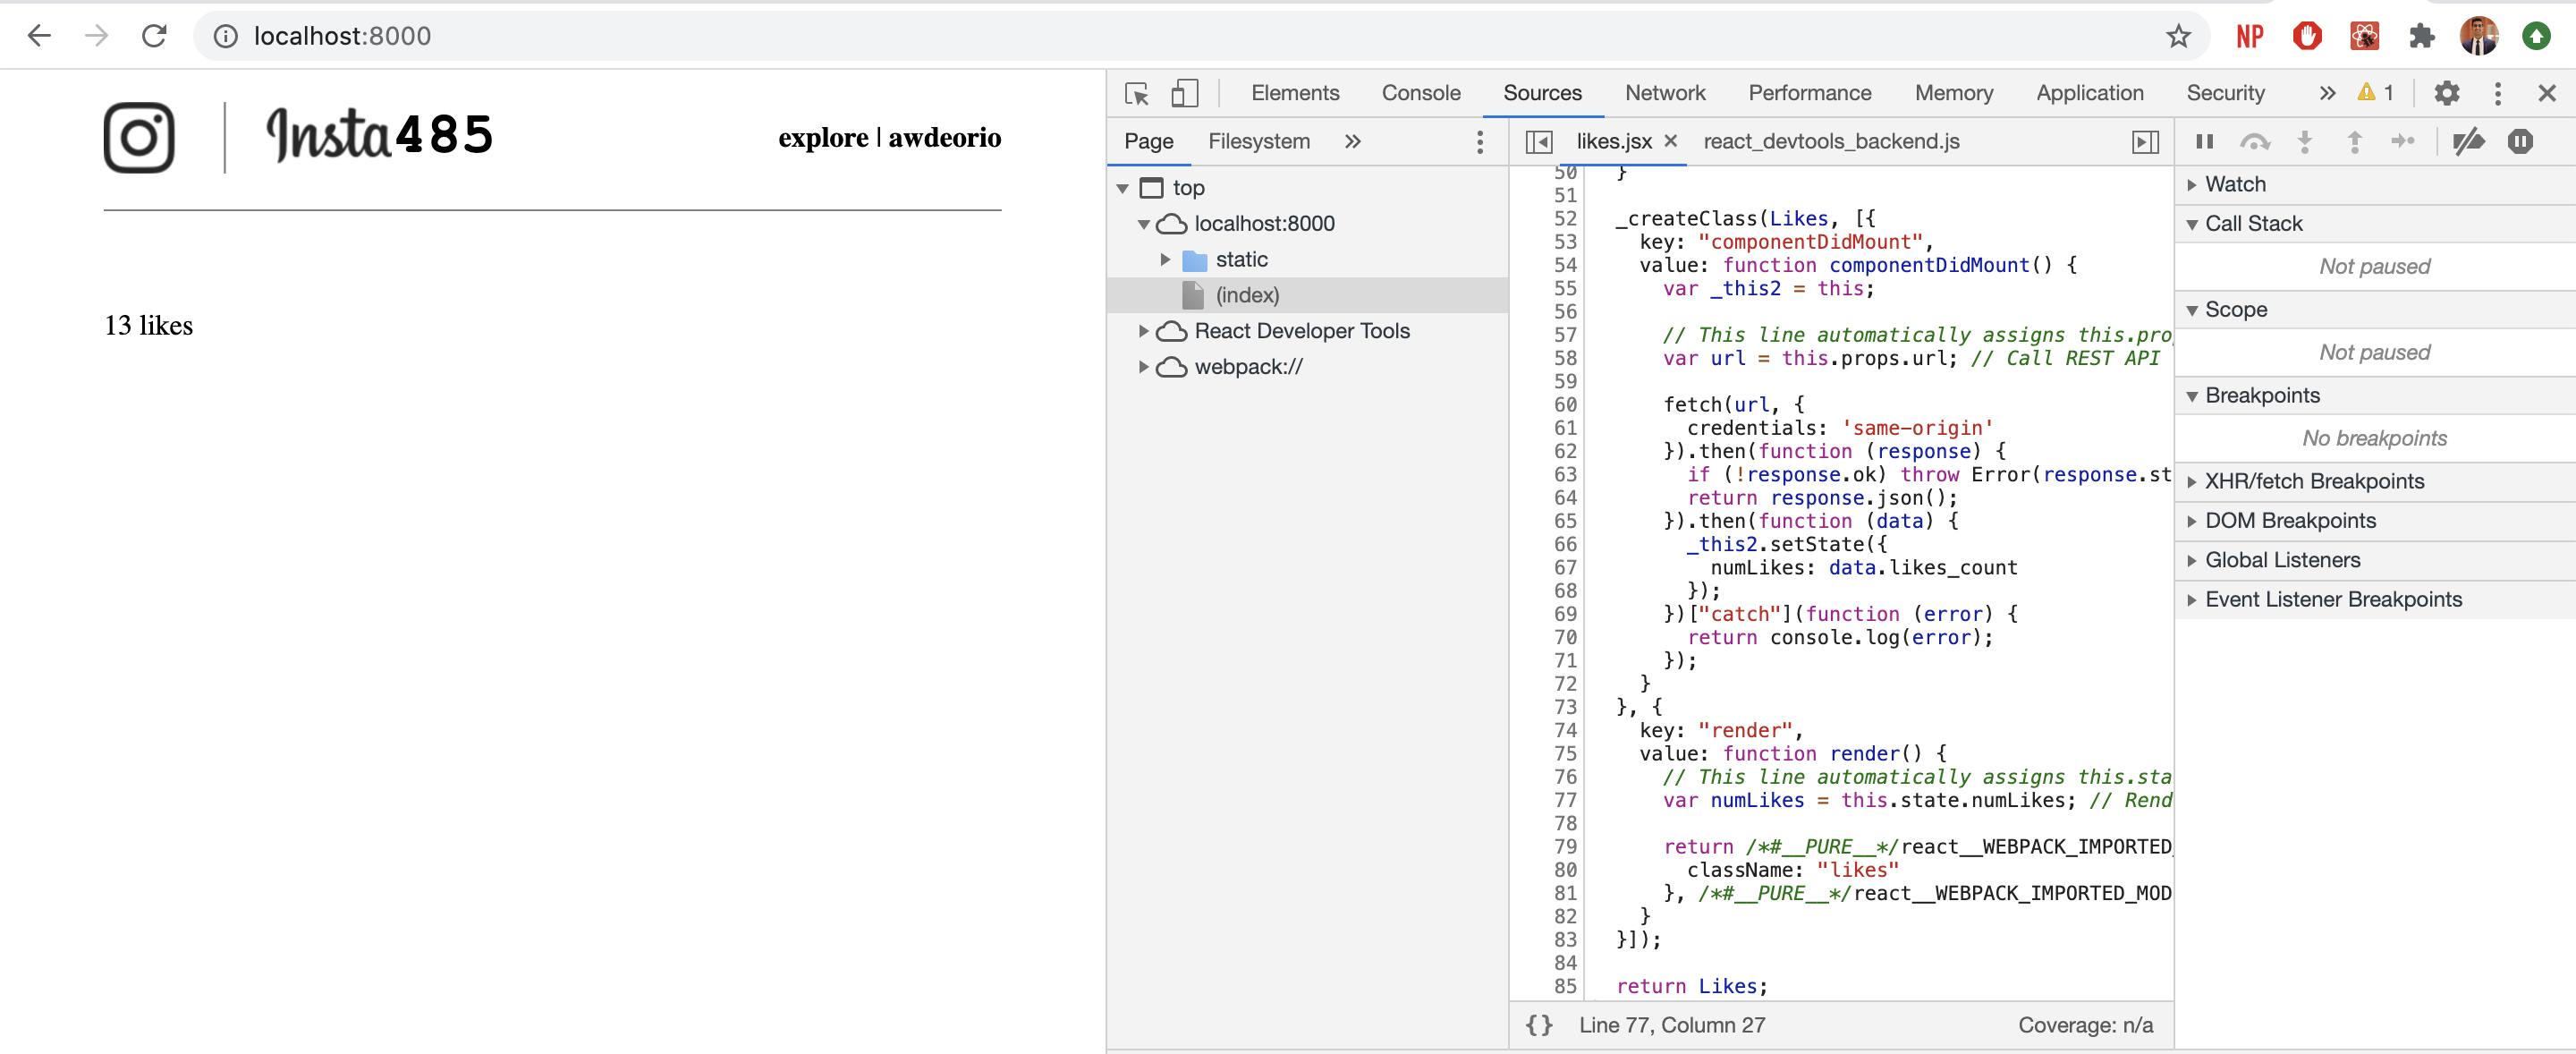
For the purpose of this lab, let’s say there is a bug somewhere in a React component that is causing 13 likes to be displayed instead of 3 likes.
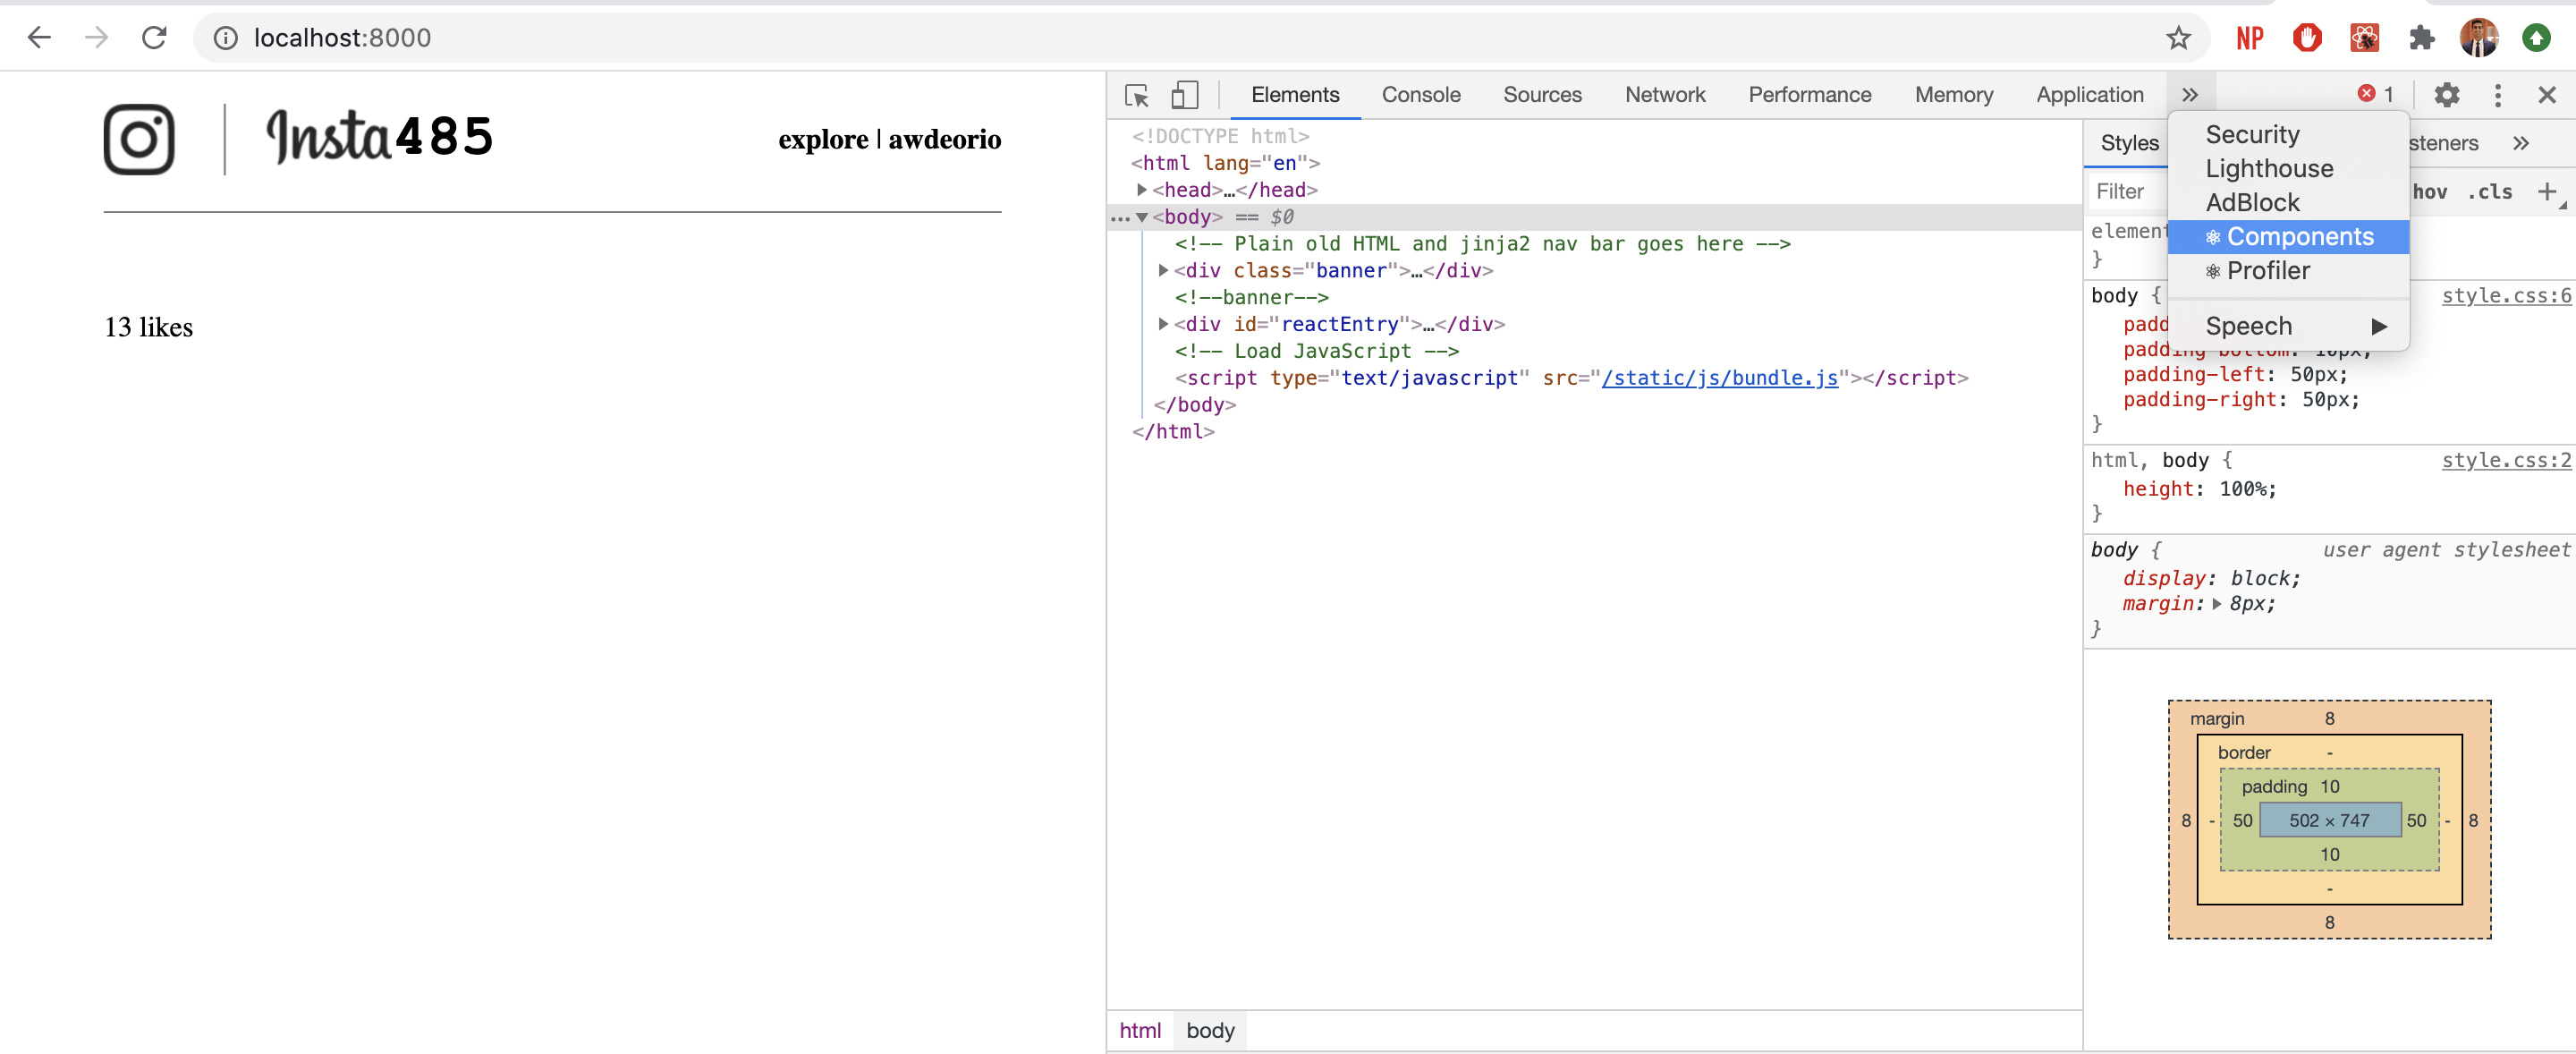
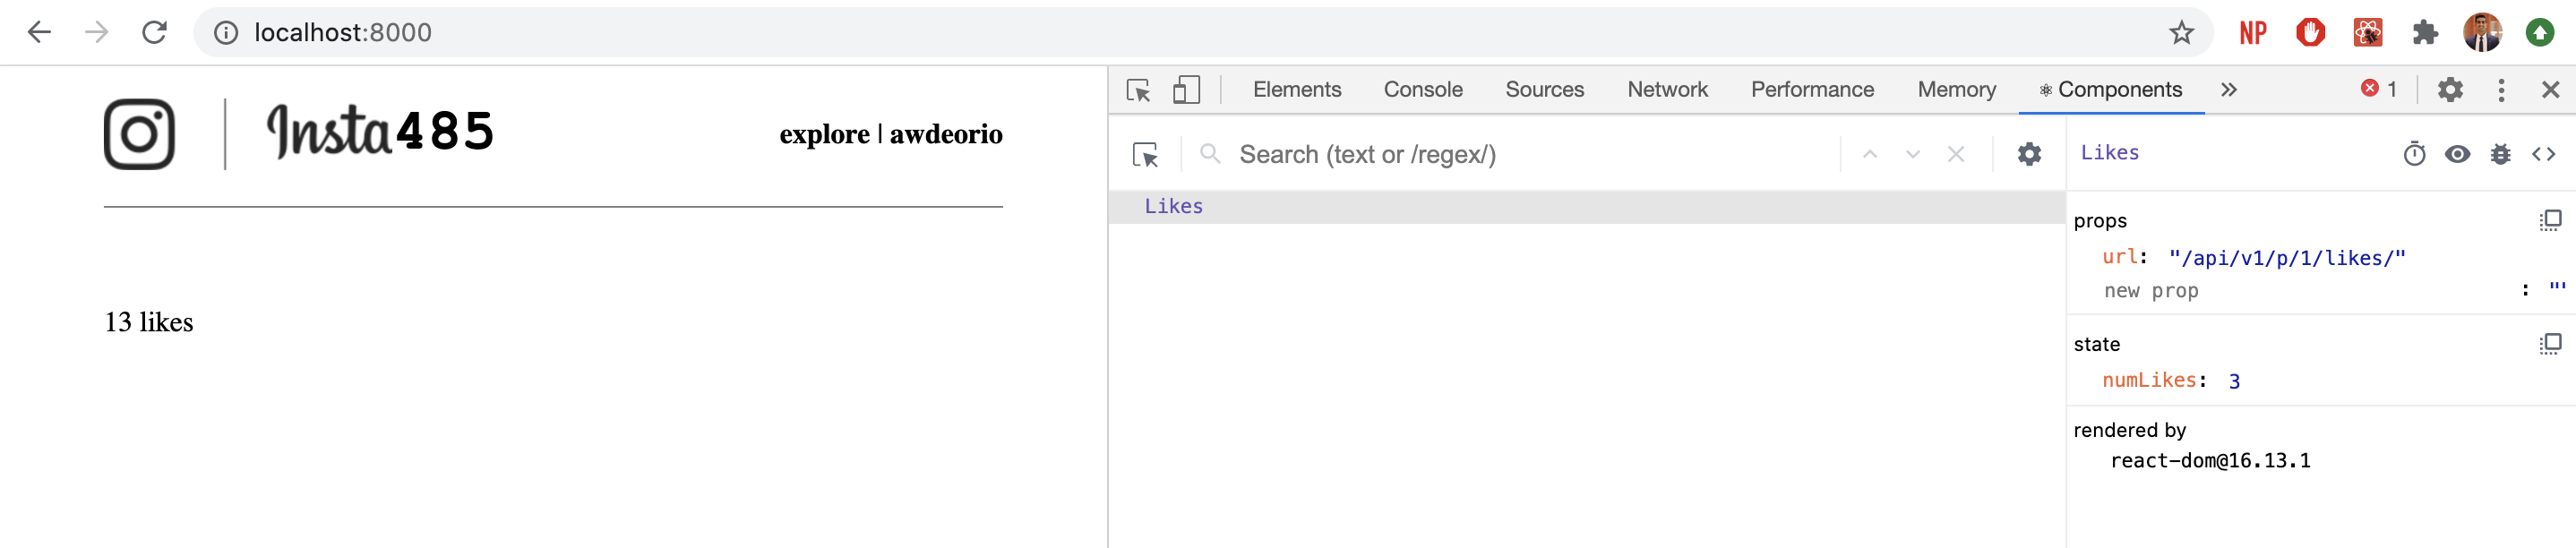
Open up the Chrome Developers tools, click on the arrow to see more tabs, and click on the Components tab, and click on the component in question (the Likes component in this case). You should see the component like a DOM element, along with its props and state. As you can see, the state of numLikes is 3, so most likely the bug is introduced when the component is being rendered.
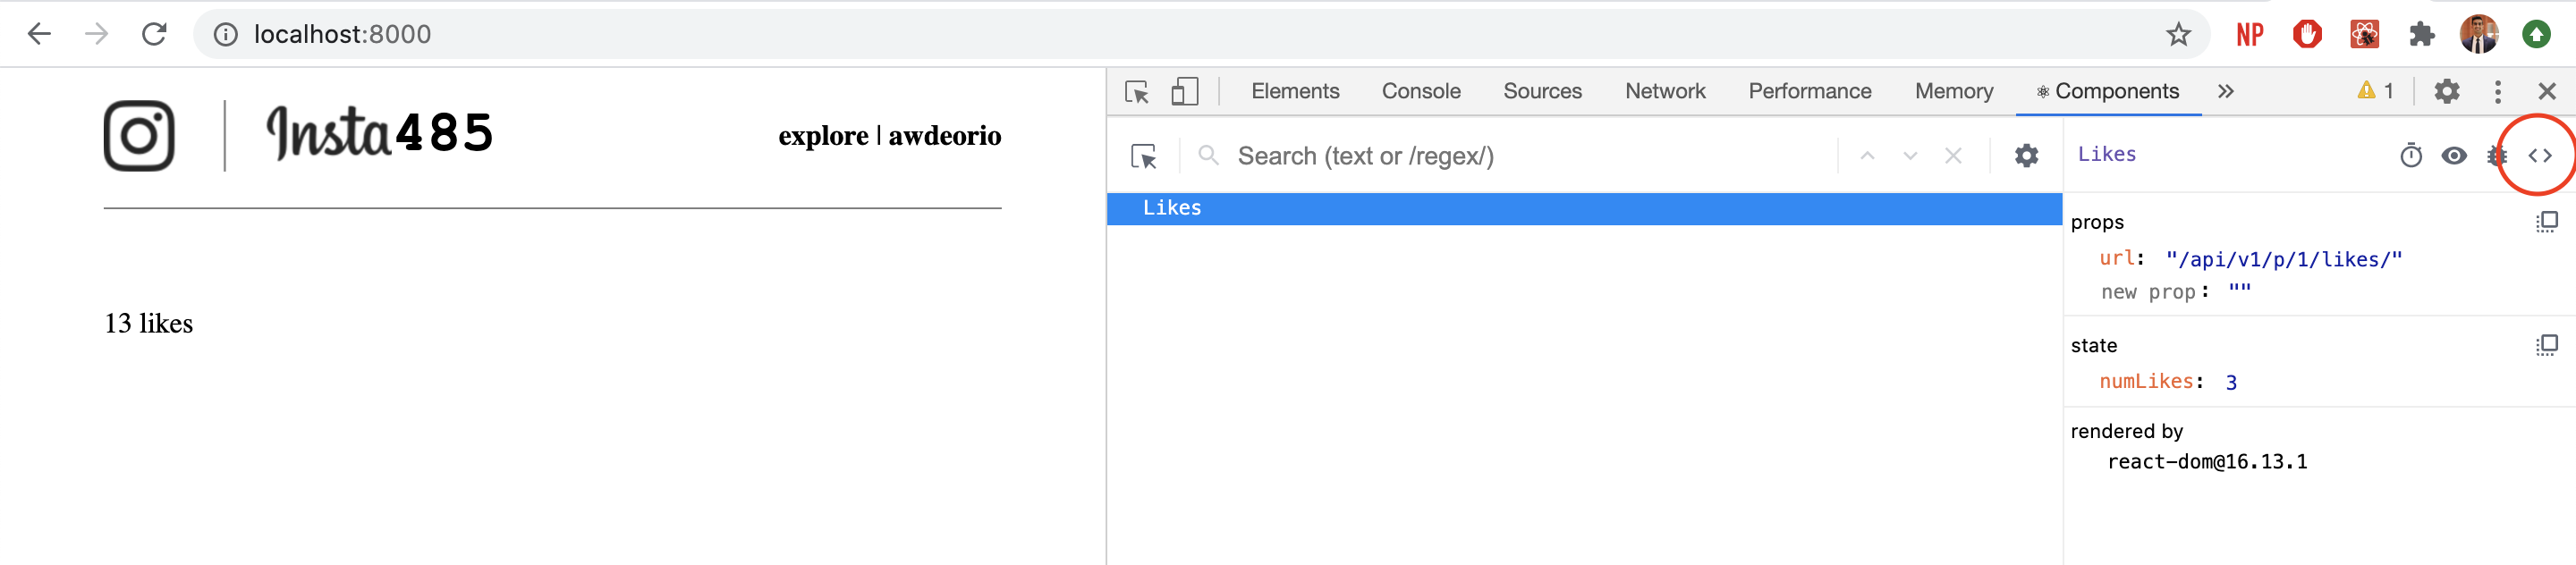
To view the source code associated with a particular component, click on the “View source for this element” button in the top right corner (looks like < >). You should now see the React code associated with the component in a relatively readable format unlike your bundle.js.
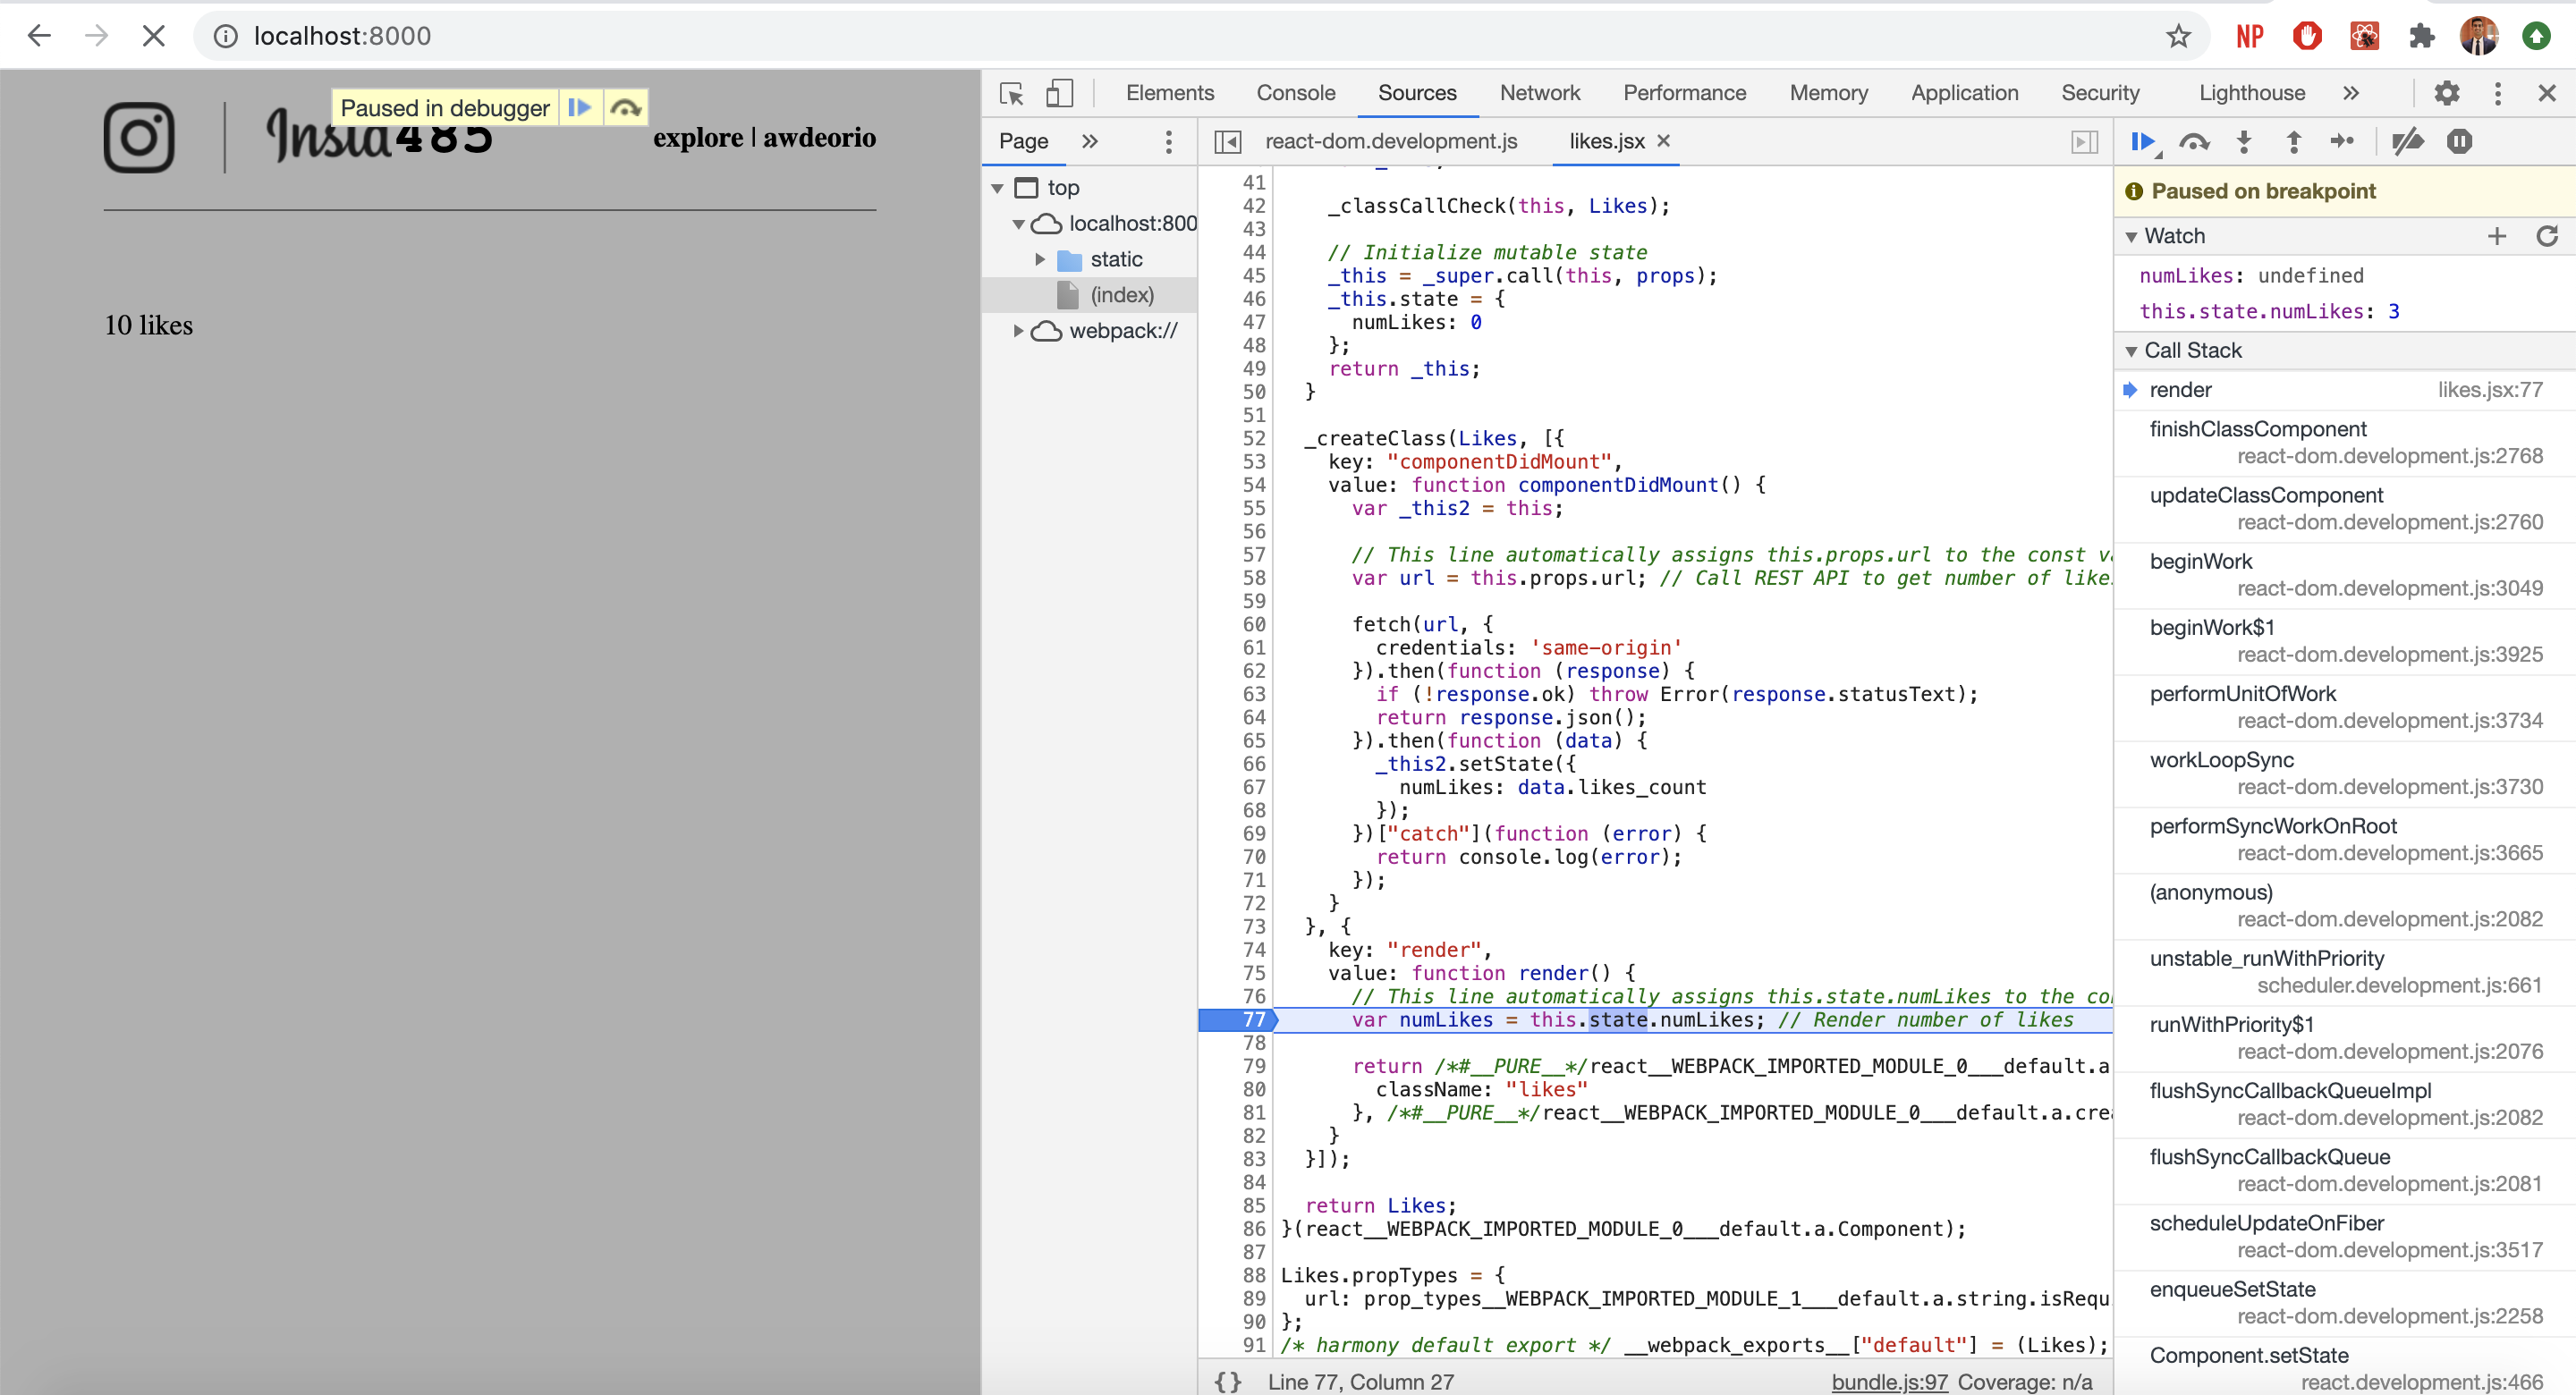
Since we think the bug is being introduced in the render() call, let’s set a breakpoint there, and add the variables of interest to the watch section, and refresh the page. You should see that the page is not fully loaded and the execution stopped on your breakpoint. Note that the this.state.numLikes is 0 because the component has not yet mounted. So click on the “Resume script execution” button to stop the execution again after componentDidMount() has completed. Now notice that this.state.numLikes is 3.

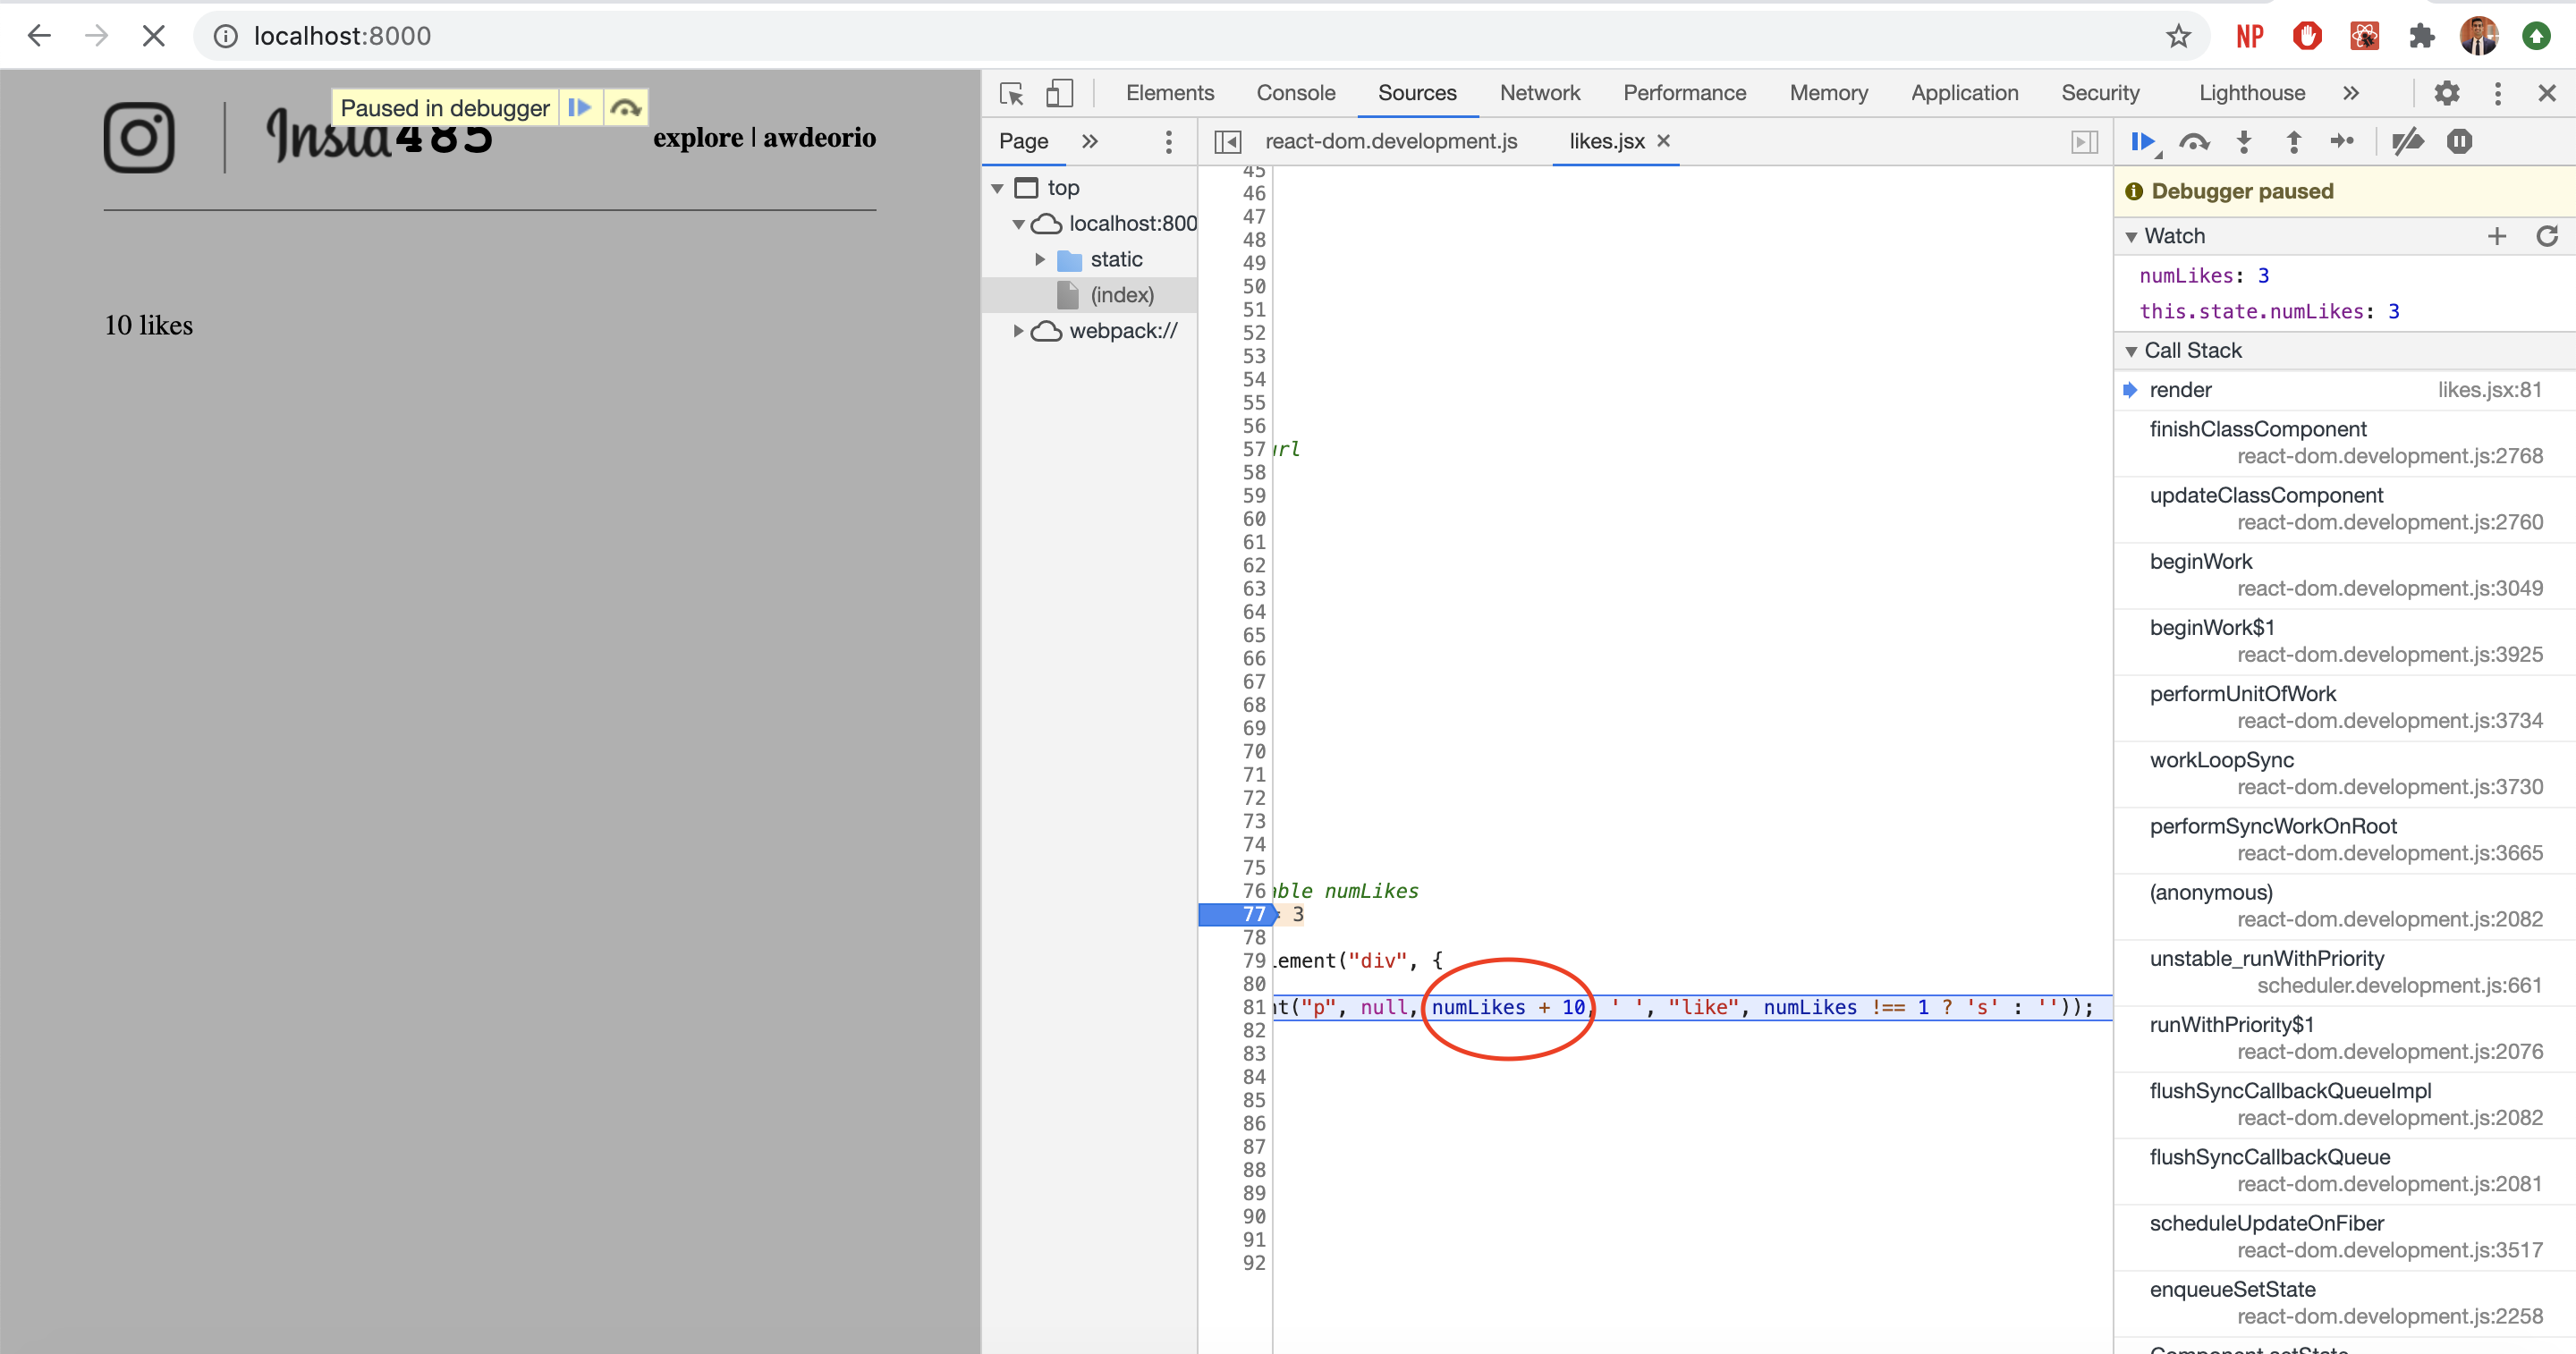
Since the we are using the local variable numLikes in our render call to display the number of likes, the bug most likely involves numLikes. As you step through the lines of code, you notice that you are rendering numLikes + 10 instead of just numLikes. You have now caught your bug!
Debugging React code is not as simple as debugging single-threaded C++ programs in an IDE because of the asynchronous nature of JavaScript. Make sure you understand what part of the execution you are in (after constructor() ran, before componentDidMount() ran, etc.) as that will help you diagnose the root cause of bugs much faster.
Completion criteria
- Have a complete local environment for your back end tool chain
Check
$ echo $VIRTUAL_ENV /Users/awdeorio/src/eecs485/p3-insta485-clientside/env - Have two interpreters, one for Python and one for JavaScript
Check
$ which python /Users/awdeorio/src/eecs485/p3-insta485-clientside/env/bin/python $ which node # macOS /usr/local/bin/node $ which node # Linux/WSL /usr/bin/node - Have two package managers, one for Python and one for JavaScript
Check
$ which pip /Users/awdeorio/src/eecs485/p3-insta485-clientside/env/bin/pip $ which npm # macOS /usr/local/bin/npm $ which npm # Linux/WSL /usr/bin/npm - Have the appropriate command line utilities installed
Check
$ npx eslint --version v6.8.0 $ npx webpack --version 4.41.5 - Completed the React tutorial
- Understand the basics of React components, mutable state, and immutable props
- Be able to differentiate between the various lifecycle methods and their roles in developing a UI (
constructor(),componentDidMount(),render()) - Understand the React build process at a high level
- Understand the basics of asynchronous programming and how it can be achieved using
Promises - Be able to utilize a REST API through the use of fetch() calls to build a dynamic UI
- Be able to check style of code with
eslintCheck
$ npx eslint --ext jsx insta485/js/ - Be able to view the test “Post” React Component
Check
$ npx webpack ... $ ./bin/insta485run - Have Google Chrome and ChromeDriver installed
Check
$ google-chrome --version Google Chrome 79.0.3945.130 $ npx chromedriver --version ChromeDriver 79.0.3945.36 (3582db32b33893869b8c1339e8f4d9ed1816f143-refs/branch-heads/3945@{#614}) - Be able to run an end-to-end test provided in the starter files
Check
$ pytest -v --log-cli-level=INFO tests/test_index.py::test_anything ... INFO autograder:conftest.py:77 Setup test fixture 'app' INFO autograder:conftest.py:130 Setup test fixture 'base_driver' INFO autograder:conftest.py:160 IMPLICIT_WAIT_TIME=10 INFO autograder:conftest.py:192 Setup test fixture 'driver' INFO werkzeug:_internal.py:122 * Running on http://localhost:50504/ (Press CTRL+C to quit) INFO werkzeug:_internal.py:122 127.0.0.1 - - [22/Jan/2020 08:25:52] "GET / HTTP/1.1" 302 - INFO werkzeug:_internal.py:122 127.0.0.1 - - [22/Jan/2020 08:25:52] "GET /accounts/login/ HTTP/1.1" 200 - INFO werkzeug:_internal.py:122 127.0.0.1 - - [22/Jan/2020 08:25:52] "GET / HTTP/1.1" 302 - INFO werkzeug:_internal.py:122 127.0.0.1 - - [22/Jan/2020 08:25:52] "GET /accounts/login/ HTTP/1.1" 200 - INFO werkzeug:_internal.py:122 127.0.0.1 - - [22/Jan/2020 08:25:52] "GET /static/css/style.css HTTP/1.1" 200 - INFO werkzeug:_internal.py:122 127.0.0.1 - - [22/Jan/2020 08:25:52] "GET /static/images/logo.png HTTP/1.1" 200 - PASSED - Be able to use the various developer tools for React
- Be able to debug JavaScript with your browser tools
Lab Quiz
Complete the lab quiz by the due date.