p5-search-engine
EECS 485 Project 5: Search Engine
Due 11:59pm ET April 14, 2026. This is a group project to be completed in groups of two or three.
Change Log
Initial Release for W26
Introduction
Build a scalable search engine similar to Google or Bing.
The learning goals of this project include information retrieval concepts like text analysis (tf-idf) and link analysis (PageRank), and parallel data processing with MapReduce. You’ll also gain experience using a Service-Oriented Architecture to scale dynamic pages and web search.
Create a segmented inverted index of web pages using a pipeline of MapReduce programs. Then, build an Index server, a REST API app that returns search results in JSON format. Finally, build a Search server, a user interface that returns search results just like Google or Bing.
When you’re done, you’ll have a working search engine that looks like this:

GAI help bot
These bots are experimental and may provide inaccurate or incomplete information. This project spec is the final authority.
Webby is trained on the Project 5 spec, tutorials, and EECS 485 course material. Use this bot for general project questions.
Setup
Group registration
Register your group on the Autograder.
Project folder
Create a folder for this project. Your folder location might be different.
$ pwd
/Users/awdeorio/src/eecs485/p5-search-engine
Pitfall: Avoid paths that contain spaces. Spaces cause problems with some command line tools.
| Bad | Good |
|---|---|
EECS 485/Project 5 Search Engine |
eecs485/p5-search-engine |
WSL Pitfall: Avoid project directories starting with /mnt/c/. This shared directory is slow.
| Bad | Good |
|---|---|
/mnt/c/ ... |
/home/awdeorio/ ... |
Version control
Set up version control using the Version control tutorial.
Be sure to check out the Version control for a team tutorial.
After you’re done, you should have a local repository with a “clean” status and your local repository should be connected to a remote GitHub repository.
$ pwd
/Users/awdeorio/src/eecs485/p5-search-engine
$ git status
On branch main
Your branch is up-to-date with 'origin/main'.

nothing to commit, working tree clean
$ git remote -v
origin	https://github.com/awdeorio/p5-search-engine.git (fetch)
origin	https://github.com/awdeorio/p5-search-engine.git (push)
You should have a .gitignore file (instructions).
$ pwd
/Users/awdeorio/src/eecs485/p5-search-engine
$ head .gitignore
This is a sample .gitignore file that's useful for EECS 485 projects.
...
Python virtual environment
Create a Python virtual environment using the Python Virtual Environment Tutorial.
Check that you have a Python virtual environment, and that it’s activated (remember source env/bin/activate).
$ pwd
/Users/awdeorio/src/eecs485/p5-search-engine
$ ls -d env
env
$ echo $VIRTUAL_ENV
/Users/awdeorio/src/eecs485/p5-search-engine/env
Starter files
Download and unpack the starter files.
$ pwd
/Users/awdeorio/src/eecs485/p5-search-engine
$ wget https://eecs485staff.github.io/p5-search-engine/starter_files.tar.gz
$ tar -xvzf starter_files.tar.gz
Move the starter files to your project directory and remove the original starter_files/ directory and tarball.
$ pwd
/Users/awdeorio/src/eecs485/p5-search-engine
$ mv starter_files/* .
$ rm -rf starter_files starter_files.tar.gz
This project involves very few starter files. You have learned everything you need to build this project from (almost) scratch. Each major part of the spec will walk you through the expected directory structure. It’s up to you to move the starter files into the right places.
At the end of this project, your directory structure should look something like this:
bin/: Shell scripts. Init scripts and install scripts live here.inverted_index/: Pipeline of MapReduce programs whose output is an inverted index. See Inverted Index for more details.index_server/: Inverted Index REST API server. See Index server for more details.search_server/: Search server using server-side dynamic pages. See Search server for more details.tests/: Public test cases.
$ pwd
/Users/awdeorio/src/eecs485/p5-search-engine
$ tree -I 'env|__pycache__|*.egg-info'
.
├── bin
│   ├── index
│   ├── install
│   ├── search
│   └── searchdb
├── index_server
│   ├── index
│   │   ├── __init__.py
│   │   ├── api
│   │   │   ├── __init__.py
│   │   │   └── *.py
│   │   ├── inverted_index
│   │   │   ├── inverted_index_0.txt
│   │   │   ├── inverted_index_1.txt
│   │   │   └── inverted_index_2.txt
│   │   ├── pagerank.out
│   │   └── stopwords.txt
│   └── pyproject.toml
├── inverted_index
│   ├── crawl.tar.xz
│   ├── example_crawl
│   │   ├── 44664014.html
│   │   ├── 67613335.html
│   │   └── 78661573.html
│   ├── example_output
│   │   ├── part-00000
│   │   └── part-00001
│   ├── crawl
│   │   ├── 00035015.html
│   │   ├── 00051163.html
│   │   └── ...
│   ├── map0.py
│   ├── map1.py
│   ├── ...
│   ├── pipeline.sh
│   ├── pylintrc
│   ├── reduce0.py
│   ├── reduce1.py
│   ├── ...
│   ├── partition.py
│   └── stopwords.txt
├── requirements.txt
├── search_server
│   ├── pyproject.toml
│   └── search
│       ├── __init__.py
│       ├── config.py
│       ├── model.py
│       ├── static
│       │   └── css
│       │       └── style.css
│       ├── templates
│       │   └── *.html
│       └── views
│           ├── __init__.py
│           └── *.py
├── tests
│   └── ...
└── var
    └── search.sqlite3
install script
Write a bash script bin/install to install your project. Don’t forget to check for shell script pitfalls.
- Create a virtual environment and activate it. Then install the necessary dependencies for the project.
python3 -m venv env source env/bin/activate pip install -r requirements.txt - Because you’ll be running two backend servers for this project, you need to install two different Python packages.
pip install -e index_server
pip install -e search_server
Group members can now check out the code base and run ./bin/install.
MapReduce Example
Next we will run a MapReduce word count program. See the Hadoop Streaming Tutorial for a detailed explanation. Your inverted index pipeline will consist of multiple MapReduce programs a lot like this example.
Copy the MapReduce example program. The example MapReduce program is in example/. The code is in example/map.py and example/reduce.py.
$ madoop --example
$ tree example/
example/
├── input
│   ├── input01.txt
│   └── input02.txt
├── map.py
└── reduce.py
Take a look at the input files.
$ head example/input/input*
==> example/input/input01.txt <==
Hello World
Bye World

==> example/input/input02.txt <==
Hello Hadoop
Goodbye Hadoop
Execute the example MapReduce program using Madoop and show the output.
$ madoop \
  -input example/input \
  -output example/output \
  -mapper example/map.py \
  -reducer example/reduce.py
After the MapReduce job finishes, the output will be in the output directory. Each reducer produces a one part-XXXXX file.
$ ls example/output/
part-00000  part-00001  part-00002
$ head example/output/part-*
==> example/output/part-00000 <==
Goodbye 1

==> example/output/part-00001 <==
Bye 1
Hadoop 2
World 2

==> example/output/part-00002 <==
Hello 2
Inverted Index Pipeline
Build an inverted index using a pipeline of MapReduce programs. Write each map and reduce program as a stand-alone Python program compatible with the Hadoop Streaming Interface. You’ll use Michigan Hadoop (Madoop) to execute the MapReduce programs.
The input is a copy of a subset of Wikipedia pages (documents) crawled from Michigan- and technology-related seed pages. The output is an inverted index containing inverse document frequency, term frequency, and document normalization factor. The output is several files segmented by document.
Before continuing, read the Hadoop Streaming Tutorial.
Directory structure
We’ve provided most of the files to get you started.
$ pwd
/Users/awdeorio/src/eecs485/p5-search-engine
$ tree inverted_index -I '__pycache__'
inverted_index
├── crawl.tar.xz
├── example_crawl
│   ├── 44664014.html
│   ├── 67613335.html
│   └── 78661573.html
├── example_output
│   ├── part-00000
│   └── part-00001
├── map0.py
├── pipeline.sh
├── pylintrc
├── reduce0.py
└── stopwords.txt
Within the inverted_index directory:
example_crawlandexample_output: A small input with correct output.crawl.tar.xz: Large input tarball consisting of downloaded Wikipedia pages.map*.pyandreduce*.py: MapReduce programs that you will write.pipeline.sh: MapReduce pipeline script that runs your MapReduce programs. We’ve provided a starter file with helpful comments.pylintrcConfiguration for running Pylint on the inverted index.stopwords.txt: Words to ignore when building the inverted index.
Unpack input dataset
Unpack the input tarball. You should see a bunch of HTML files inside inverted_index/crawl/.
$ pwd
/Users/awdeorio/src/eecs485/p5-search-engine/inverted_index
$ tar -xvJf crawl.tar.xz
$ ls crawl/
... lots of HTML files ...
Input
The input is a collection of HTML documents, stored in crawl. The name of each HTML file is its 8-digit document ID.
For example, the wiki article about the “Hello, World!” program.
$ pwd
/Users/awdeorio/src/eecs485/p5-search-engine/inverted_index
$ head crawl/00263504.html
<!DOCTYPE html>
<html class="client-nojs vector-feature-language-in-header-enabled vector-feature-language-in-main-page-header-disabled vector-feature-sticky-header-disabled vector-feature-page-tools-pinned-disabled vector-feature-toc-pinned-clientpref-1 vector-feature-main-menu-pinned-disabled vector-feature-limited-width-clientpref-1 vector-feature-limited-width-content-enabled vector-feature-custom-font-size-clientpref-1 vector-feature-appearance-pinned-clientpref-1 vector-feature-night-mode-enabled skin-theme-clientpref-day vector-toc-available" dir="ltr" lang="en">
 <head>
  <meta charset="utf-8"/>
  <title>
   "Hello, World!" program - Wikipedia
  </title>
...
Pro-tip: Start with the small example input in example_crawl.
Cleaning
Follow these cleaning steps for one document. When you parse a query in the Index server, you’ll use the same procedure.
- Remove non-alphanumeric characters (that also aren’t spaces) like this:
import re text = re.sub(r"[^a-zA-Z0-9 ]+", "", text) -
The inverted index should be case insensitive. Convert upper case characters to lower case using
casefold(). -
Split the text into whitespace-delimited terms.
- Remove stop words. We have provided a list of stop words in
inverted_index/stopwords.txt.
Output
The output is an inverted index, with one term on each line. For example, the term program from the instructor solution:
$ pwd
/Users/awdeorio/src/eecs485/p5-search-engine/inverted_index
$ grep '^program ' output/part-00000
program 0.2818852037063175 00111573 3 325.75383701920936 00350748 4 84.83590461973002 00354708 2 87.0541761344327...
The elements in one line of the inverted index are separated by a space. The first item is the term, then the inverse document frequency. After that, items come in groups of 3, where each group represents the occurrence of the term in one document. For example:
| Term | Inverse document frequency |
Document (ID) |
Term frequency |
Normalization factor |
Document (ID) |
Term frequency |
Normalization factor |
… |
| program | 0.282 | 00111573 | 3 | 325.753 | 00350748 | 4 | 84.835 | … |
| \(t_{k}\) | \(idf_{k}\) | \(d_{i}\) | \(tf_{ik}\) | \(\vert d_{i} \vert\) | \(d_{j}\) | \(tf_{jk}\) | \(\vert d_{j} \vert\) | … |
| Term \(t_{k}\) appears in document \(d_{i}\) | Term \(t_{k}\) appears in document \(d_{j}\) | … | ||||||
One normalization factor applies to one document \(d_{i}\). See the calculation example for more details.
Terms must be in ascending sorted order, which means that the terms should be in alphabetical order.
Doc IDs must be in ascending sorted order. When a term appears in multiple documents, multiple doc IDs may appear on one line of an inverted index segment. Sort these doc IDs using string comparison. Pro-tip: The MapReduce grouper can do this for you. Do not remove leading zeros from doc IDs.
Segments
The output inverted index is divided into several files, segmented by document. Specifically, 3 files partitioned by doc_id % 3. To produce segments that match the instructor solution, the last map.py should output doc_id % 3 as the key and the last job should use a custom partitioner, partition.py.
Create a file called partition.py in the inverted_index directory and paste this code:
#!/usr/bin/env -S python3 -u
import sys


for line in sys.stdin:
    key, _, _ = line.partition("\t")
    print(int(key))
This custom partitioner guarantees that each document with doc_id % 3 = i will end up in partition i and that the final output of the pipeline will be in 3 segments. Make sure to set the executable bit!
Madoop supports custom partitioning. Here’s an example Madoop command that uses a custom partitioner:
$ madoop \
  -input input \
  -output output \
  -mapper map.py \
  -reducer reduce.py  \
  -partitioner partition.py \
  -numReduceTasks 3
The same term may appear in multiple segments when that term appears in several documents. This example shows only the first document on each line (cut -d' ' -f1-5 shows columns 1-5). Notice that program appears in multiple segments.
$ pwd
/Users/awdeorio/src/eecs485/p5-search-engine/inverted_index
$ grep '^program ' output/part-* | cut -d' ' -f1-5
output/part-00000:program 0.2818852037063175 00111573 3 325.75383701920936
output/part-00001:program 0.2818852037063175 00266386 3 46.56754275689103
output/part-00002:program 0.2818852037063175 00101420 2 156.04011724725942
Doc IDs with the same value doc_id % 3 appear in the same segment. For example, Doc IDs 00350748 and 00111573 are in the same segment because 00350748 % 3 == 0 and 00111573 % 3 == 0.
$ egrep '^(computer|program) ' output/part-00000 | cut -d' ' -f1-5
computer 0.25275517682114196 00350748 11 84.83590461973002
program 0.2818852037063175 00111573 3 325.75383701920936
A small input might not have any occurrences of a term in a doc such that doc_id % 3 == 0, for example. That means your final MapReduce output may have less than 3 files for small inputs.
tf-idf calculation
Here’s a copy of the term frequency and inverse document frequency definitions.
| \(w_{ik} = tf_{ik}*idf_{k}\) | tf-idf score for term \(t_{k}\) in document \(d_{i}\) |
| \(t_{k}\) | Term \(k\) |
| \(d_{i}\) | Document \(i\) |
| \(tf_{ik}\) | Frequency of term \(t_{k}\) in document \(d_{i}\) |
| \(idf_{k} = log(N/n_{k})\) | Inverse document frequency of term \(t_{k}\) in collection \(C\) |
| \(N\) | Number of documents in collection \(C\) |
| \(n_{k}\) | Number of documents that contain term \(t_{k}\) |
| \(\vert d_{i} \vert = \sqrt{\sum_{k=1}^t w_{ik}^2} = \sqrt{\sum_{k=1}^t \left( tf_{ik} * idf_{k} \right)^2}\) | Normalization factor for one document \(d_{i}\) over every term \(t_{k}\) in that document |
Use log base 10 in your calculations.
Your numbers may be slightly different due to floating point arithmetic. We compare values with a tolerance of 5%.
MapReduce pipeline
A MapReduce pipeline executes several MapReduce programs. The output of one MapReduce program is the input to the next MapReduce program.
We have provided inverted_index/pipeline.sh, which has helpful comments for getting started.
Pitfall: Make sure you unpacked the input tarball into crawl/ before running the pipeline!
Job 0
The first MapReduce job counts the total number of documents in the collection. The mapper and reducer executables should be named map0.py and reduce0.py.
Read input from crawl/ and write output to output0/.
The output should be a single integer. Hint: each HTML document contains exactly one <!DOCTYPE html> tag.
In pipeline.sh, copy the output (e.g., output0/part-00000) to total_document_count.txt. In later pipeline jobs, read the document count from total_document_count.txt, not output0/part-00000.
For example:
$ cat example_crawl/*.html | ./map0.py | sort | ./reduce0.py
3
Job 1
MapReduce Job 1 parses each HTML document, extracting the document ID and content. The mapper and reducer executables should be named map1.py and reduce1.py.
Read input from crawl/ and write output to output1/.
The output should include the parsed content from the documents and their doc IDs. The doc IDs can be found in the document as meta elements with property eecs485_docid.
Paste this code into map1.py to parse the HTML documents and get the doc ID in the same way as the instructor solution. It uses BeautifulSoup for HTML parsing and removes extra newlines.
# FIXME shebang
import sys
import bs4

# Parse one HTML document at a time.  Note that this is still O(1) memory
# WRT the number of documents in the dataset.
HTML = ""
for line in sys.stdin:
    # Assume well-formed HTML docs:
    # - Starts with <!DOCTYPE html>
    # - End with </html>
    # - Contains a trailing newline
    if "<!DOCTYPE html>" in line:
        HTML = line
    else:
        HTML += line

    # If we're at the end of a document, parse
    if "</html>" not in line:
        continue

    # Configure Beautiful Soup parser
    soup = bs4.BeautifulSoup(HTML, "html.parser")

    # Get docid from document
    doc_id = soup.find("meta", attrs={"eecs485_docid": True}).get("eecs485_docid")

    # Parse content from document
    # get_text() will strip extra whitespace and
    # concatenate content, separated by spaces
    element = soup.find("html")
    content = element.get_text(separator=" ", strip=True)
    # Remove extra newlines
    content = content.replace("\n", " ")

    # FIXME Map 1 output.  Emit one line for each document, including the doc
    # ID and document content (You will need them later!)
Jobs 2-(N-1) pipeline
Each MapReduce job 2 and beyond should read input from the previous job’s output directory. For example, Job 2 should read from output1/ and write output to output2/, Job 3 should read from output2/ and write output to output3/, etc.
Your pipeline may contain up to 9 MapReduce jobs (excluding job0), but the inverted index can be produced in fewer. Name your map and reduce executables in pipeline order: map0.py and reduce0.py, map1.py and reduce1.py, etc.
Every Map stage in Jobs 2–(N-1) must emit more than one unique intermediate key on the example input to enable parallelization.
Pro-tip: Use our template reducer code to get started on each reducer.
Job N
The last job in the pipeline should produce 3 files, one for each segment. The Segments section describes how to achieve this.
Example
We’ve provided a small example input with correct output. Run the pipeline and make sure it generated 2 output files.
$ ./pipeline.sh example_crawl
...
Output directory: output
$ ls output
part-00000  part-00001
Compare your output files to the solution output files. Take a look at our diff tips and tricks for help narrowing down a mismatch.
$ diff output/part-00000 example_output/part-00000
$ diff output/part-00001 example_output/part-00001
Pro-tip: Write a quick shell script to run your pipeline with the example input and check the output. You could save this to example_run.sh.
#!/bin/bash
set -Eeuxo pipefail

./pipeline.sh example_crawl
diff example_output/part-00000 output/part-00000
diff example_output/part-00001 output/part-00001
Quick link to the Shell script pitfalls
Pro-tip: Debug a single map or reduce program at the command line. For example, here’s how to debug the job 2 map program.
$ cat example_crawl/*.html | ./map1.py | sort | ./reduce1.py | ./map2.py
Still having trouble? Here’s how to use debugger in a map or reduce program.
Design
This section highlights a few tips for designing MapReduce programs.
Map transforms, reduce computes
Often, the Map program is simpler than the Reduce program. In the Hadoop Streaming Word Count example, the Map Stage outputted each word with a count of 1.
$ cat input/input* | ./map.py
Hello	1
World	1
Bye	1
World	1
Hello	1
Hadoop	1
Goodbye	1
Hadoop	1
The Reduce Stage added up the values to actually do the counting.
$ cat input/input* | ./map.py | sort | ./reduce.py
Bye	1
Goodbye	1
Hadoop 2
Hello 2
World 2
Pitfall: If your Map program is more complicated than your Reduce program, consider reorganizing. Transform data in Map, compute in Reduce.
Map rearranges values
You can use the Map stage to rearrange the input to produce different groups for the Reduce stage. For example, if your input looks like this:
{doc_id} {segment} ...
Group by segment with Map Stage output like this:
{segment}\t{doc_id} ...
Tuples as keys
If you need to group by multiple criteria, you can use a tuple containing multiple values as the key. For example, if your input looks like this:
{docid}\t{term} {tf} ...
Group by both docid and term with Map Stage output like this:
{docid} {term}\t{tf} ...
Identity mappers or reducers
Not every Map or Reduce Stage has to change something. For example, if your input looks like this:
{docid} {term}\t{tf} ...
Use the existing input key with Map Stage output that copies input to output:
{docid} {term}\t{tf} ...
Duplicate values
If the Reduce Stage needs access to the same value in different groups, then each group needs a copy. You may want to emit duplicate values for different keys in the Map stage to make that value available in the Reduce stage. For example, if your input looks like this:
# docid,docbody
100,hello world
101,bye world
Group by each term in docbody and provide the original docid to the Reduce Stage by emitting the same docid for each term with Map Stage output like this:
hello\t100
world\t100
bye\t101
world\t101
Testing
Once you have implemented your MapReduce pipeline to create the inverted index, you should be able to pass all tests in test_pipeline_public.py. These tests have small inputs.
$ pytest -v tests/test_pipeline_public.py
The test_pipeline_public.py::test_sample_inverted_index test expects that you have already run your pipeline.sh script with the full size crawl directory, and that it is copied over to index_server/index/inverted_index. This test compares a few selected lines from your large inverted index to the instructor solution inverted index.
$ pwd
/Users/awdeorio/src/eecs485/p5-search-engine/index_server/index/inverted_index
$ ls
inverted_index_0.txt  inverted_index_1.txt  inverted_index_2.txt
$ pwd
/Users/awdeorio/src/eecs485/p5-search-engine
$ pytest -v tests/test_pipeline_public.py::test_sample_inverted_index
Your map and reduce programs should pass these linters.
$ pwd
/Users/awdeorio/src/eecs485/p5-search-engine
$ pylint --rcfile inverted_index/pylintrc inverted_index/*.py
$ pycodestyle inverted_index/*.py
$ pydocstyle inverted_index/*.py
Debugging
This section will show how to sanity check your final inverted index, and provide some debugging tips.
Autograder inputs
Most of the pipeline tests run your pipeline with a different input. For example, take a look at test_pipeline_public.py::test_simple, find the input directory, and run it yourself.
$ ./pipeline.sh ../tests/testdata/test_pipeline03/crawl
...
Output directory: output
Compare your output to the correct output file. Notice that we need to concatenate and sort the pipeline output for this particular test. You can find the path to expected.txt in the test.
$ sort output/part-* > output/sorted.txt
$ diff output/sorted.txt ../tests/testdata/test_pipeline03/expected.txt
Some pipeline tests compare each inverted index segment, like test_segments. You can compare each output file to the expected output.
$ ./pipeline.sh ../tests/testdata/test_pipeline14/crawl
...
Output directory: output
$ diff output/part-00000 ../tests/testdata/test_pipeline14/expected/part-0.txt
$ diff output/part-00001 ../tests/testdata/test_pipeline14/expected/part-1.txt
$ diff output/part-00002 ../tests/testdata/test_pipeline14/expected/part-2.txt
Printing to stderr
To avoid interfering with pipeline output in stdout, direct debugging print messages to stderr:
print("DEBUG finding bugs... ~(^._.)", file=sys.stderr)
Diff tips and tricks
Comparing large files is tricky. Here are some tips. We’ll use the example input and output for the following examples.
$ pwd
/Users/awdeorio/src/eecs485/p5-search-engine/inverted_index
$ ./pipeline.sh example_crawl
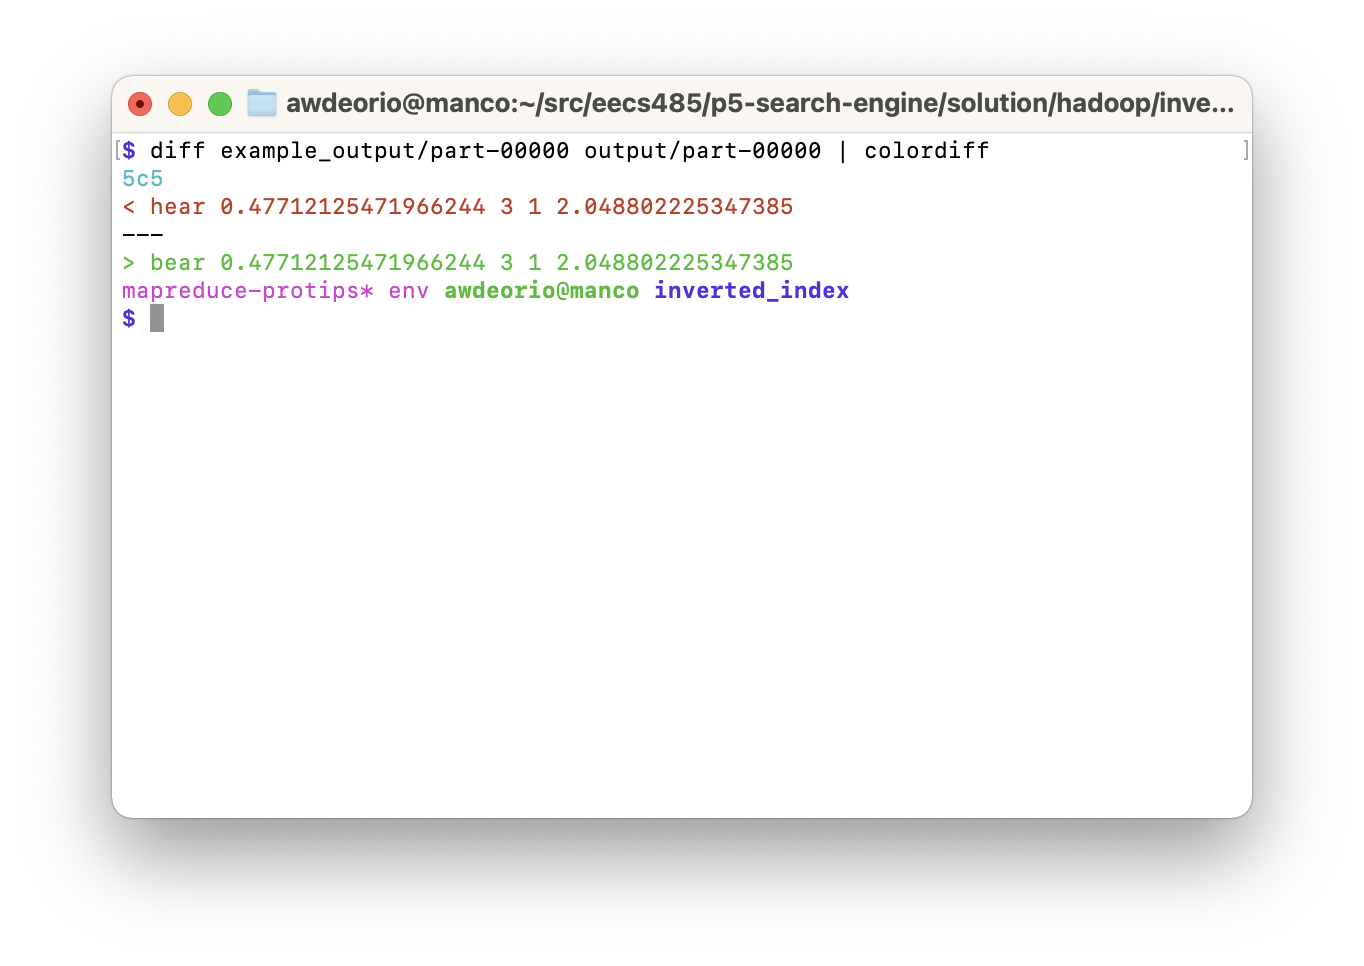
Like colors? Try piping into colordiff.
$ diff example_output/part-00000 output/part-00000 | colordiff
Want to see the files side-by-side? Try diff --side-by-side.
$ diff --side-by-side example_output/part-00000 output/part-00000
...
information 0.47712125471966244 78661573 1 3.8547271270316728   information 0.47712125471966244 78661573 1 3.8547271270316728
larry 0.47712125471966244 67613335 1 2.691288582065867        | harry 0.47712125471966244 67613335 1 2.691288582065867
maya 0.17609125905568124 67613335 1 2.691288582065867           maya 0.17609125905568124 67613335 1 2.691288582065867
...
Too much on one line? Try comparing just one column. The -d' ' breaks up a line on spaces, and -f1 shows the first column. You can also see multiple columns, e.g., -f1-5 or -f1,3.
$ diff --side-by-side <(cut -d' ' -f1 output/part-00000) <(cut -d' ' -f1 example_output/part-00000) | colordiff
...
information              information
harry                  | larry
maya                     maya
...
If your output is mostly correct and you’re having trouble narrowing down the difference between two similar versions of a line, try wdiff.
$ wdiff example_output/part-00000 output/part-00000 | colordiff
...
information [-0.47712125471966244-] {+0.66712125471966244+} 78661573 1 3.8547271270316728
larry [-0.47712125471966244-] {+0.66712125471966244+} 67613335 1 2.691288582065867
maya 0.17609125905568124 67613335 1 2.691288582065867
...
Do those lines REALLY look the same? Maybe it’s a whitespace problem. Ignore whitespace and see if the problem goes away.
$ diff --ignore-all-space example_output/part-00000 output/part-00000
Emacs user? Try Ediff, invoked with M-x ediff.
Common problems
Your should be able to run your map and reduce scripts as standalone executables. Make sure your map and reduce scripts have the following shebang at the top of the file:
#!/usr/bin/env python3
Your map and reduce programs should use relative paths when opening an input or output file. For example, to access stopwords.txt:
with open("stopwords.txt", "r") as stopwords:
    for line in stopwords:
        # Do something with line
Other important things to include in your code:
- Every mapper should produce and key and a value, not just a key.
- Do not emit empty keys or values.
- Separate key value pairs with a tab, e.g.,
f"{key}\t{value}" - Include a newline at the end of every line of map output, and every line of reduce output.
- Each MapReduce job must emit more than a single line.
Index server
The Index server and Search server are separate services. The Index server is a REST API app that returns search results in JSON format. You’ll run several Index servers, one for each inverted index segment. The Search server is a server-side dynamic pages app that returns search results in HTML format. It makes REST API calls to each Index server segment and combines the results.
GET /api/v1/
Return a list of services available. The output should look exactly like this example.
$ http "localhost:9000/api/v1/"
HTTP/1.0 200 OK
...
{
    "hits": "/api/v1/hits/",
    "url": "/api/v1/"
}
GET /api/v1/hits/
Return a list of hits with doc ID and score. The query is specified by the parameter q=<query>.
This example searches for “hello world” using one Index segment server running on port 9000.
$ http "localhost:9000/api/v1/hits/?q=hello+world"
HTTP/1.0 200 OK
...
{
    "hits": [
        {
            "docid": 1257030,
            "score": 0.10999948727231794
        },
        {
            "docid": 41693013,
            "score": 0.03882980761722256
        },
        ...
    ]
}
PageRank weight
The weight of PageRank in the score is specified by the optional parameter w=<weight>. If w=<weight> is not specified, use the default value of 0.5.
This example searches for “hello world” with a PageRank weight of 1.0 using one Index segment server running on port 9000. Notice that the results are different.
$ http "localhost:9000/api/v1/hits/?q=hello+world&w=1.0"
HTTP/1.0 200 OK
...
{
    "hits": [
        {
            "docid": 28563363,
            "score": 0.0020055248148158063
        },
        {
            "docid": 41693013,
            "score": 0.0018097500111107574
        },
        ...
    ]
}
Directory structure
Here’s what your final Index server directory structure should look like.
$ pwd
/Users/awdeorio/src/eecs485/p5-search-engine
$ tree index_server -I '__pycache__|*.egg-info'
index_server
├── index
│   ├── __init__.py
│   ├── api
│   │   ├── __init__.py
│   │   ├── ...
│   │   └── main.py
│   ├── inverted_index
│   │   ├── inverted_index_0.txt
│   │   ├── inverted_index_1.txt
│   │   └── inverted_index_2.txt
│   ├── pagerank.out
│   └── stopwords.txt
└── pyproject.toml
The inverted index segments are copied from the MapReduce pipeline output. For example, copy inverted_index/output/part-00000 to index_server/index/inverted_index/inverted_index_0.txt.
The stopwords.txt file is copied from inverted_index.
Install and run
Install the Index server app.
$ pwd
/Users/awdeorio/src/eecs485/p5-search-engine
$ pip install -r requirements.txt
$ pip install -e index_server
Run the Index server. By default, the Flask app reads inverted_index_1.txt.
$ flask --app index --debug run --host 0.0.0.0 --port 9000
...
 * Running on http://127.0.0.1:9000/ (Press CTRL+C to quit)
Load the inverted index
The Index server loads the inverted index file, PageRank file, and stopwords file into memory. It should only load the files into memory once after the Flask app is initialized.
Make sure that your Index server reads stopwords.txt and pagerank.out from the index_server/index/ directory. Call a function that loads these files from your API’s __init__.py like this. Your function name might be different.
# ...
import index.api  # noqa: E402  pylint: disable=wrong-import-position

# Load inverted index, stopwords, and pagerank into memory
index.api.load_index()
Inverted index segments
Different instances of the Index server will serve different segments of the inverted index. One Index server should load one segment from the file specified by the environment variable INDEX_PATH. If the environment variable is not set, then default to the absolute path to index_server/index/inverted_index/inverted_index_1.txt. Here’s a snippet from our instructor solution index_server/index/__init__.py:
INDEX_DIR = Path(__file__).parent/"inverted_index"
app.config["INDEX_PATH"] = os.getenv(
    "INDEX_PATH",  # Environment variable name
    INDEX_DIR/"inverted_index_1.txt"  # Default value
)
When you run the Index server, you may optionally set the INDEX_PATH environment variable, for example INDEX_PATH=index_server/index/inverted_index/inverted_index_0.txt.
$ INDEX_PATH=index_server/index/inverted_index/inverted_index_0.txt flask --app index --debug run --host 0.0.0.0 --port 9000
Example with two segments
We’ll start two Index servers on two ports, then make REST API requests for the query “web” to both servers.
Start an Index server for segment 0 on port 9000.
$ INDEX_PATH=index_server/index/inverted_index/inverted_index_0.txt flask --app index  --debug run --host 0.0.0.0 --port 9000
...
 * Running on http://0.0.0.0:9000/ (Press CTRL+C to quit)
Start an Index server for segment 1 on port 9001. Do this in a second terminal window.
$ INDEX_PATH=index_server/index/inverted_index/inverted_index_1.txt flask --app index --debug run --host 0.0.0.0 --port 9001
...
 * Running on http://0.0.0.0:9001/ (Press CTRL+C to quit)
Make two requests for the query “web”, one to each Index server. Do this in a third terminal window. Notice that the two Index segment servers return different doc IDs for the same query.
$ http "localhost:9000/api/v1/hits/?q=web"
HTTP/1.0 200 OK
...
{
    "hits": [
        {
            docid": 82917387,
            "score": 0.2860617261239708
        },
...
$ http "localhost:9001/api/v1/hits/?q=web"
HTTP/1.0 200 OK
...
{
    "hits": [
        {
            "docid": 61683796,
            "score": 0.21858607509586597
        },
...
Query processing
Clean the query using the same procedure as in inverted index construction cleaning.
Queries containing multiple words are treated as AND (AKA non-phrase) queries. That is, assume the words in a query do not have to appear consecutively in a document. Select documents from the in-memory inverted index data structure that contain every word in the cleaned query.
Return search results sorted in order of relevance score, with the most relevant documents at the beginning.
PageRank integration
PageRank expresses the relative importance of a website based on links. Sites that are more important will have a higher PageRank score, so they should appear higher in the search results.
Rank documents based on the weighted linear combination of two factors: the query-dependent tf-idf score, and the query-independent PageRank score. The formula for the score of a query \(q\) on a single document \(d\) is:
\[Score(q, d, w) = w * PageRank(d) + (1 - w) * cosSim(q, d)\]\(w\) is the weight of a document’s PageRank score, and takes on a value \([0,1]\). The weight of a document’s cosine similarity score is \(1 - w\). The value \(w\) is provided as a URL query parameter. Don’t confuse \(w\) with \(w_{ik}\) given by the formula in the tf-idf calculation.
\(PageRank(d)\) is the PageRank score of document \(d\) obtained using the provided pagerank.out. Load this file into memory once, creating a data structure that maps doc ID to PageRank score. See Load the inverted index for tips.
\(cosSim(q, d)\) is the cosine similarity between the query \(q\) and the document \(d\) tf-idf weight vectors. Each weight \(w_{ik}\) in a tf-idf weight vector is calculated via the formula in the tf-idf calculation.
Calculation example
This is a detailed example for the query michigan wolverine with PageRank weight 0.3 and tf-idf weight is 0.7.
Read inverted index and PageRank
Search all inverted index segments for michigan and then for wolverine.
$ grep '^michigan ' ./index_server/index/inverted_index/inverted_index_*.txt
./index_server/index/inverted_index/inverted_index_0.txt:michigan 0.4163370894506465 00111573 4  325.75383701920936 ...
./index_server/index/inverted_index/inverted_index_1.txt:michigan 0.4163370894506465 00121099 30 79.53307571219761 ...
./index_server/index/inverted_index/inverted_index_2.txt:michigan 0.4163370894506465 00035015 26 45.948318376200106 ...
$ grep '^wolverine ' ./index_server/index/inverted_index/inverted_index_*.txt
./index_server/index/inverted_index/inverted_index_0.txt:wolverine 1.7958091063337285 07205250 1 586.8556370515278 ...
./index_server/index/inverted_index/inverted_index_1.txt:wolverine 1.7958091063337285 09285100 2 186.43740642772494 ...
./index_server/index/inverted_index/inverted_index_2.txt:wolverine 1.7958091063337285 07271486 1 326.4994547458223 ...
We see that the idf for michigan is 0.416 and the idf for wolverine is 1.796. If we look at the docids for michigan and wolverine, docid 47914064 contains both terms.
$ egrep '^(michigan|wolverine) .*47914064' ./index_server/index/inverted_index/inverted_index_*.txt
./index_server/index/inverted_index/inverted_index_2.txt:michigan 0.4163370894506465 ... 47914064 515 437.9032652563985 ...
./index_server/index/inverted_index/inverted_index_2.txt:wolverine 1.7958091063337285 ... 47914064 5 437.9032652563985 ...
The output above tells us that in document 47914064, michigan appears 515 times, and wolverine occurs 5 times. The normalization factor for document 47914064 over every term in that document is 437.903.
If you’re curious, document 47914064 is the Wikipedia page about the University of Michigan.
$ grep -A 2 "<title>" inverted_index/crawl/47914064.html
  <title>
   University of Michigan - Wikipedia
  </title>
We’ll also read the value of PageRank for document 47914064 from pagerank.out.
$ grep "47914064," ./index_server/index/pagerank.out
47914064,0.003004007731185798
Query vector
We’ll start with a query vector.
\[\bar{q} = \left[ tf_{q1} * idf_1, tf_{q2} * idf_2, \ldots \right]\]The query vector has one position for each term. Term 1 is michigan and term 2 is wolverine.
\[\bar{q} = \left[ tf_{michigan} * idf_{michigan}, tf_{wolverine} * idf_{wolverine} \right]\]Each position in the query vector is calculated as term frequency in query * inverse document frequency.
\[\bar{q} = \left[ 1 * 0.416337, 1 * 1.795809 \right] = \left[0.416337, 1.795809 \right]\]The normalization factor for the query is the length of the query vector.
\[\vert \bar{q} \vert = \sqrt{\sum_{k=1}^t \left( tf_{qk} * idf_{k} \right)^2}\]Compute the normalization factor for the query.
\[\bar{q} = \left[0.416337, 1.795809 \right]\] \[\vert \bar{q} \vert = \sqrt{\left( 0.416337 \right)^2 + \left( 1.795809 \right)^2} = 1.843439\]Normalize the query vector.
\[\hat{q} = \frac{\bar{q}}{\vert \bar{q} \vert} = \frac{ \left[0.416337, 1.795809 \right] }{ 1.843439 } = \left[0.225848, 0.974163 \right]\]Document vector
Next, make a document vector for document \(d_{i}\).
\[\bar{d_{i}} = \left[ tf_{i1} * idf_1, tf_{i2} * idf_2, \ldots \right]\]The document vector has one position for each term. Term 1 is michigan and term 2 is wolverine. The document number in this example is 47914064.
Each position in the document vector is calculated as term frequency in document i * inverse document frequency.
\[\bar{d_{47914064}} = \left[ 515 * 0.416337, 5 * 1.795809 \right] = \left[ 214.413601, 8.979046 \right]\]The document normalization factor is the length of the document vector.
\[\vert \bar{d_{i}} \vert = \sqrt{\sum_{k=1}^t \left( tf_{ik} * idf_{k} \right)^2}\]Earlier we read the normalization factor 437.9032652563985 for document 47914064 from the inverted index.
Normalize the document vector.
\[\hat{d_{i}} = \frac{\bar{d_{i}}}{\vert \bar{d_{i}} \vert} = \frac{ \left[214.413601, 8.979046 \right] }{ 437.9032652563985 } = \left[0.489637, 0.020505 \right]\]tf-idf similarity score
Compute the dot product (cosine similarity) of the normalized query and document vectors.
\[cosSim(q, d_{i}) = \hat{q} \cdot \hat{d_{i}}\] \[= \left[0.225848, 0.974163 \right] \cdot \left[ 0.489637, 0.020505 \right]\] \[= 0.225848 * 0.489637 + 0.974163 * 0.020505\] \[= 0.110584 + 0.0199748\] \[= 0.130558\]Weighted score
Finally, we combine tf-idf and PageRank using the weight.
\[Score(q, d, w) = w * PageRank(d) + (1 - w) * cosSim(q, d)\] \[= 0.3 * 0.003004 + (1-0.3) * 0.130558 = 0.092292\]Running from Index Server
We can verify this score by running the Index Server.
Start an Index server for segment 2 on port 9002.
$ INDEX_PATH=index_server/index/inverted_index/inverted_index_2.txt flask --app index  --debug run --host 0.0.0.0 --port 9002
...
 * Running on http://0.0.0.0:9002/ (Press CTRL+C to quit)
In a second terminal, make a request for the query “michigan wolverine” with PageRank weight 0.3. The URL for this query is /api/v1/hits/?w=0.3&q=michigan+wolverine". Notice that we get a hit for document 47914064 with score 0.092292, which matches our example calculation.
$ http "localhost:9002/api/v1/hits/?w=0.3&q=michigan+wolverine"
...
{
    "hits": [
      ...
        {
            "docid": 47914064,
            "score": 0.09229207473927269
        },
      ...
    ]
}
Init script
Write a shell script to launch the Index servers. The examples below show output with the commands your script should run, but we won’t check your output, just the functionality.
Example: start index. The command flask run ... & will start up your flask server in the background. The >> var/log/index.log 2&1 appends stdout and stderr to a log file.
$ ./bin/index start
starting index server ...
+ mkdir -p var/log
+ rm -f var/log/index.log
+ INDEX_PATH="index_server/index/inverted_index/inverted_index_0.txt" flask --app index run --host 0.0.0.0 --port 9000 >> var/log/index.log 2>&1 &
+ INDEX_PATH="index_server/index/inverted_index/inverted_index_1.txt" flask --app index run --host 0.0.0.0 --port 9001 >> var/log/index.log 2>&1 &
+ INDEX_PATH="index_server/index/inverted_index/inverted_index_2.txt" flask --app index run --host 0.0.0.0 --port 9002 >> var/log/index.log 2>&1 &
Watch the log file produced by the Index servers. Type Control-C to stop watching the log.
$ tail -f var/log/index.log
 * Serving Flask app "index"
 * Environment: production
   WARNING: This is a development server. Do not use it in a production deployment.
   Use a production WSGI server instead.
 * Debug mode: off
 * Running on http://0.0.0.0:9000/ (Press CTRL+C to quit)
 * Running on http://0.0.0.0:9001/ (Press CTRL+C to quit)
 * Running on http://0.0.0.0:9002/ (Press CTRL+C to quit)
Example: Start Index server when one or more Index servers is already running. To check if the first Index server is already running, you can use pgrep -f "flask --app index run --host 0.0.0.0 --port 9000". Don’t forget, you’ll need to do this 3 times, one for each server.
$ ./bin/index start
Error: index server is already running
Example: Stop index.
$ ./bin/index stop
stopping index server ...
+ pkill -f "flask --app index run --host 0.0.0.0 --port 9000" || true
+ pkill -f "flask --app index run --host 0.0.0.0 --port 9001" || true
+ pkill -f "flask --app index run --host 0.0.0.0 --port 9002" || true
Example: Restart index.
$ ./bin/index restart
stopping index server ...
+ pkill -f "flask --app index run --host 0.0.0.0 --port 9000" || true
+ pkill -f "flask --app index run --host 0.0.0.0 --port 9001" || true
+ pkill -f "flask --app index run --host 0.0.0.0 --port 9002" || true
starting index server ...
+ mkdir -p var/log
+ rm -f var/log/index.log
+ INDEX_PATH="index_server/index/inverted_index/inverted_index_0.txt" flask --app index run --host 0.0.0.0 --port 9000 >> var/log/index.log 2>&1 &
+ INDEX_PATH="index_server/index/inverted_index/inverted_index_1.txt" flask --app index run --host 0.0.0.0 --port 9001 >> var/log/index.log 2>&1 &
+ INDEX_PATH="index_server/index/inverted_index/inverted_index_2.txt" flask --app index run --host 0.0.0.0 --port 9002 >> var/log/index.log 2>&1 &
Example: Index status. Exit 0 if the Index server is running, and exit non-zero otherwise.
$ ./bin/index status
index server stopped
$ ./bin/index start
starting index server ...
$ ./bin/index status
index server running
$ pkill -f 'flask --app index run --host 0.0.0.0 --port 9001'
$ ./bin/index status
index server error: found 2 processes, expected 3
$ ./bin/index stop
stopping index server ...
$ ./bin/index status
index server stopped
The code for index status is tricky, so we’ll just give it to you.
set +o pipefail
NPROCS=$(pgrep -f "flask --app index run --host 0.0.0.0 --port 900[0-2]" | wc -l)
set -o pipefail
if [ "$NPROCS" -eq 3 ]; then
  echo "index server running"
  exit
elif [ "$NPROCS" -eq 0 ]; then
  echo "index server stopped"
  exit 1
else
  echo "index server error: found ${NPROCS} processes, expected 3"
  exit 2
fi
Testing
Once you have implemented your Index server, you should be able to pass all tests in test_index_server_public.py.
$ pytest -v tests/test_index_server_public.py
Your Index server code should pass these linters.
$ pwd
/Users/awdeorio/src/eecs485/p5-search-engine
$ pylint --rcfile index_server/pyproject.toml index_server
$ pycodestyle index_server
$ pydocstyle index_server
Search server
The Search server is a user interface implemented with server-side dynamic pages. A user enters a query and the Search server returns a page of search results, just like Google or Bing.
The Search server backend makes REST API requests to each Index server and combines the results from each inverted index segment. It should make these requests in parallel threads. The Search server then displays the top 10 results to the client.
Directory structure
Here’s what your final Search server directory structure should look like.
$ tree search_server -I '__pycache__|*.egg-info'
search_server
├── search
│   ├── __init__.py
│   ├── config.py
│   ├── model.py
|   ├── static
│   │   └── css
│   │       └── style.css
│   ├── templates
│   │   └── *.html
│   └── views
│       ├── __init__.py
│       └── *.py
└── pyproject.toml
Configuration
The Search server configuration in config.py should have a configuration parameter called SEARCH_INDEX_SEGMENT_API_URLS. The unit tests will change this variable when the ports of the Index segment servers on the autograder change.
You can hardcode your API URLs like we did in our instructor solution search_server/search/config.py:
SEARCH_INDEX_SEGMENT_API_URLS = [
    "http://localhost:9000/api/v1/hits/",
    "http://localhost:9001/api/v1/hits/",
    "http://localhost:9002/api/v1/hits/",
]
searchdb script
Write a Python program searchdb that extracts details about each document and adds them to a database. The Search server will read the database at query time for things like a page’s title, URL, and summary.
The default input directory is inverted_index/crawl/ and the output is var/search.sqlite3. Read all of the files in the input directory and add one row to the database for each file.
$ ./bin/searchdb
Created var/search.sqlite3
Schema
The schema for the database is one table, documents, that contains four columns.
docid:INTEGERandPRIMARY KEYtitle:VARCHAR(150)summary:VARCHAR(250)url:VARCHAR(150)
Data
Use BeautifulSoup to extract the doc id, title, summary, and URL from each document and add a row to the database.
A simplified example document looks like this:
<!DOCTYPE html>
<html>
 <head>
  <title>
   Operating system abstraction layer - Wikipedia
  </title>
  <meta eecs485_url="https://en.wikipedia.org/wiki/Operating_system_abstraction_layer"/>
  <meta eecs485_docid="00074285"/>
</head>
<body>
<p>
 An operating system abstraction layer ...
You can get the value from a custom property (eecs485_url) like this:
soup.find("meta", attrs={"eecs485_url": True}).get("eecs485_url")
The title of the page is the content of the title tag without the “- Wikipedia” suffix.
To extract the summary use this sample code. It chooses the first p tag with enough text in it to act as the document summary.
def get_summary(soup):
    summary = ""
    p_elts = soup.find_all("p", class_=False)
    for p in p_elts:
        p = p.text
        # If the body isn't empty and longer than 50 characters (arbitrary)
        if p.strip() and len(p) > 50:
            # Limit summary to 250 characters (including truncation)
            summary = p.strip()[0:247]

            # Replace newlines to format query string
            summary = summary.replace("\n", " ")

            # Truncate endings
            summary = summary + "..."
            break

    return summary
Pro-tip: See Project 2’s model.py for example sqlite3 database connect, commit, close, etc.
Testing
We have provided a test case, test_scripts.py::test_searchdb, to verify the functionality of your script before you continue with the Search server.
$ pytest -v tests/test_scripts.py::test_searchdb
GUI /
The graphical user interface (GUI) allows users to input a query and a weight, then view a ranked list of relevant docs. Serve this page as the main route (/).
A user enters a query into a text input box, and specifies a PageRank weight using a slider. Execute the query when the user presses the submit button.
Input
The GUI shows a text input and a slider input.

The text input box should set the q GET query parameter in the URL, and will be a string. When displaying the results, the text input box should show the query terms.
The slider should set the w GET query parameter in the URL, and will be a decimal value between 0-1, inclusive. You should set the range slider’s step value to be 0.01. When displaying the results, the slider should have a value equal to the query weight.
Use this HTML form code for the search form:
<!-- DO NOT CHANGE THIS (aside from where we say 'FIXME') -->
<form action="/" method="GET" class="search_bar">
  <input type="text" name="q"<FIXME add other attributes such as value>/>
  <input type="range" name="w" <FIXME add other attributes such as min and max> />
  <input type="submit" value="Search"/>
</form>
Output
When the user clicks the submit button, make a GET request to the index url (/) with query parameters q and w. The server should return a webpage with at most 10 search results in ranked order. Each result is the title of a document verbatim from the database.
Enclose each search result in <div class="doc">.
Within each search result, enclose each URL in <a class="doc_url">. The hypertext reference (href) should be percent-encoded. The visible text (AKA anchor text) should be decoded (convert percent-encoded characters).
- Good anchor text:
https://en.wikipedia.org/wiki/"Hello,_World!"_program - Bad anchor text:
https://en.wikipedia.org/wiki/%22Hello,_World!%22_program
Within each search result, enclose each result title in <div class="doc_title">.
Within each search result, enclose each result summary in <div class="doc_summary">. If the summary for a document in the database is empty, show “No summary available”.
If there are no search results, display <div class="no_results">No search results found!</div>.
Connect to Index servers
To produce the final list of search results, the Search server makes several REST API requests to the Index servers. An Index server URL looks like localhost:9000/api/v1/hits/, not /api/v1/hits/. Make concurrent requests to each API URL in the Flask configuration variable SEARCH_INDEX_SEGMENT_API_URLS.
Use the Requests library to make HTTP requests to the Index servers. Use threads to make concurrent requests. Consider using the heapq.merge() function to combine the results of several Index servers.
Optional CSS
We included in the starter files the CSS style sheet we used in our instructor solution (style.css). Here’s how to use it.
Make sure style.css is in the right place.
$ ls search_server/search/static/css/style.css
search_server/search/static/css/style.css
Include the CSS in your header. Our template is called search_server/search/templates/index.html, but yours might be different.
<head>
...
  <link rel="stylesheet" type="text/css" href="{{ url_for('static', filename='css/style.css') }}">
  <link href="https://fonts.googleapis.com/css?family=Montserrat" rel="stylesheet">
  <link href="https://fonts.googleapis.com/css?family=Roboto" rel="stylesheet">
...
</head>
Enclose the entire body in <div class="feed">.
Style the search bar by wrapping the input elements with <form ... class="search_bar"> as described above.
Enclose the “ask485” title in <div class="ask485">.
Display the label on the slider like this: <div class="pagerank_weight">PageRank Weight</div>.
Enclose the list of docs in <div class="docs">.
Within the list of docs, continue to use classes doc_url, doc_title, and doc_summary as described above.
Install and run
Install the Search server app.
$ pip install -r requirements.txt
$ pip install -e search_server
Make sure you’ve generated your Search server database.
$ ls var/search.sqlite3
var/search.sqlite3
If you need to create the Search server database:
$ ./bin/searchdb
Make sure the Index servers are running.
$ pgrep -lf flask  # macOS
$ pgrep -af flask  # Linux/WSL
75608 ... flask run --host 0.0.0.0 --port 9000
75609 ... flask run --host 0.0.0.0 --port 9001
75610 ... flask run --host 0.0.0.0 --port 9002
If you need to start the Index servers in the background (notice the & symbol at the end of the command):
$ INDEX_PATH=index_server/index/inverted_index/inverted_index_0.txt flask --app index run --host 0.0.0.0 --port 9000 &
$ INDEX_PATH=index_server/index/inverted_index/inverted_index_1.txt flask --app index run --host 0.0.0.0 --port 9001 &
$ INDEX_PATH=index_server/index/inverted_index/inverted_index_2.txt flask --app index run --host 0.0.0.0 --port 9002 &
Run the Search server.
$ flask --app search --debug run --host 0.0.0.0 --port 8000
Kill all Search and Index servers.
$ pkill -lf flask  # macOS
$ pkill -af flask  # Linux/WSL
Init script
Write a shell script to launch the Search server. The examples below show output with the commands your script should run, but we won’t check your output, just the functionality.
Example: Start search. The command flask run ... & will start up your flask server in the background. The &> var/log/search.log writes stdout and stderr to a log file.
$ ./bin/search start
starting search server ...
+ mkdir -p var/log
+ rm -f var/log/search.log
+ flask --app search run --host 0.0.0.0 --port 8000 &> var/log/search.log &
Watch the log file produced by the Search server. Type Control-C to stop watching the log.
$ tail -f var/log/search.log
 * Serving Flask app "search"
 * Environment: production
   WARNING: This is a development server. Do not use it in a production deployment.
   Use a production WSGI server instead.
 * Debug mode: off
 * Running on http://0.0.0.0:8000/ (Press CTRL+C to quit)
Example: Start Search server when database does not exist. Exit non-zero.
$ ./bin/search start
Error: can't find search database var/search.sqlite3
Try: ./bin/searchdb
Example: Start Search server when Index server is stopped. Exit non-zero. Pro-tip: use ./bin/index status to check if the Index server is running.
$ ./bin/search start
Error: index server is not running
Try ./bin/index start
Example: Start Search server when it’s already running. Exit non-zero.
$ ./bin/search start
Error: search server is already running
Example: Stop search.
$ ./bin/search stop
stopping search server ...
+ pkill -f 'flask --app search run --host 0.0.0.0 --port 8000' || true
Example: Restart search.
$ ./bin/search restart
stopping search server ...
+ pkill -f 'flask --app search run --host 0.0.0.0 --port 8000' || true
starting search server ...
+ mkdir -p var/log
+ rm -f var/log/search.log
+ flask --app search run --host 0.0.0.0 --port 8000 &> var/log/search.log &
Example: Search status. Exit 0 if the Search server is running, and exit non-zero otherwise. Pro-tip: you can check the Search server process with pgrep -f "flask --app search run --host 0.0.0.0 --port 8000".
$ ./bin/search status
search server stopped
$ ./bin/index start
starting index server ...
$ ./bin/search start
starting search server ...$
 ./bin/search status
search server running
$ ./bin/search stop
stopping search server ...
$ ./bin/search status
search server stopped
$ ./bin/index stop
stopping index server ...
Testing
Once you have implemented your Search and Index servers, you should be able to pass all tests in test_search_server_public.py.
$ pytest -v --log-cli-level=INFO tests/test_search_server_public.py
Run all published unit tests.
$ pytest -v
Your Search server code should pass these linters.
$ pwd
/Users/awdeorio/src/eecs485/p5-search-engine
$ pylint --rcfile search_server/pyproject.toml search_server
$ pycodestyle search_server
$ pydocstyle search_server
Submitting and grading
One team member should register your group on the autograder using the create new invitation feature.
Submit a tarball to the autograder, which is linked from https://eecs485.org. Include the --disable-copyfile flag only on macOS.
$ tar \
  -cJvf submit.tar.xz \
  --disable-copyfile \
  --exclude '*__pycache__*' \
  --exclude '*.out' \
  --exclude '*.sql' \
  --exclude '*.sqlite3' \
  --exclude '*.jar' \
  --exclude '*.egg-info' \
  --exclude '*var*' \
  --exclude '*tmp*' \
  --exclude '*/part-*' \
  bin \
  inverted_index/{map*.py,reduce*.py,partition.py,pipeline.sh} \
  index_server \
  search_server
Note that the submission command uses the -J flag: This tells tar to use the xz compression algorithm. xz is slower than gzip (which we used in past projects), but generally results in better compression and smaller file sizes. Make sure your submission tarball is less than 20MB.
$ du -h submit.tar.xz
15M	submit.tar.xz
Rubric
This is an approximate rubric.
| Deliverable | Value |
|---|---|
| Public tests | 50% |
| Hidden unit tests run after the deadline | 40% |
| Public style tests | 10% |
Code style
As in previous projects, all your Python code is expected to be pycodestyle-, pydocstyle-, and pylint-compliant.
It is fine to disable wrong-import-position pylint checks in __init__.py files for your Flask apps. For example, this line is in the instructor solution index_server/index/__init__.py:
import index.api # noqa: E402 pylint: disable=wrong-import-position
Run all style checks.
$ pytest -v tests/test_style.py
To run Pylint manually, you can use pylint --rcfile=<file> where <file> is inverted_index/pylintrc, index_server/pyproject.toml, or search_server/pyproject.toml.
$ pwd
/Users/awdeorio/src/eecs485/p5-search-engine
$ pylint --rcfile inverted_index/pylintrc inverted_index/*.py
$ pylint --rcfile index_server/pyproject.toml index_server
$ pylint --rcfile search_server/pyproject.toml search_server
Acknowledgments
Original project written by Andrew DeOrio awdeorio@umich.edu. Dataset generated by Melina O’Dell melodell@umich.edu and Maya Baveja mbaveja@umich.edu.
This document is licensed under a Creative Commons Attribution-NonCommercial 4.0 License. You’re free to copy and share this document, but not to sell it. You may not share source code provided with this document.