p4-mapreduce
Deploy EECS 485 MapReduce on AWS
This tutorial shows how to deploy your MapReduce framework to a cluster of Amazon Web Services (AWS) machines. During development, the Manager and Workers ran in different processes on the same machine. Now that you’ve finished implementing them, we’ll run them on different machines (EC2 instances).
Create an AWS account
Create an AWS account at https://aws.amazon.com. You should be free tier eligible, which means that you will be able to run an instance for free for the duration of the course.
You will need a credit card on the account, even if you only use free tier resources. This is how Amazon charges, in case you request more resources than provided in the free tier. Do not launch any additional instances other than the ones we specify in order to avoid additional charges.
Optionally, you may redeem extra benefits as a student, including $100 in AWS credits. https://aws.amazon.com/education/awseducate/
Launch an EFS file system
In order to cleanly share files between the Manager and Workers, we’ll use EFS (Elastic File System), a network file system that scales based on how much storage you use.
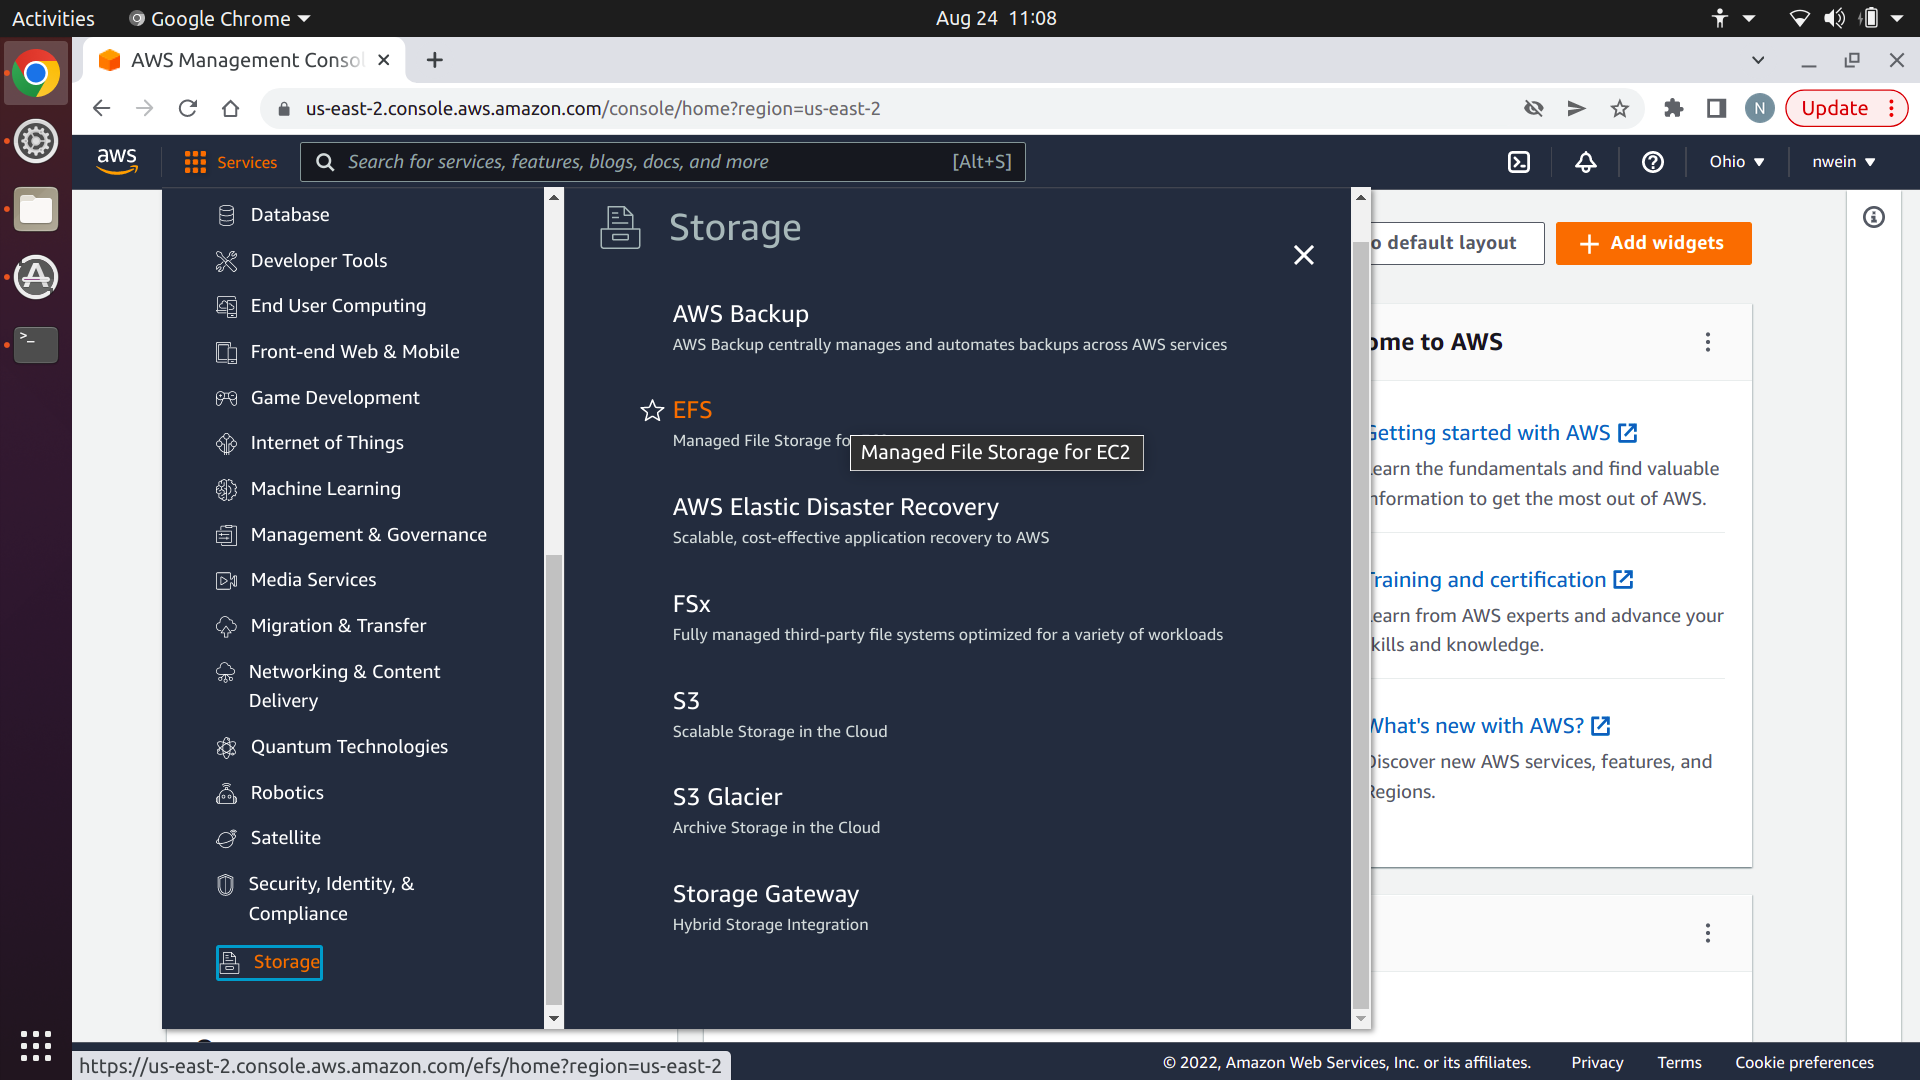
Navigate to the AWS Management Console. Select the “Services” dropdown menu, then “Storage,” and then “EFS.”
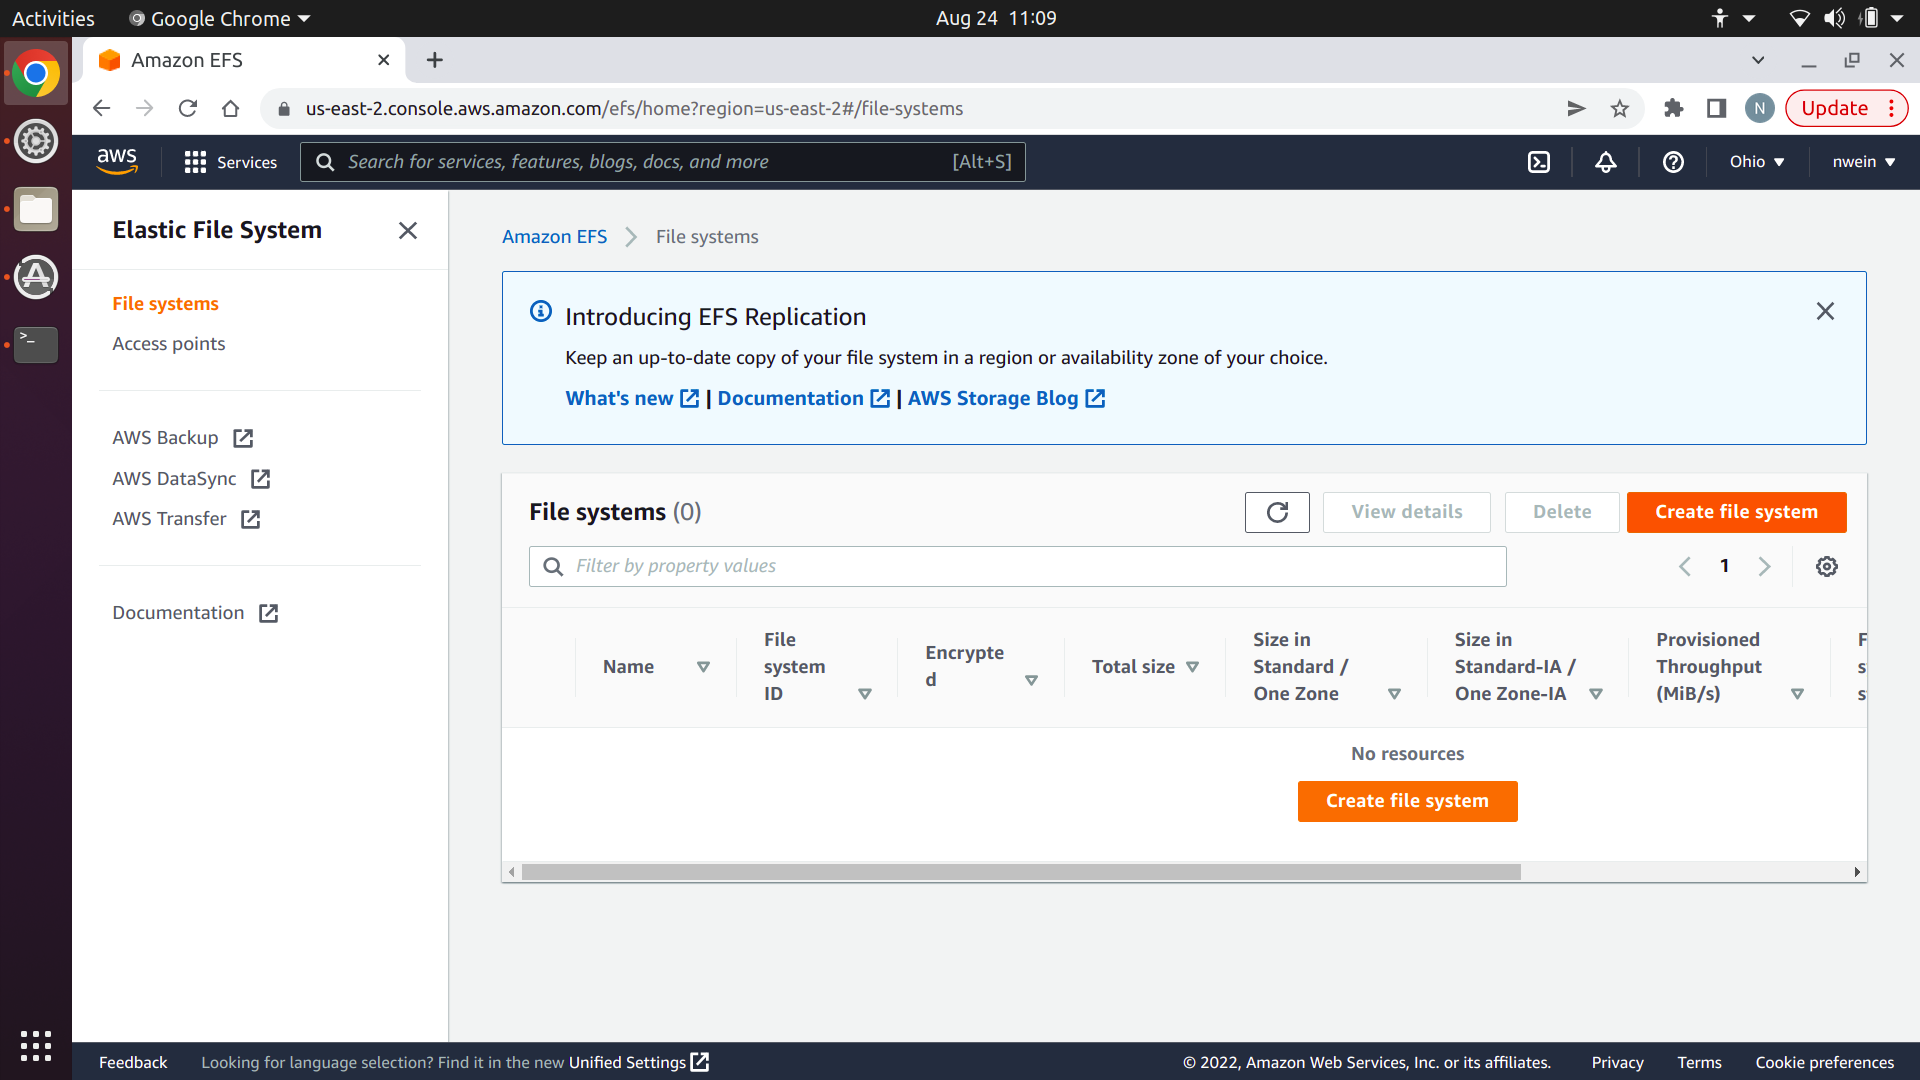
Next, click “Create file system.”
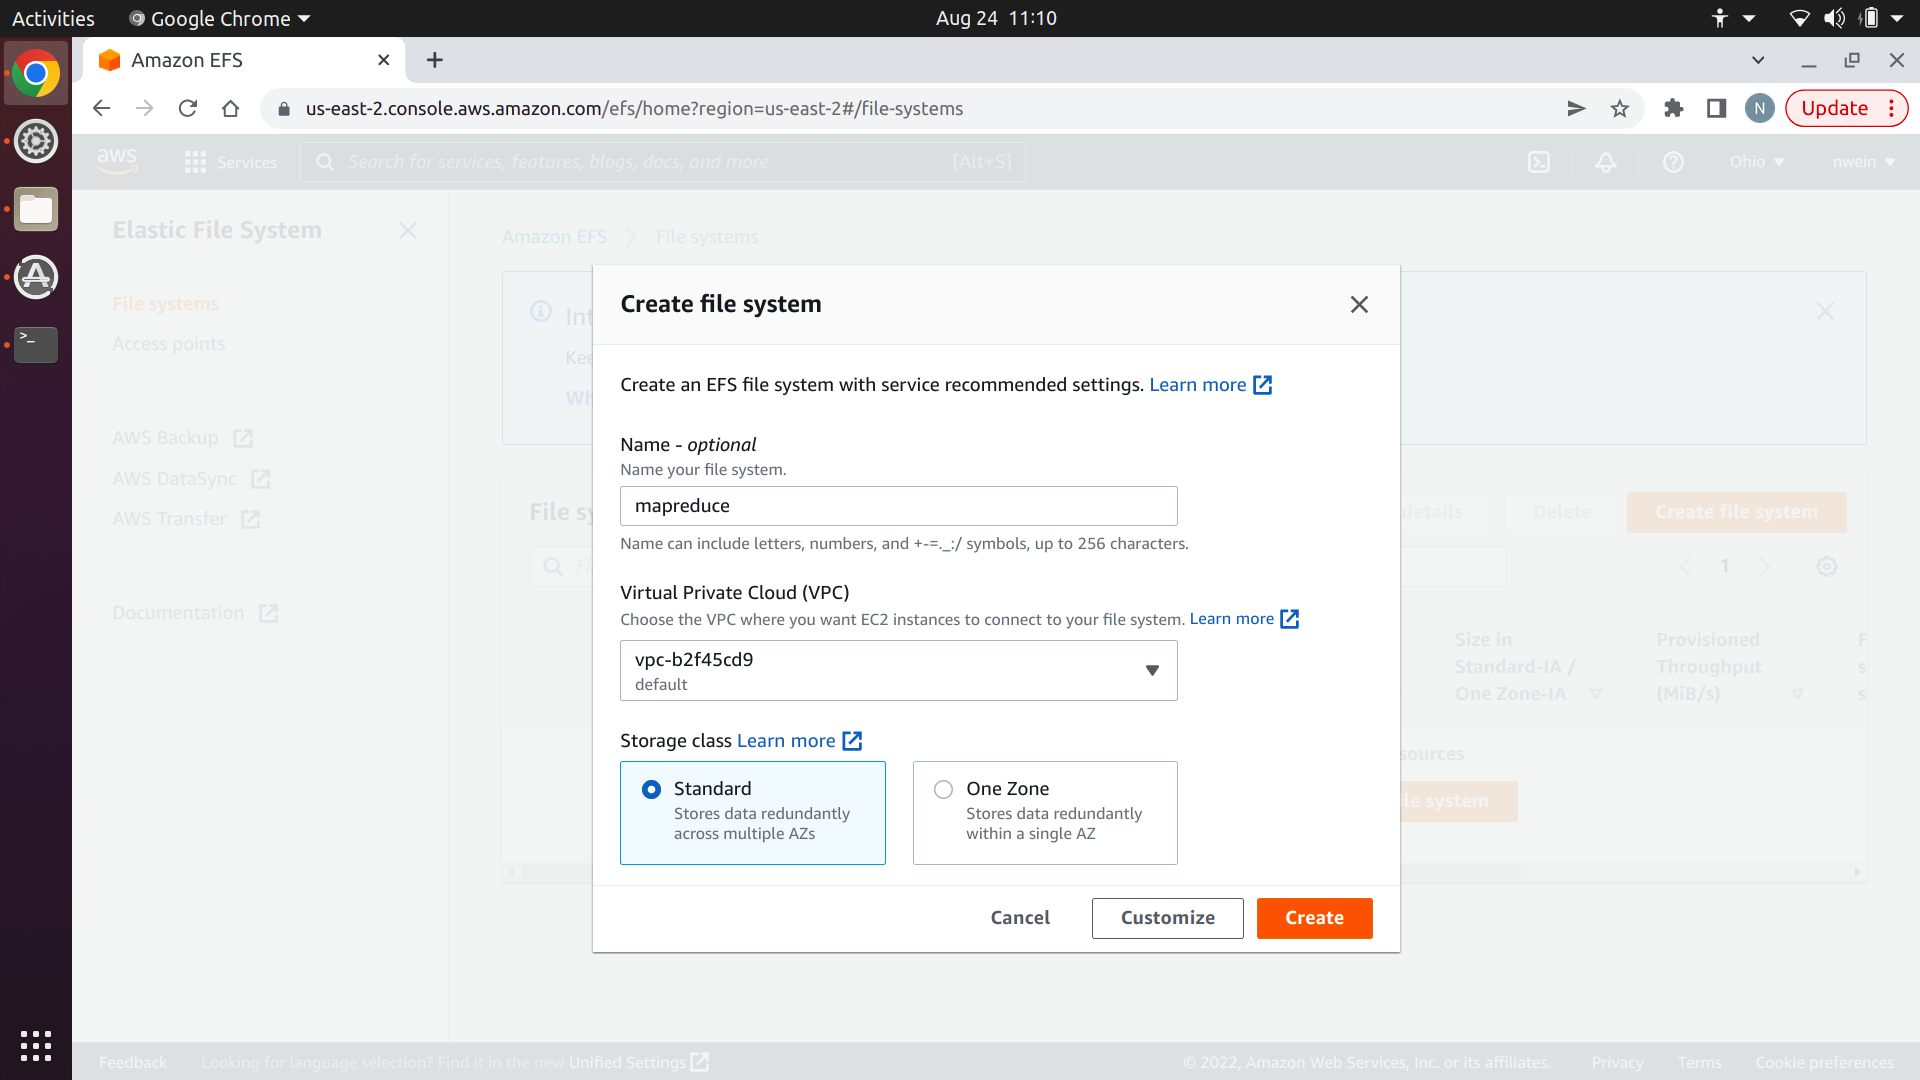
Enter a name, and click “Create.” Make sure to use your default Virtual Private Cloud.
Create EC2 security group
Before we create our EC2 instances, we’ll create a security group, which is a virtual firewall. We’ll set up a rule that allows SSH, a rule that allows the client to submit jobs to the Manager, and rules that allow the Manager and Worker to communicate with each other over TCP and UDP. The EC2 instances will ignore all other traffic.
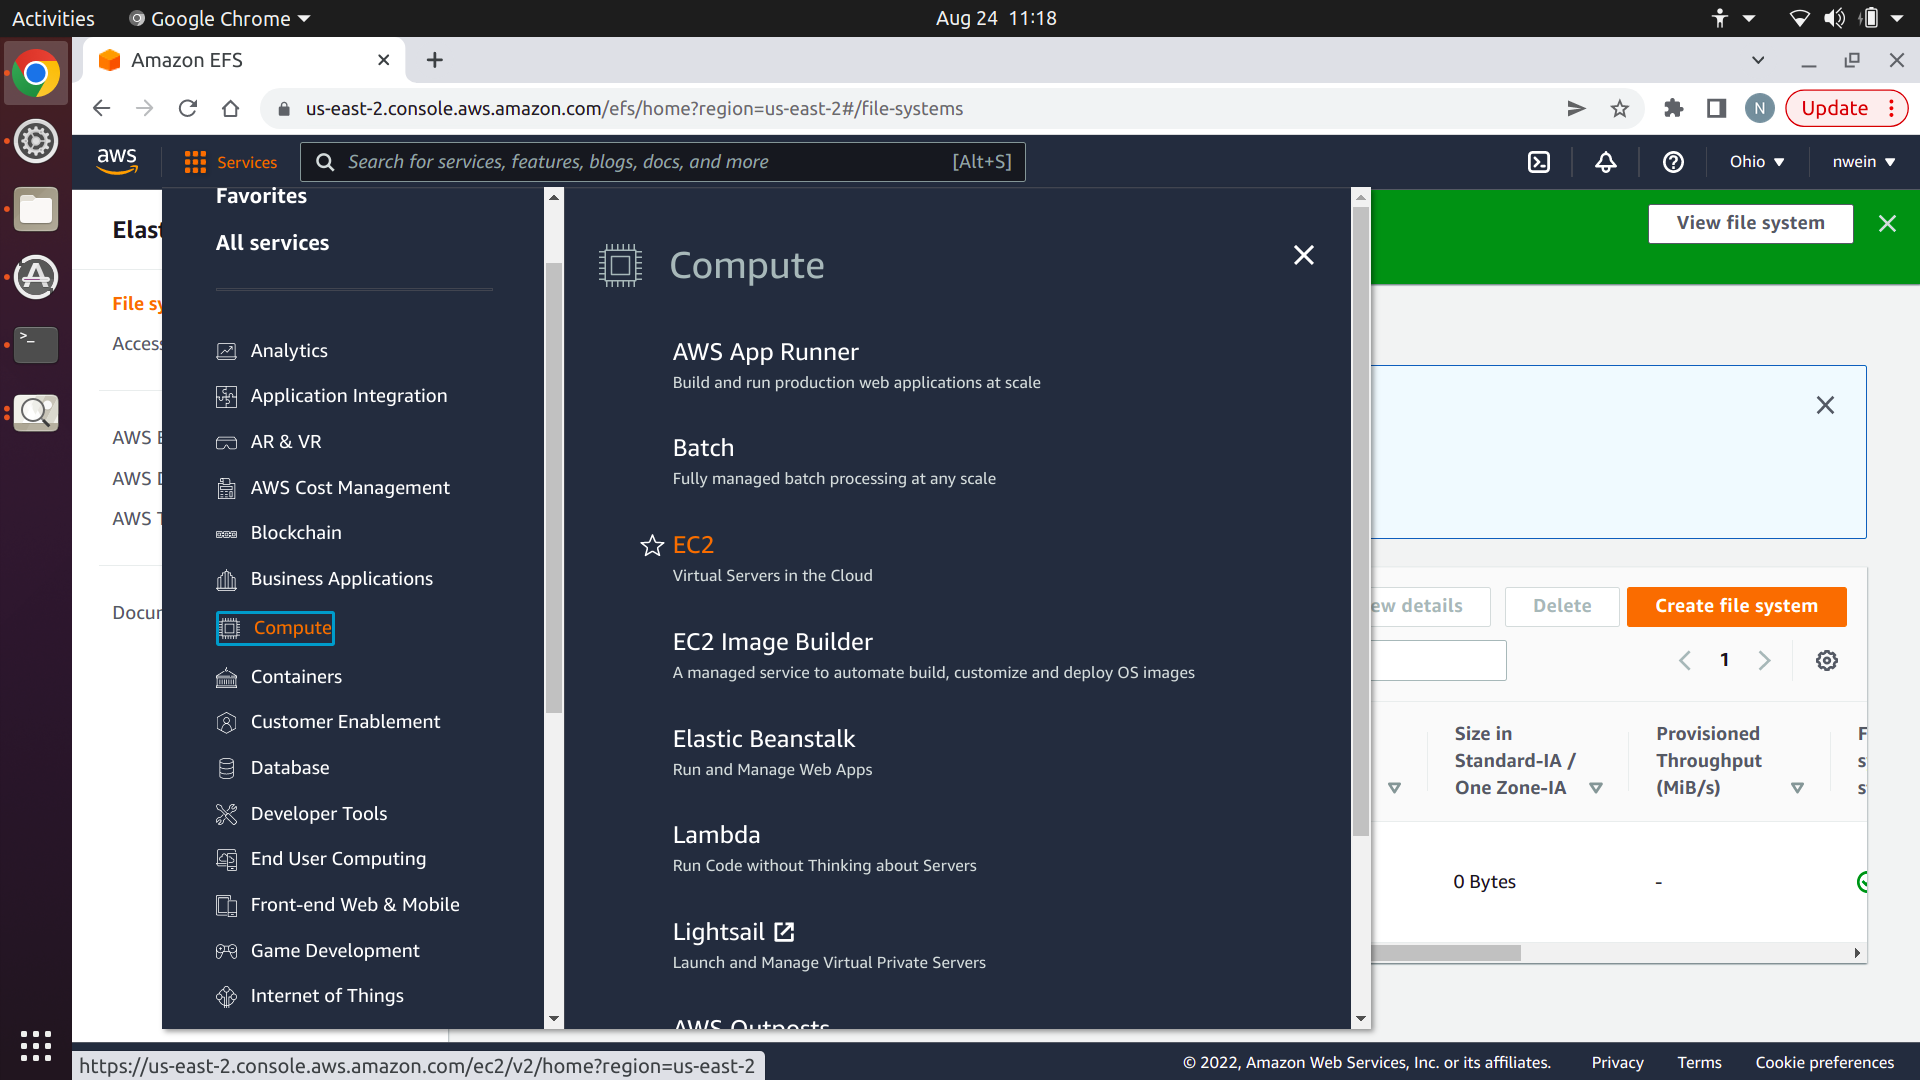
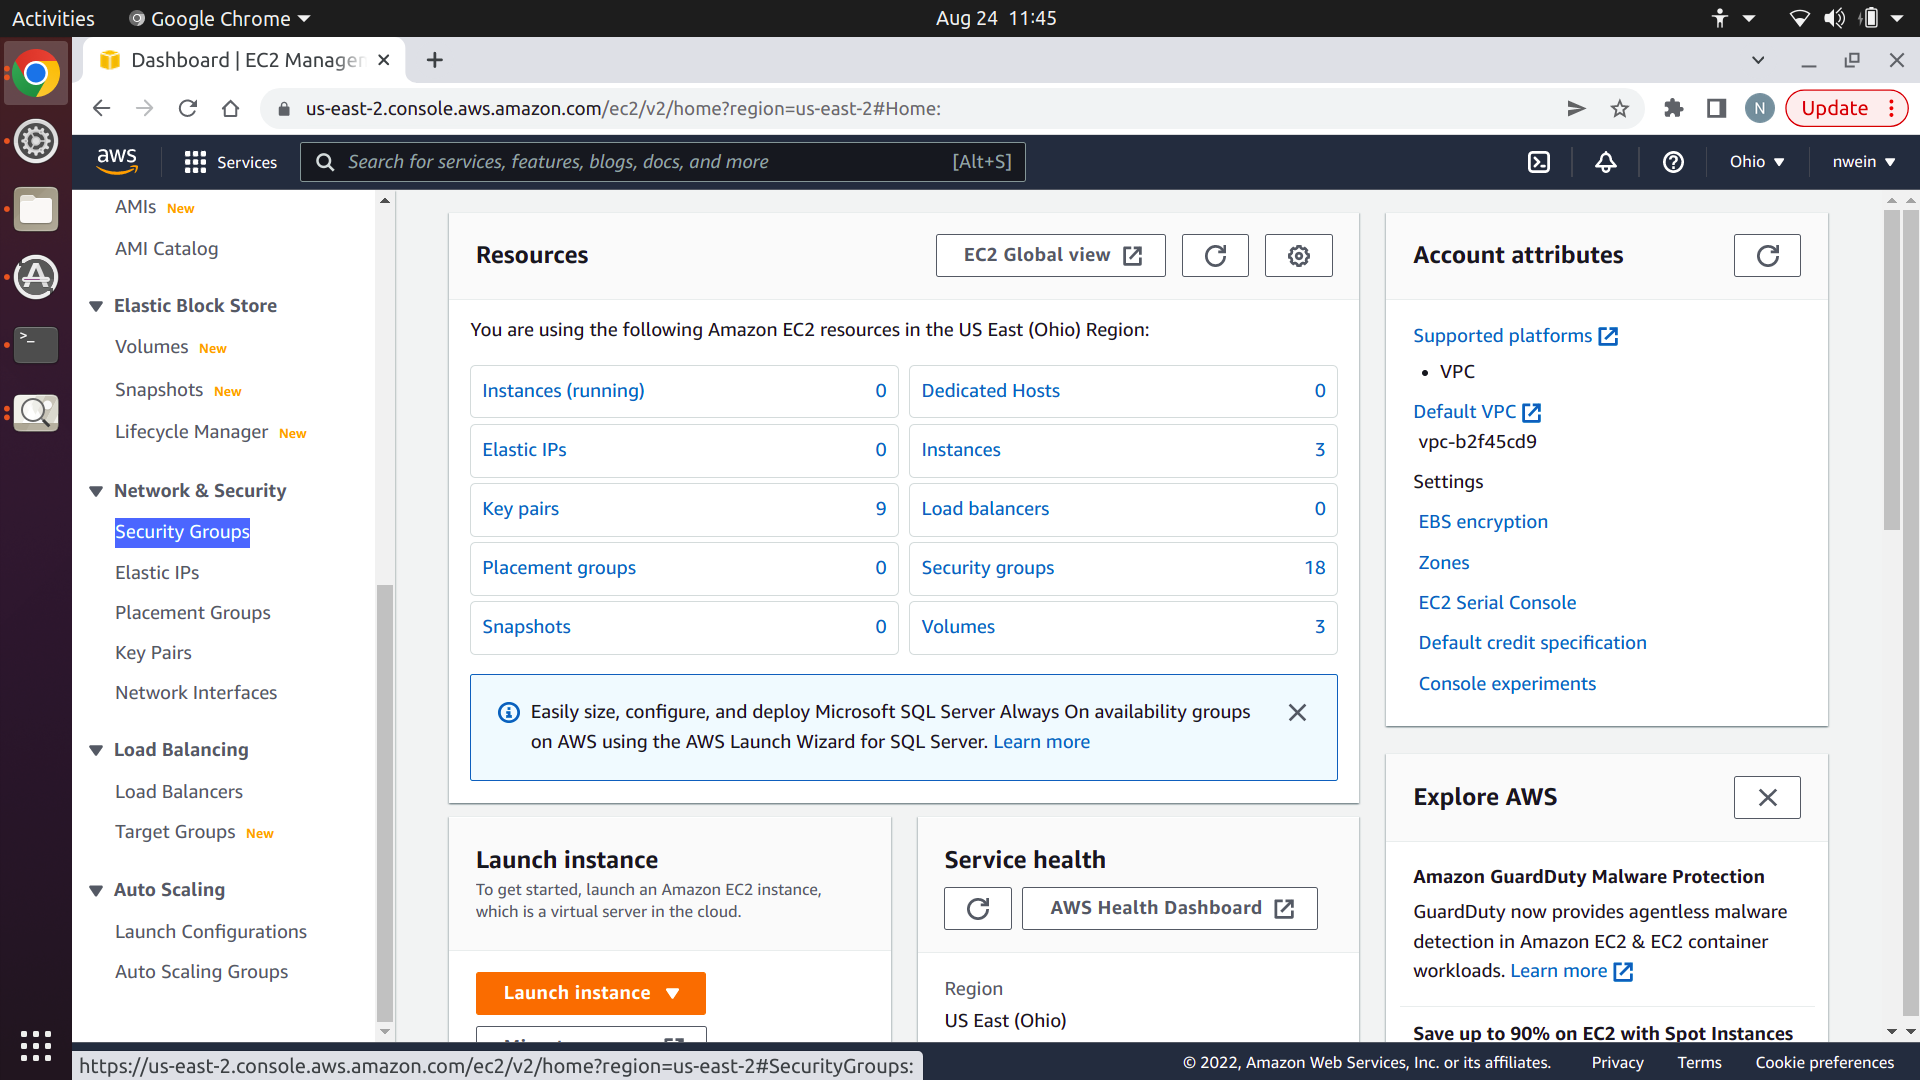
Navigate to the AWS Management Console. Select the “Services” dropdown menu, then “Compute,” and then “EC2.”
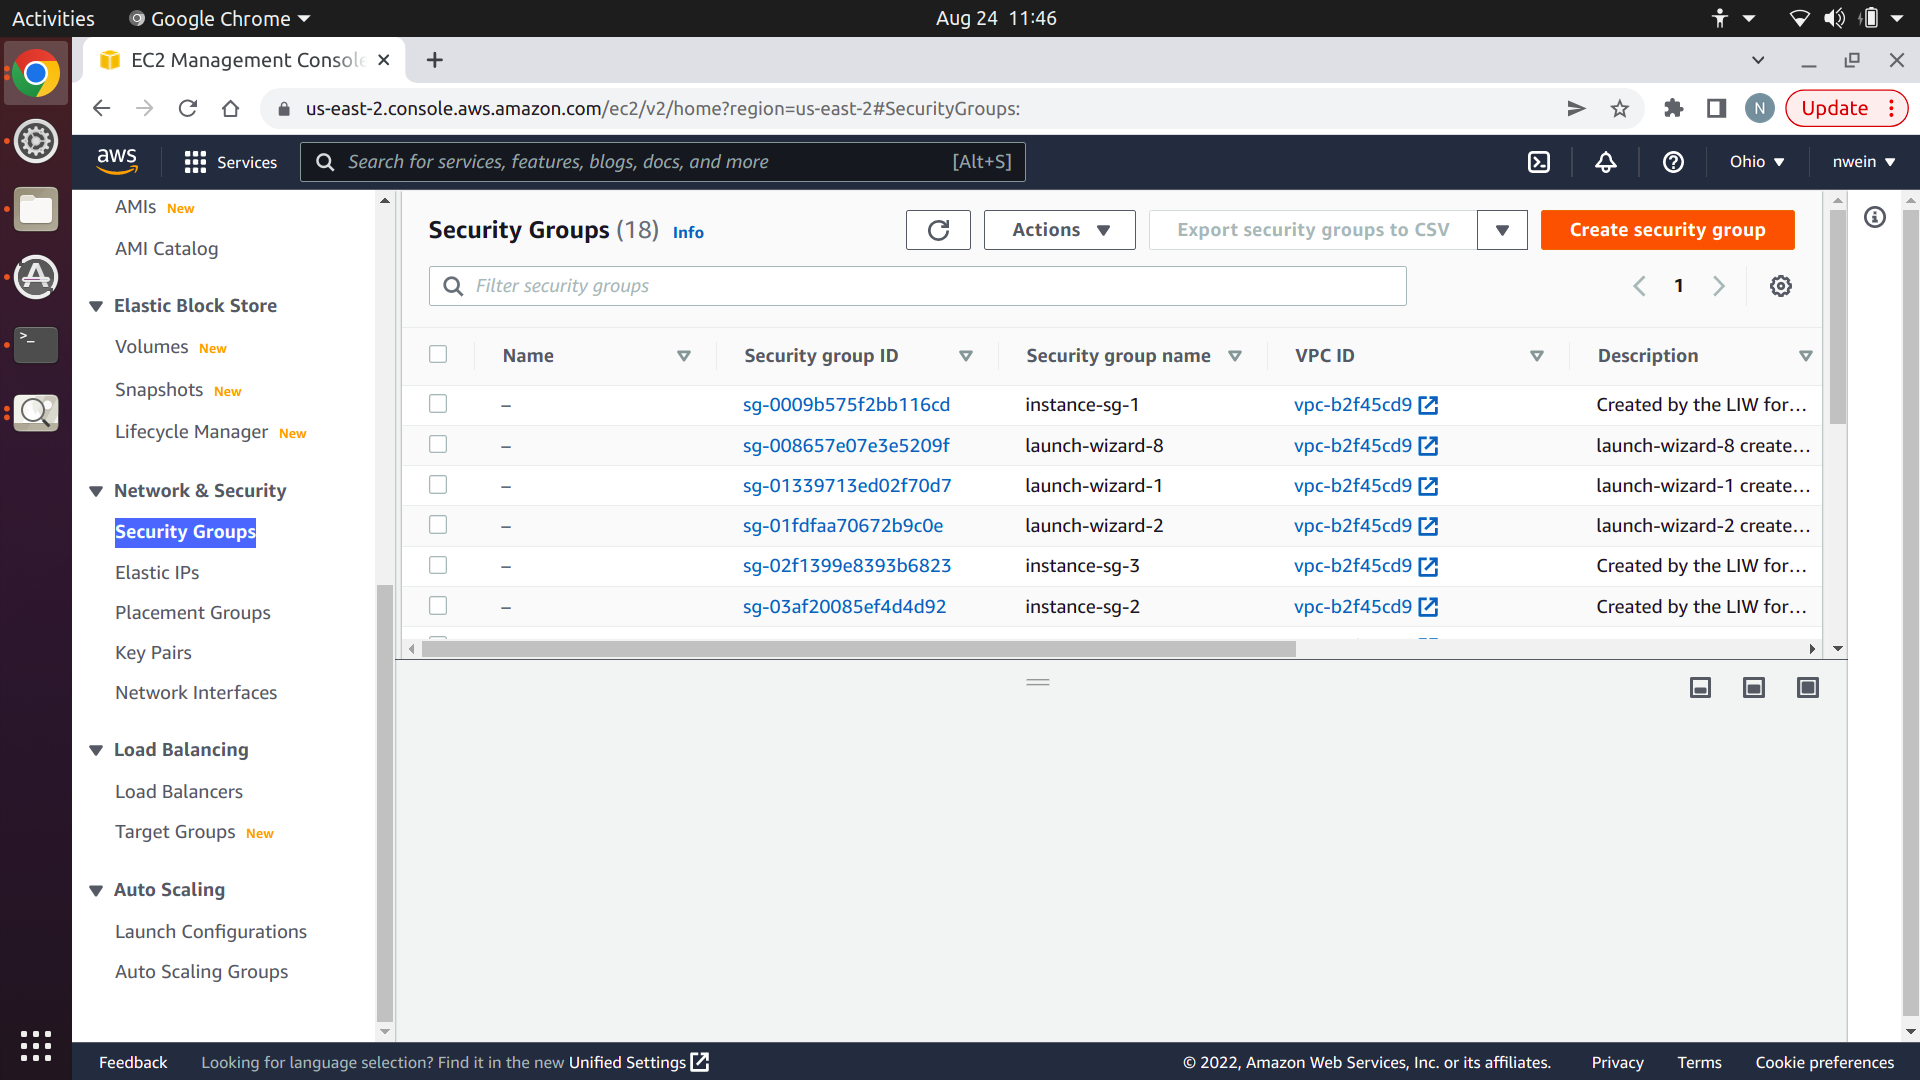
Scroll down to “Network & Security” in the EC2 console sidebar, and click “Security Groups.”
Click “Create Security Group.”
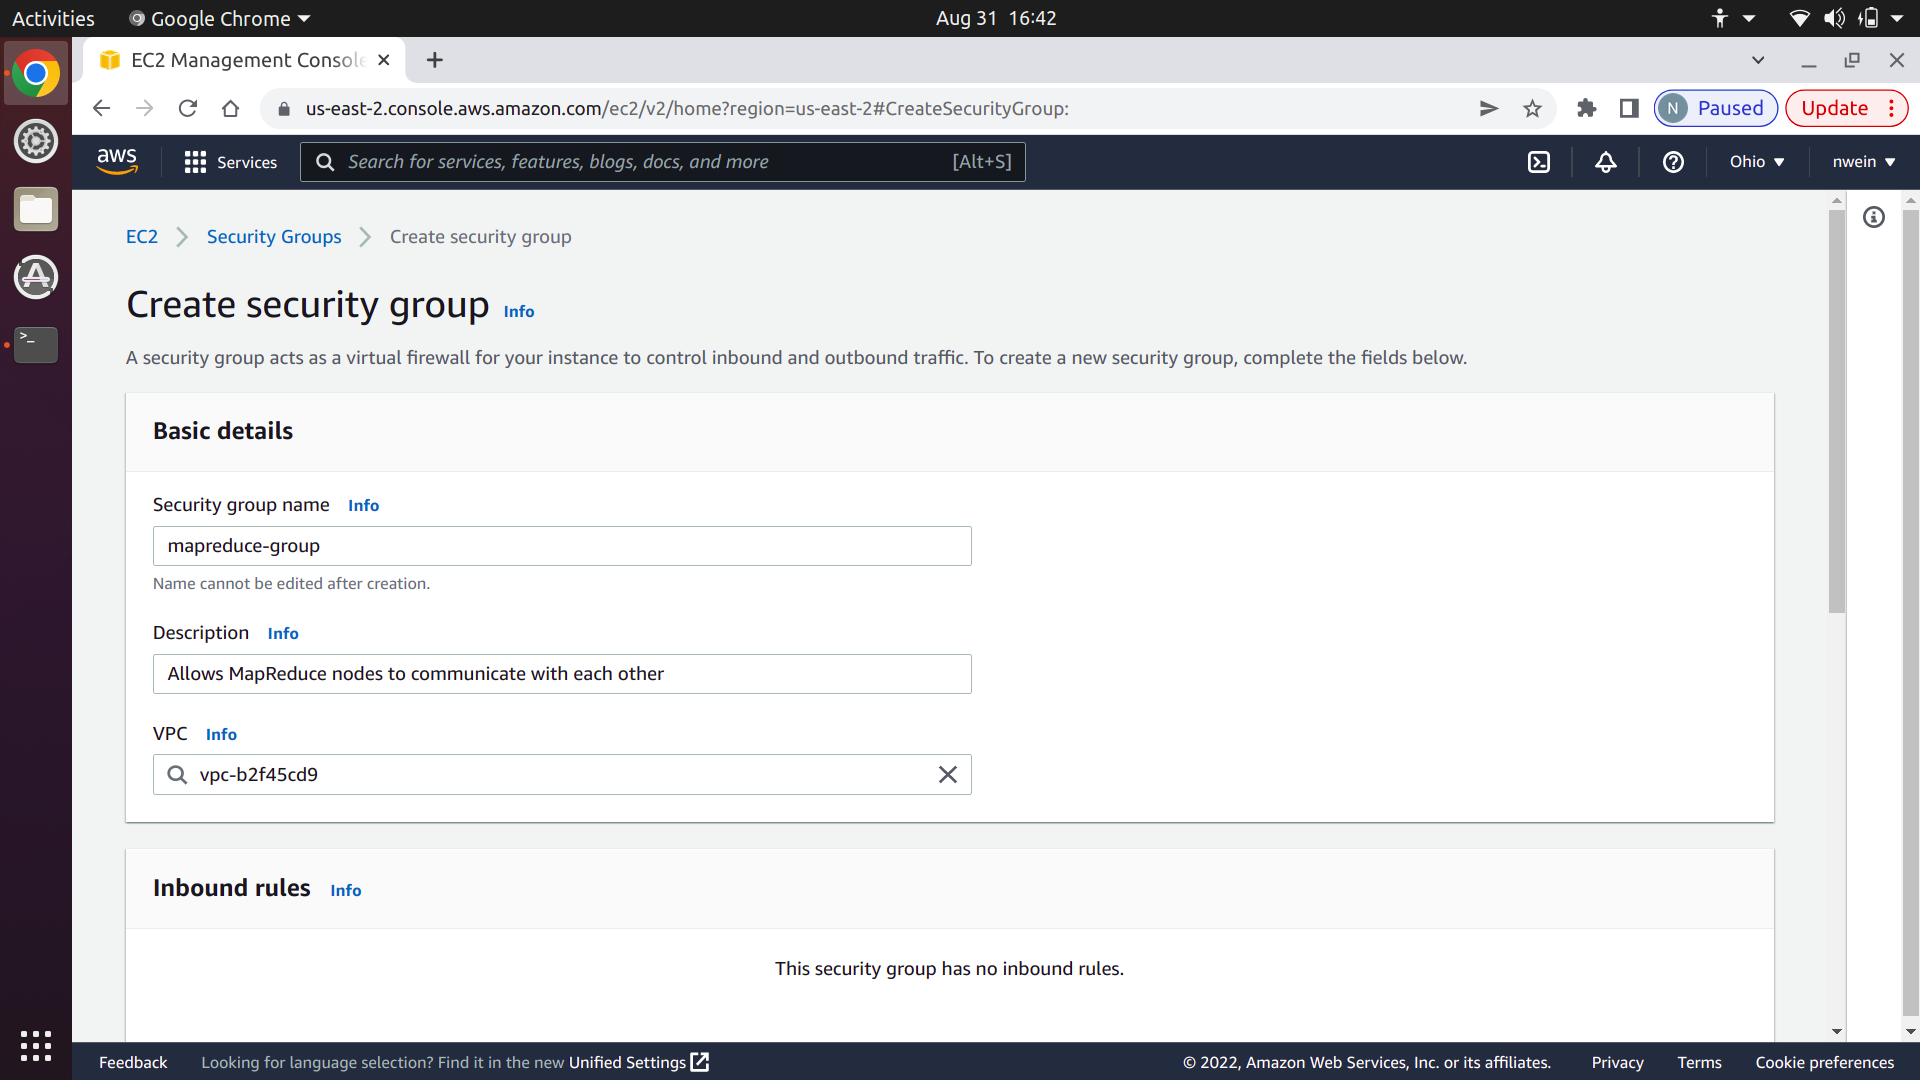
Give it a name and description. You cannot change the name later. Make sure that the VPC specified is the same one that you used for your EFS file system. Both should use the default.
Create an inbound rule for SSH with the source set to “Anywhere-IPv4.” This will allow you to remotely control your EC2 instances with SSH like you did in projects 2 and 3.
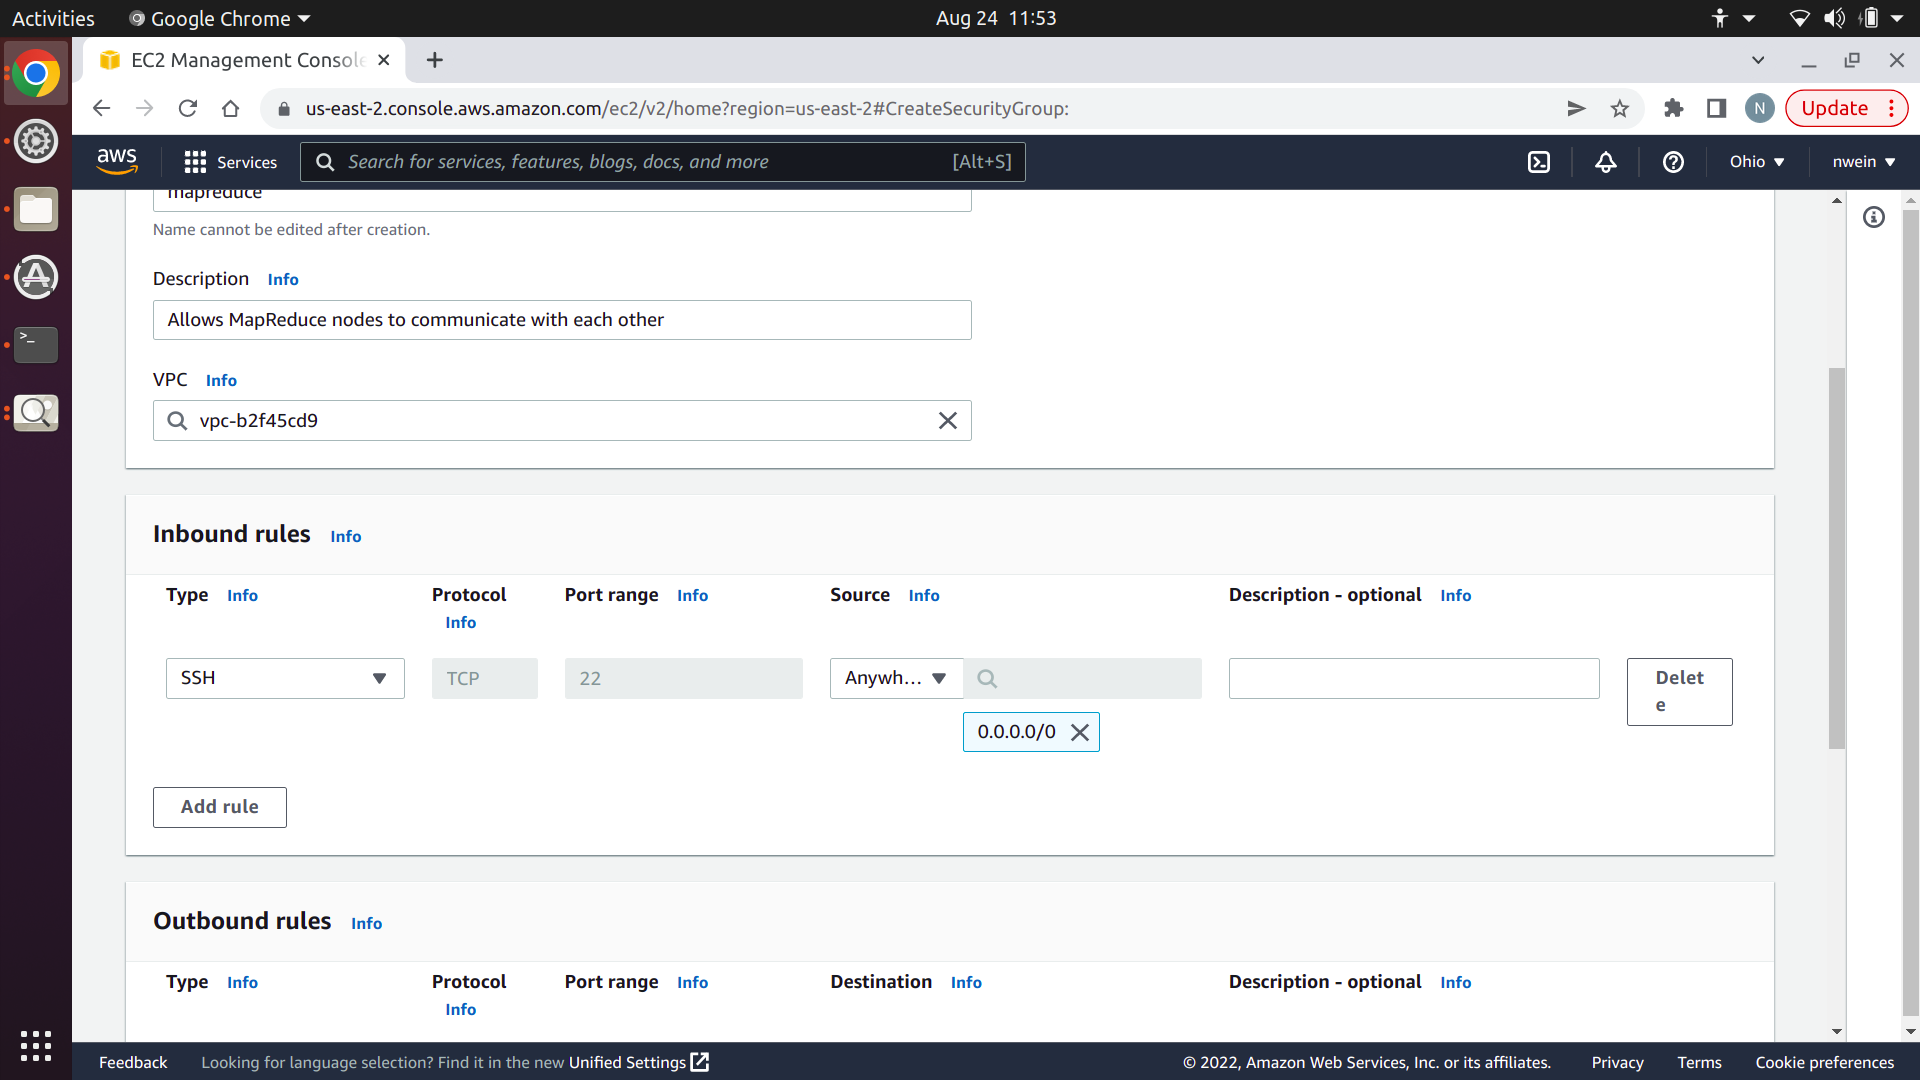
Create an inbound rule for Custom TCP with the port range set to 6000 and the source set to “My IP.” This will allow you to send TCP messages to the Manager on port 6000 from your local machine, while blocking TCP messages from unknown clients.
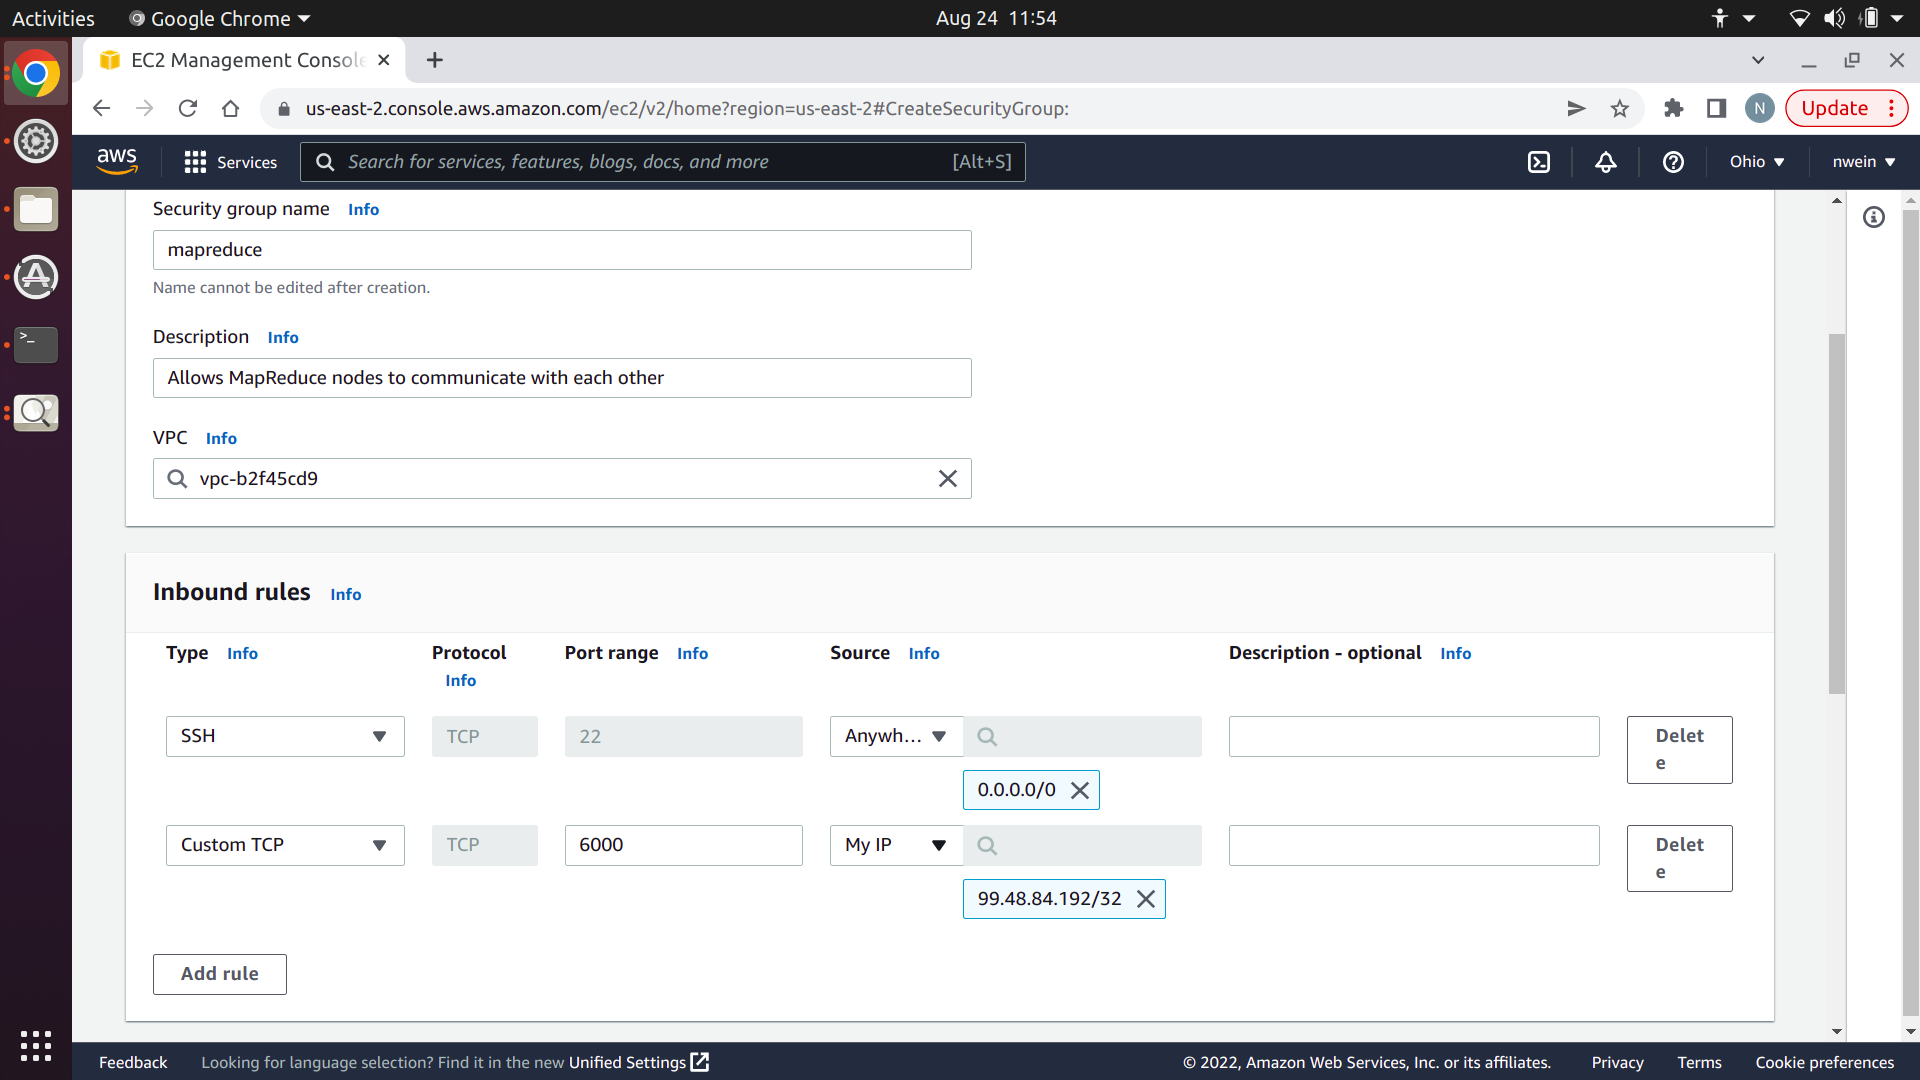
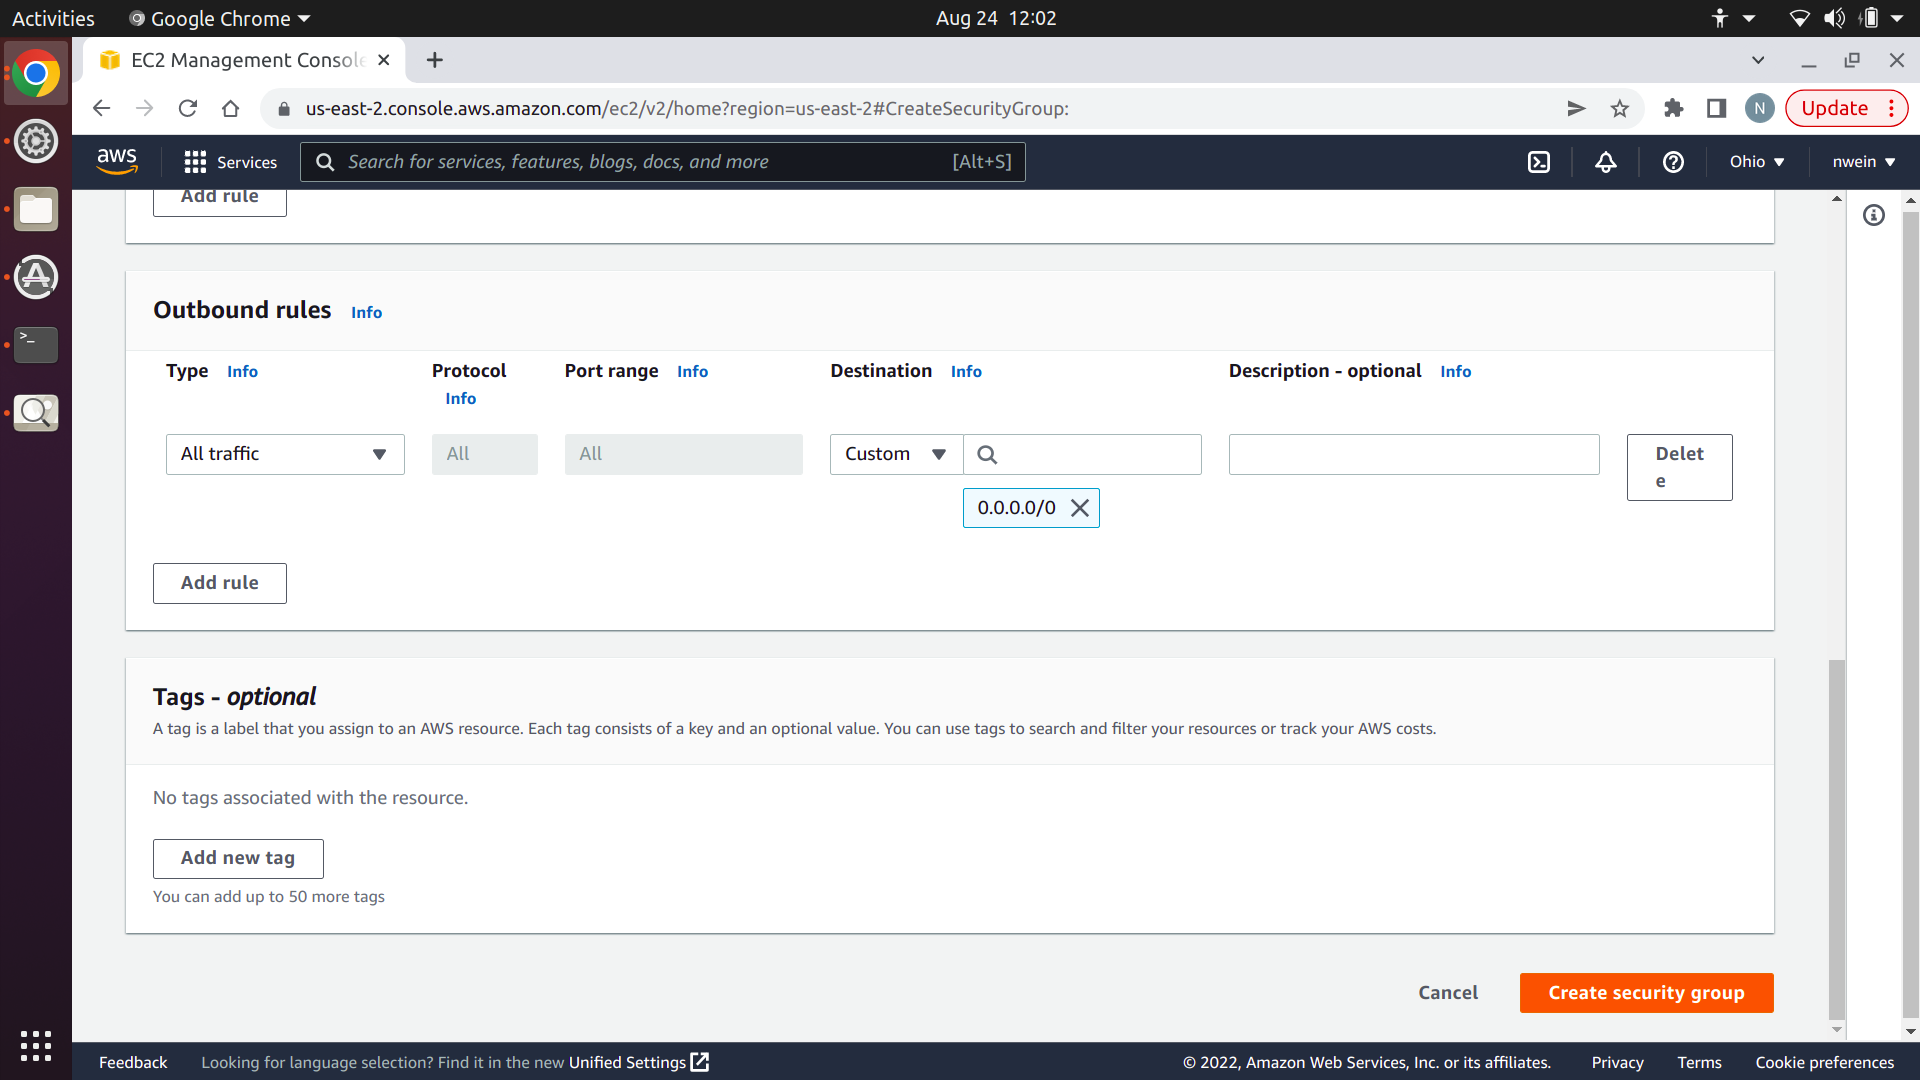
We also need to allow the EC2 instances to communicate with each other over TCP and UDP. However, the security group has to exist already before the AWS console will recognize it, so ignore this and click “Create security group.”
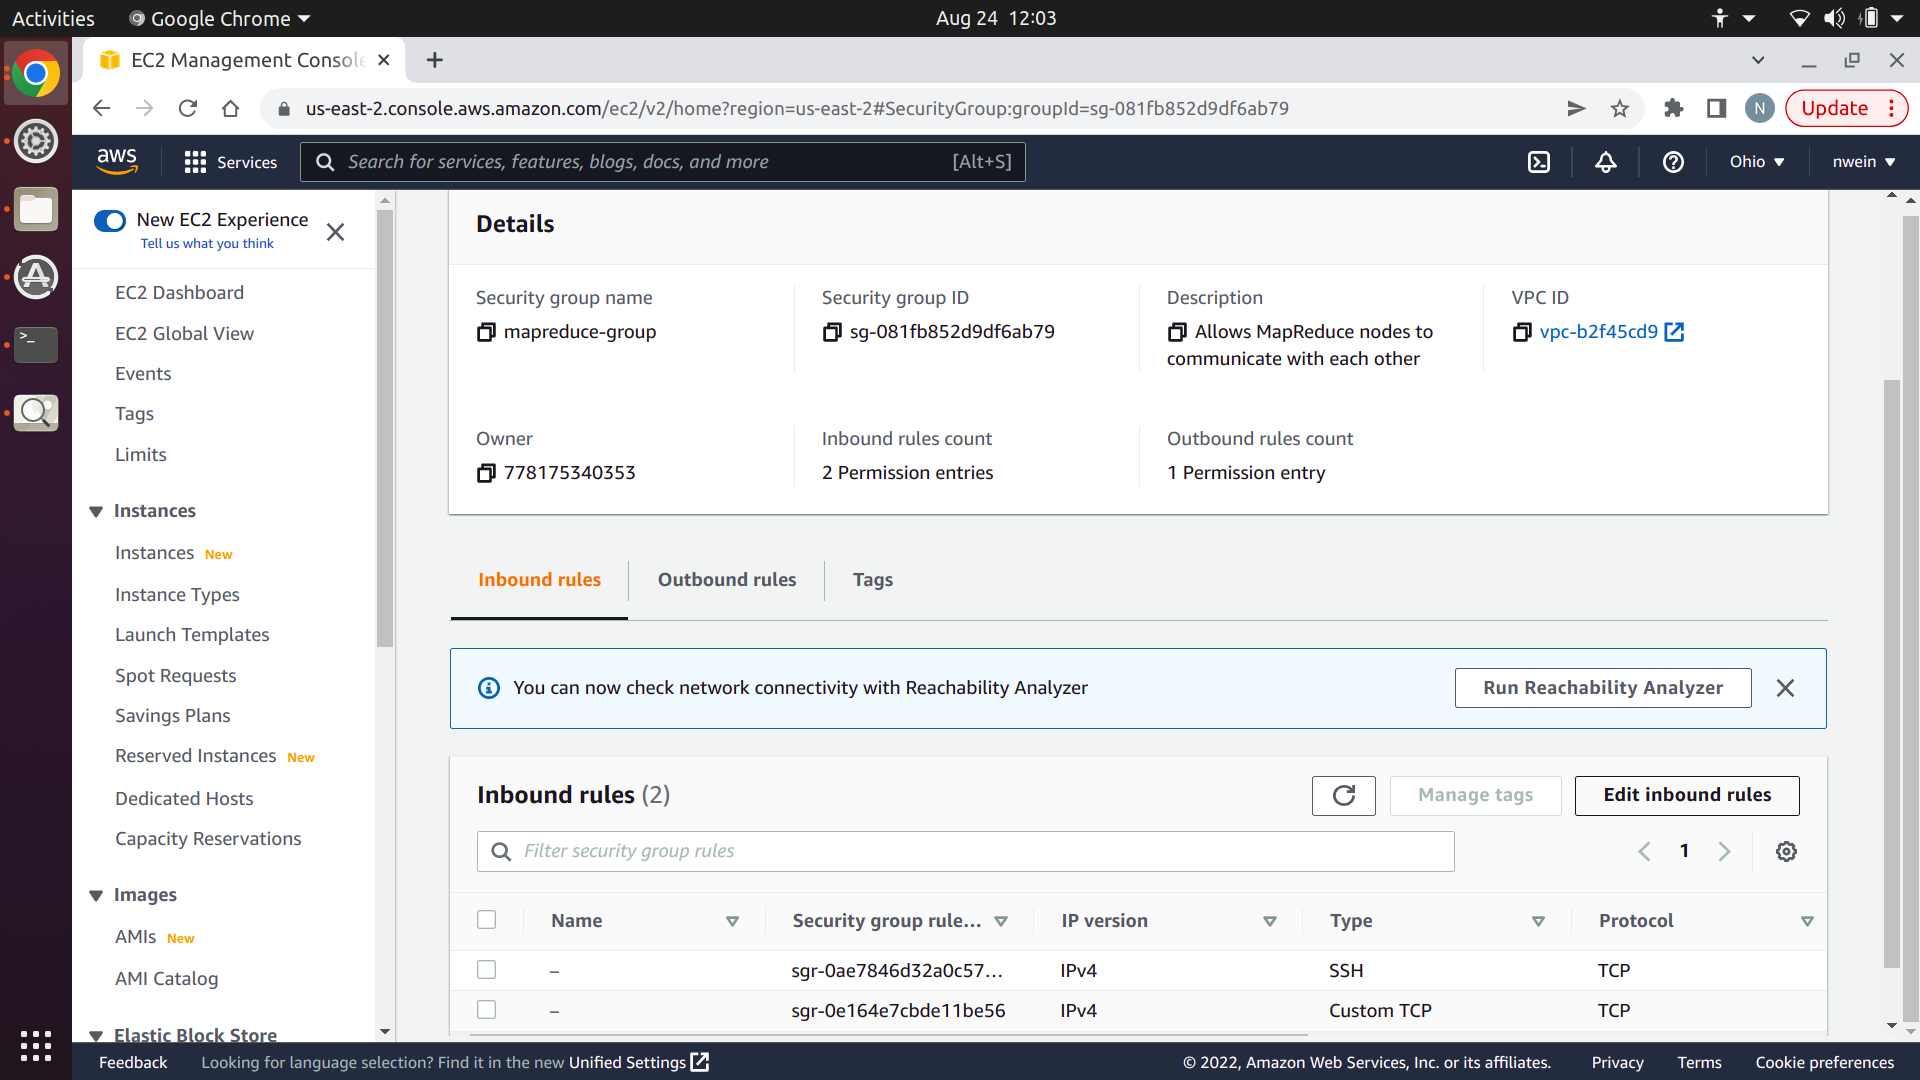
Now click “Edit inbound rules.”
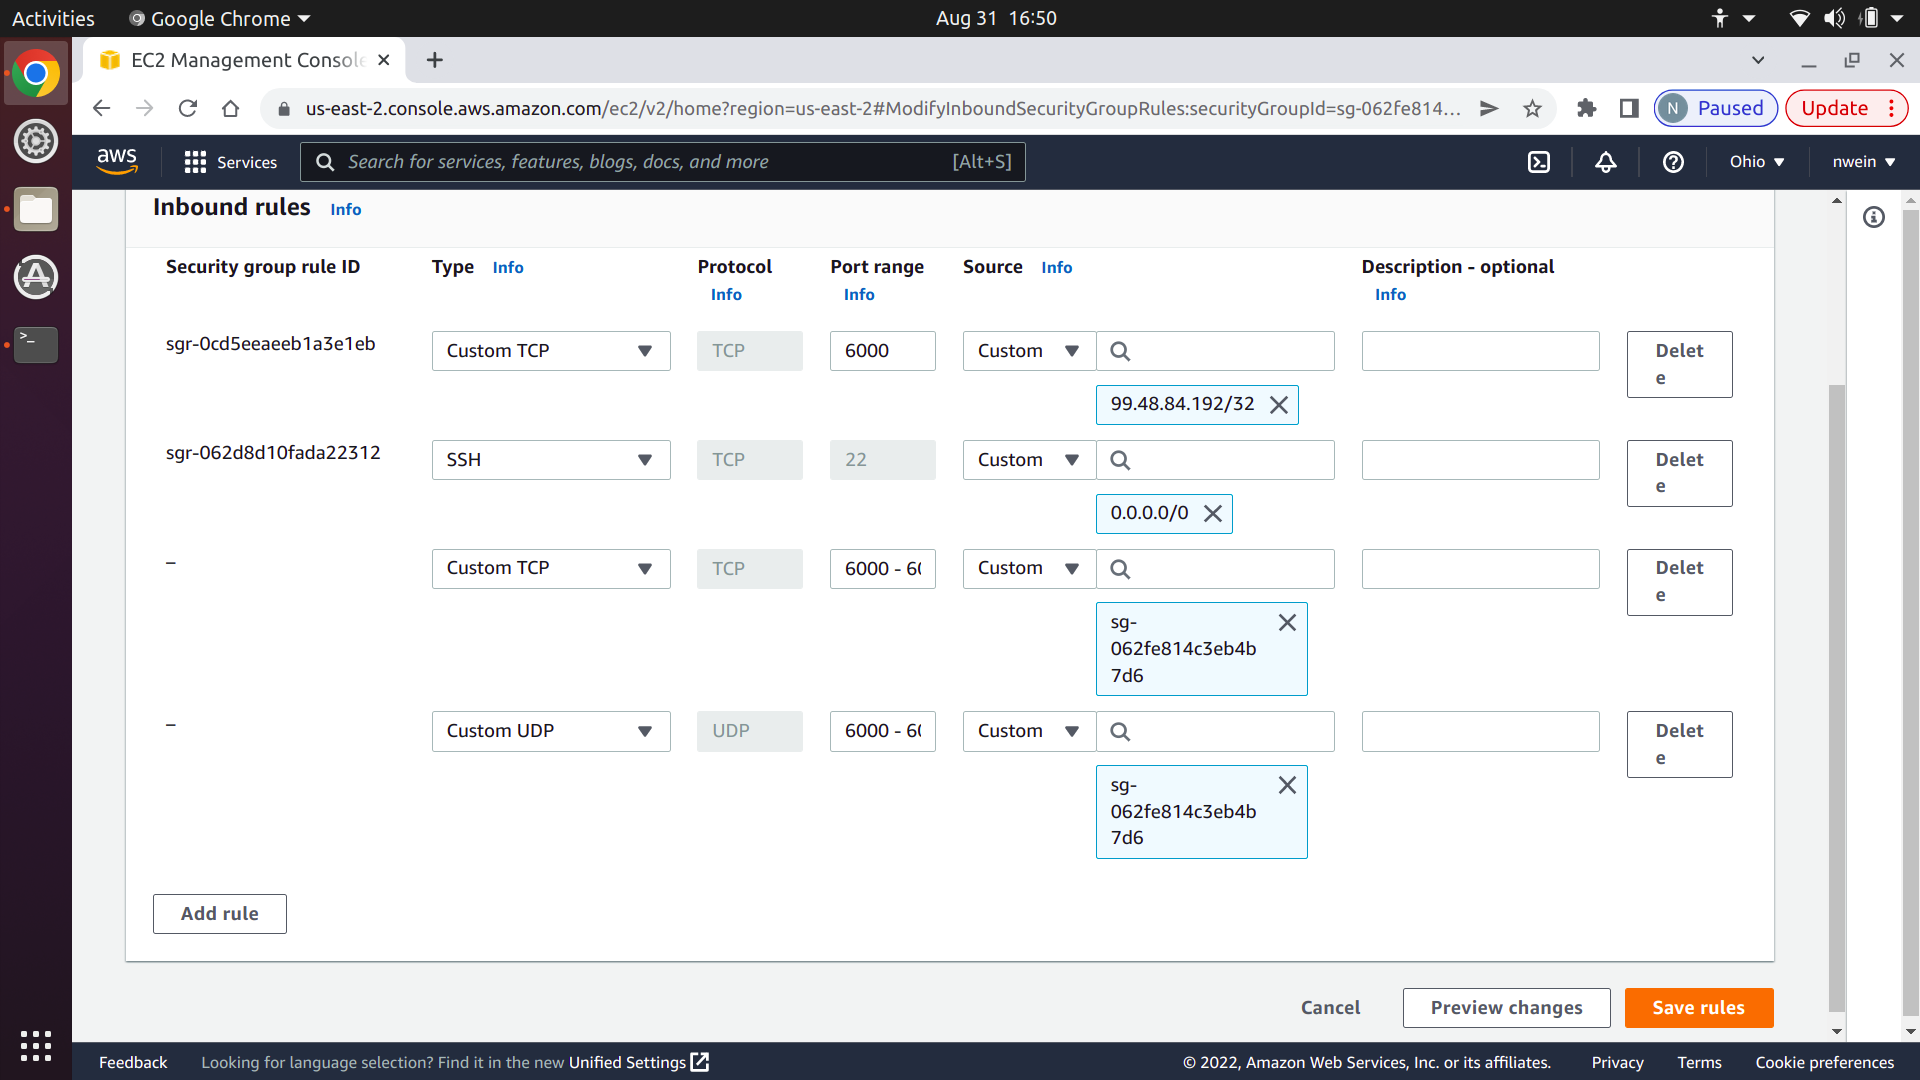
Add a new rule for Custom TCP with the port range set to 6000-6001. Set the source to “Custom,” and in the text box to the right, start typing in the name of your security group. Select it when it appears.

Do the exact same thing for “Custom UDP” and click “Save rules.”
Launch EC2 instances
Now we’ll launch EC2 instances for running a Manager and Workers. As you’ll recall from projects 2/3, an EC2 instance is a rented virtual machine running in an AWS data center.
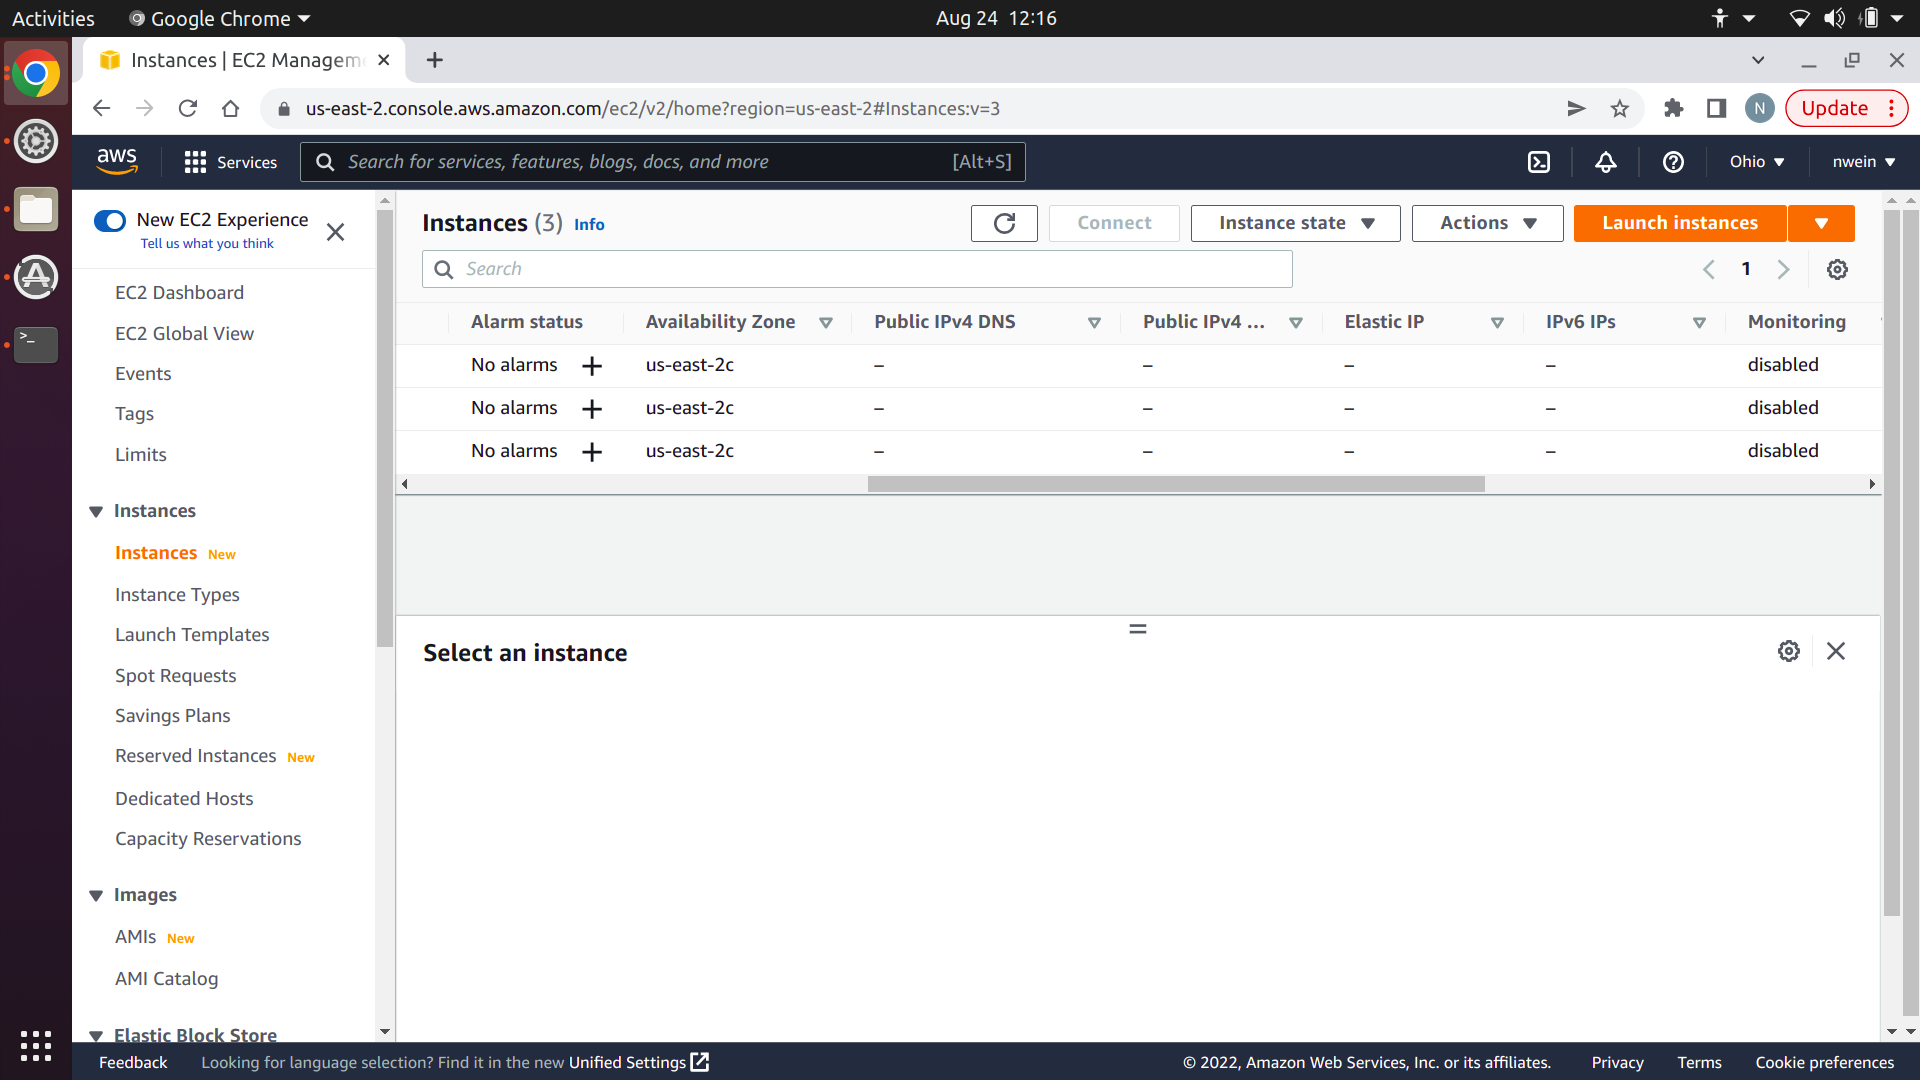
In the sidebar of the EC2 console, click “Instances” and then “Launch instances.”
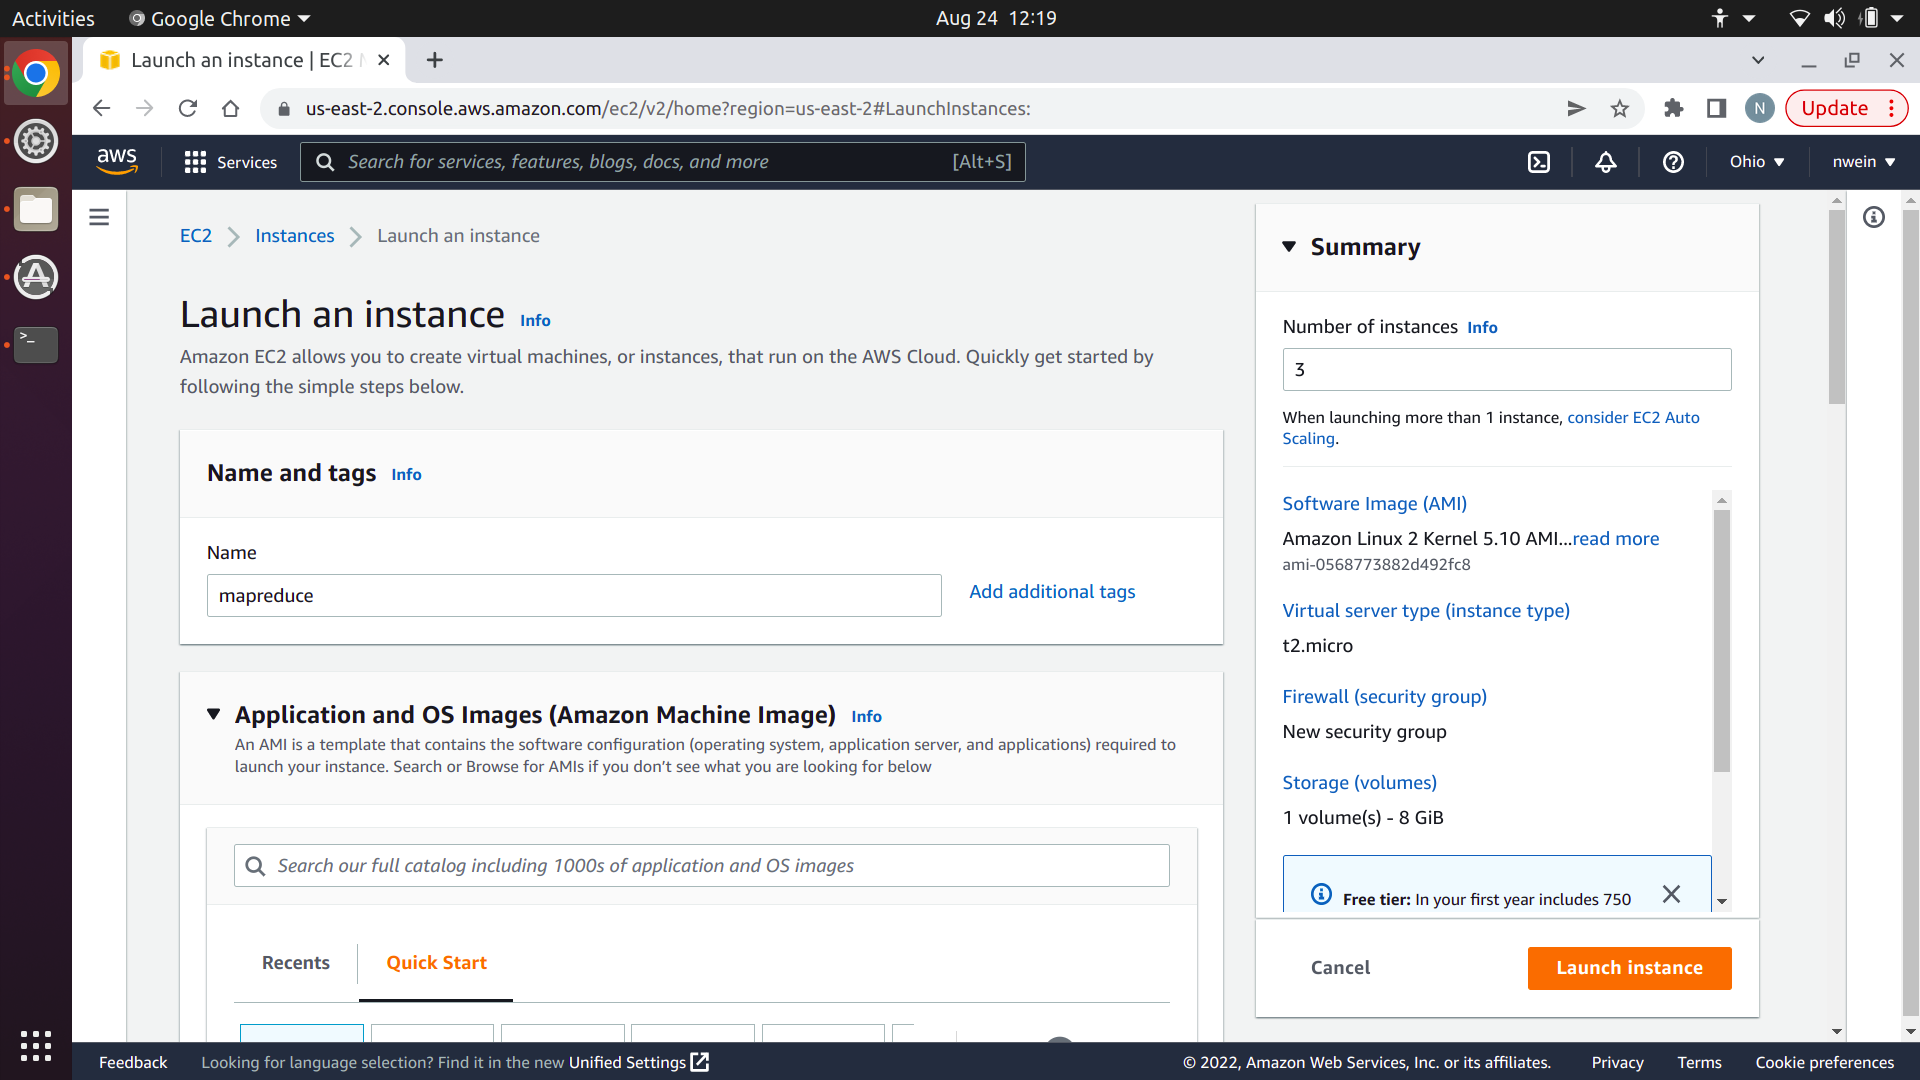
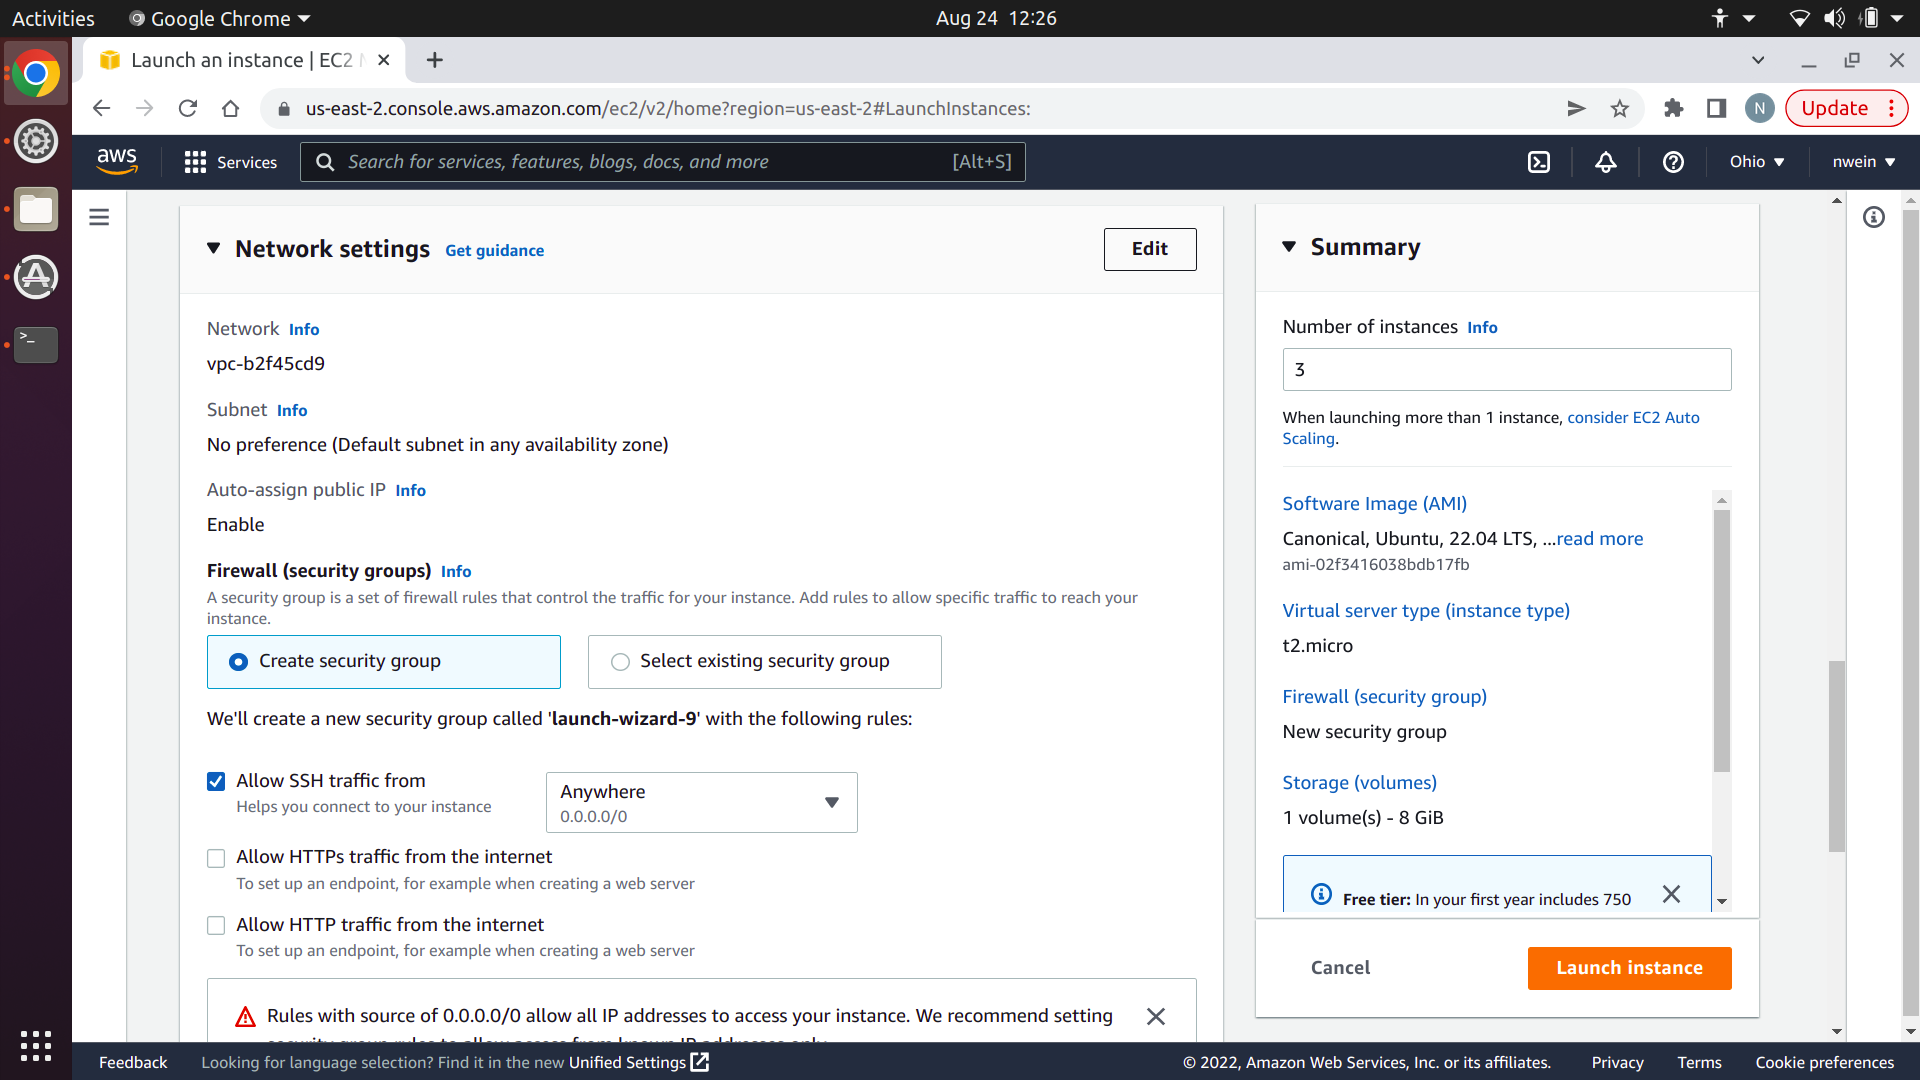
Enter a name, and set the number of instances to 3. This is for convenience: we need three EC2 instances with the exact same settings, so we’ll create them all at once and change the names afterward to distinguish them.
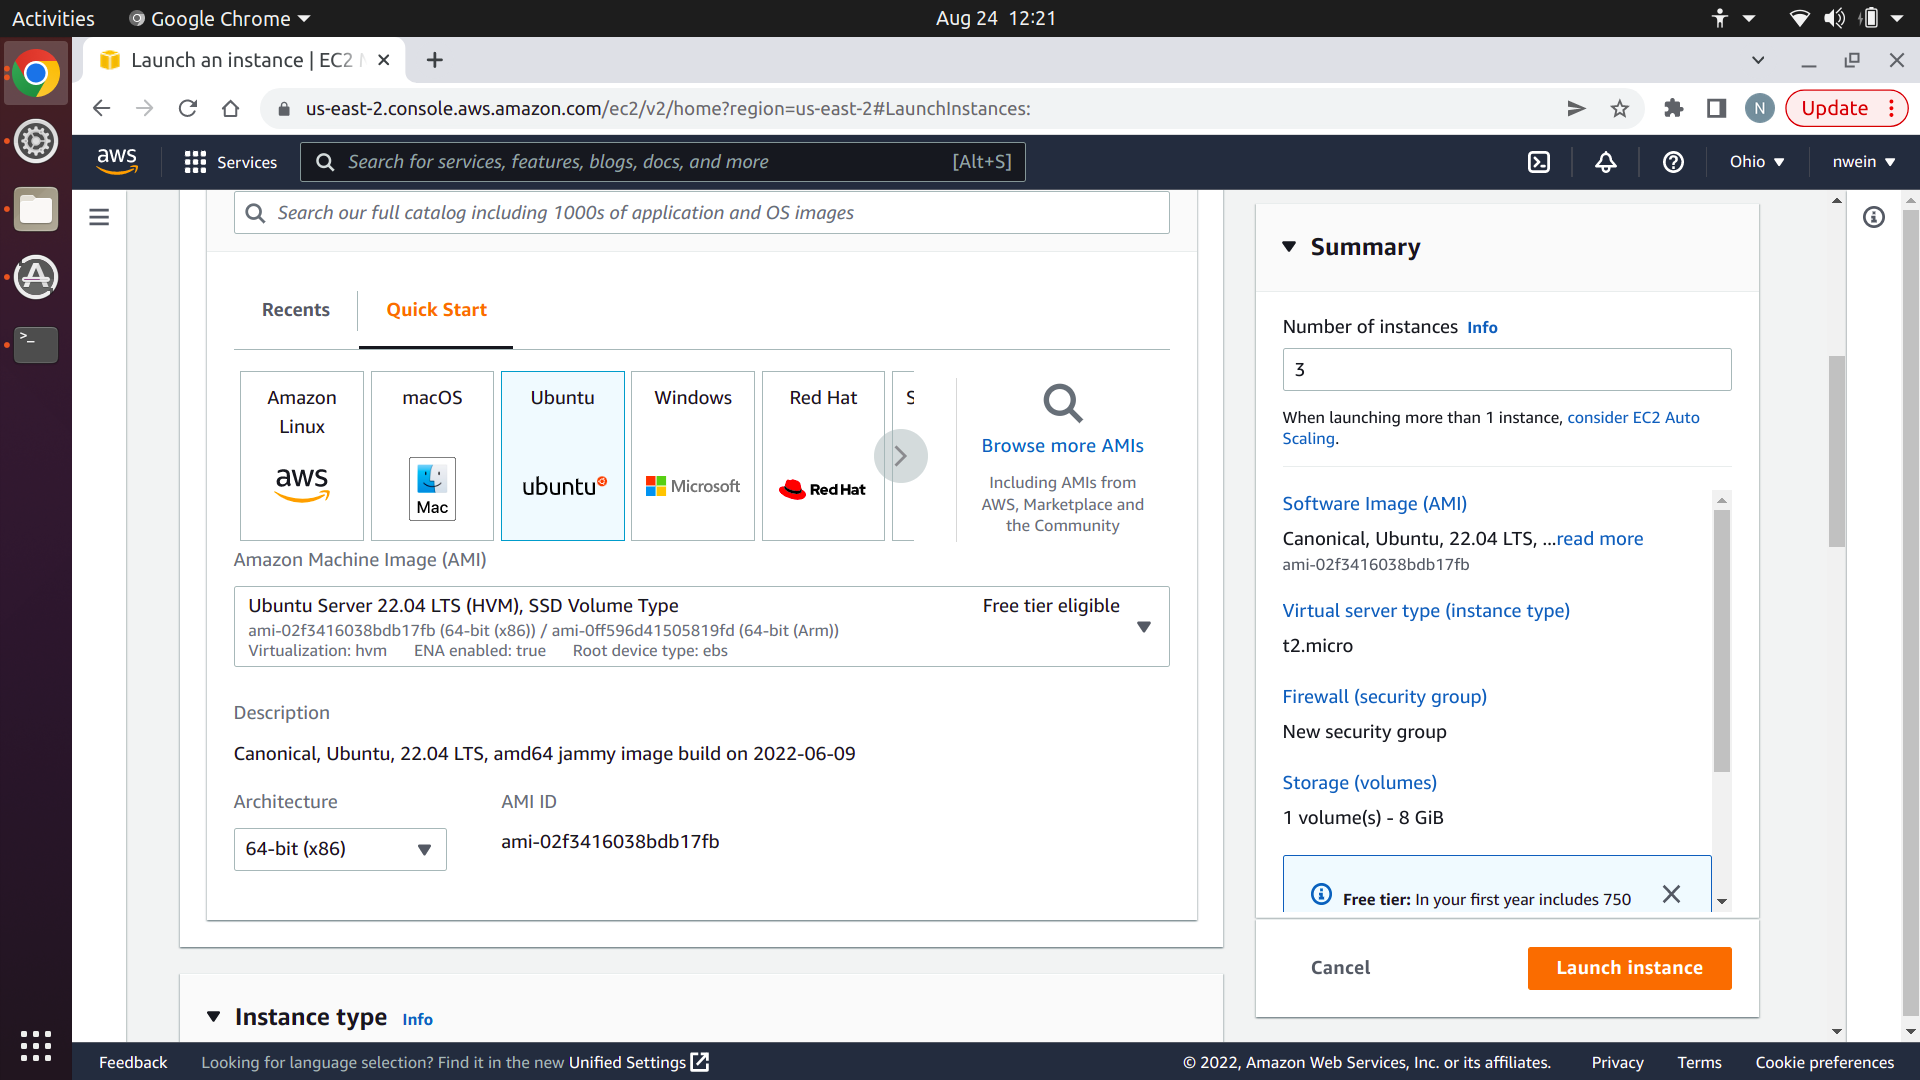
Set the OS image to the same Ubuntu server version as specified in the P1 tutorial. Your version might be different from this screenshot.
Set the instance type to t2.micro. If you still have your key pair from deploying in projects 2 and 3, you can use it again, or you can create a new one. See the project 2 AWS tutorial for a refresher on this.
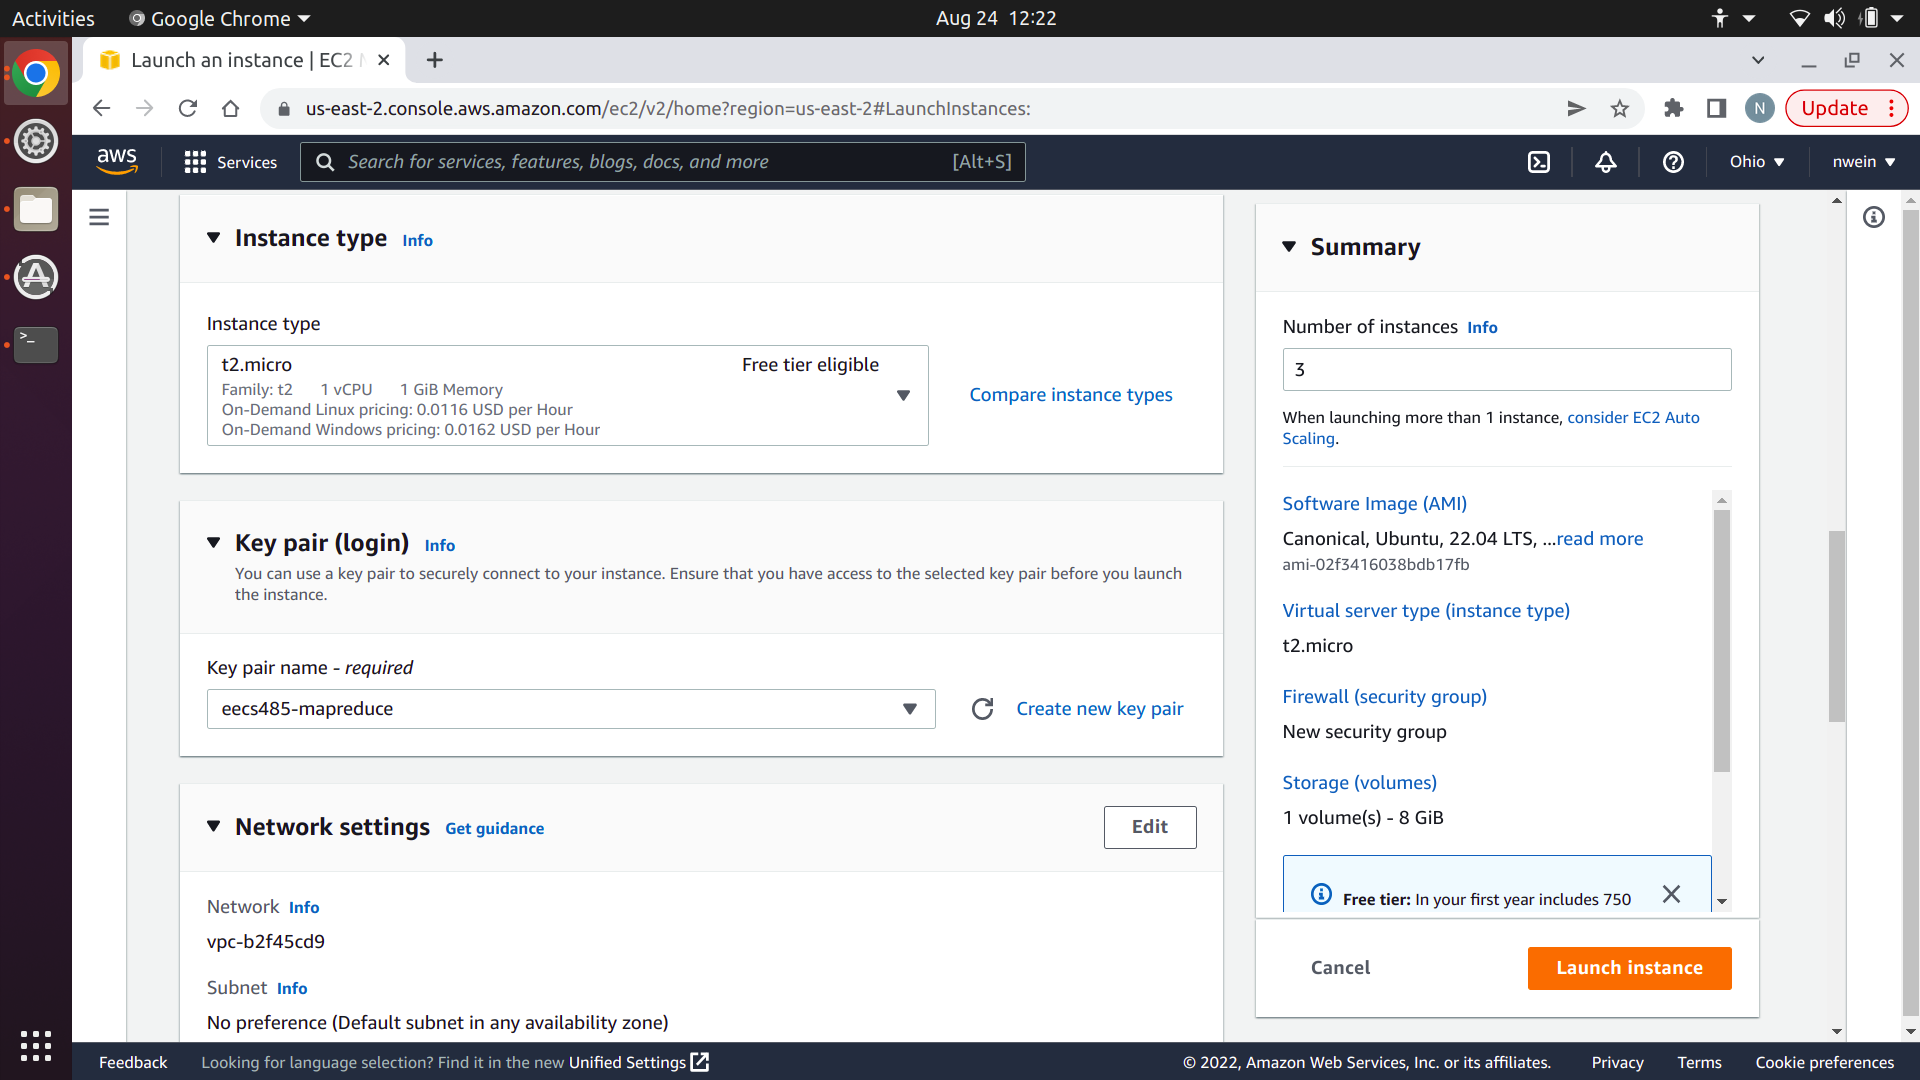
Under “Network Settings,” click “Edit” in the top-right corner.
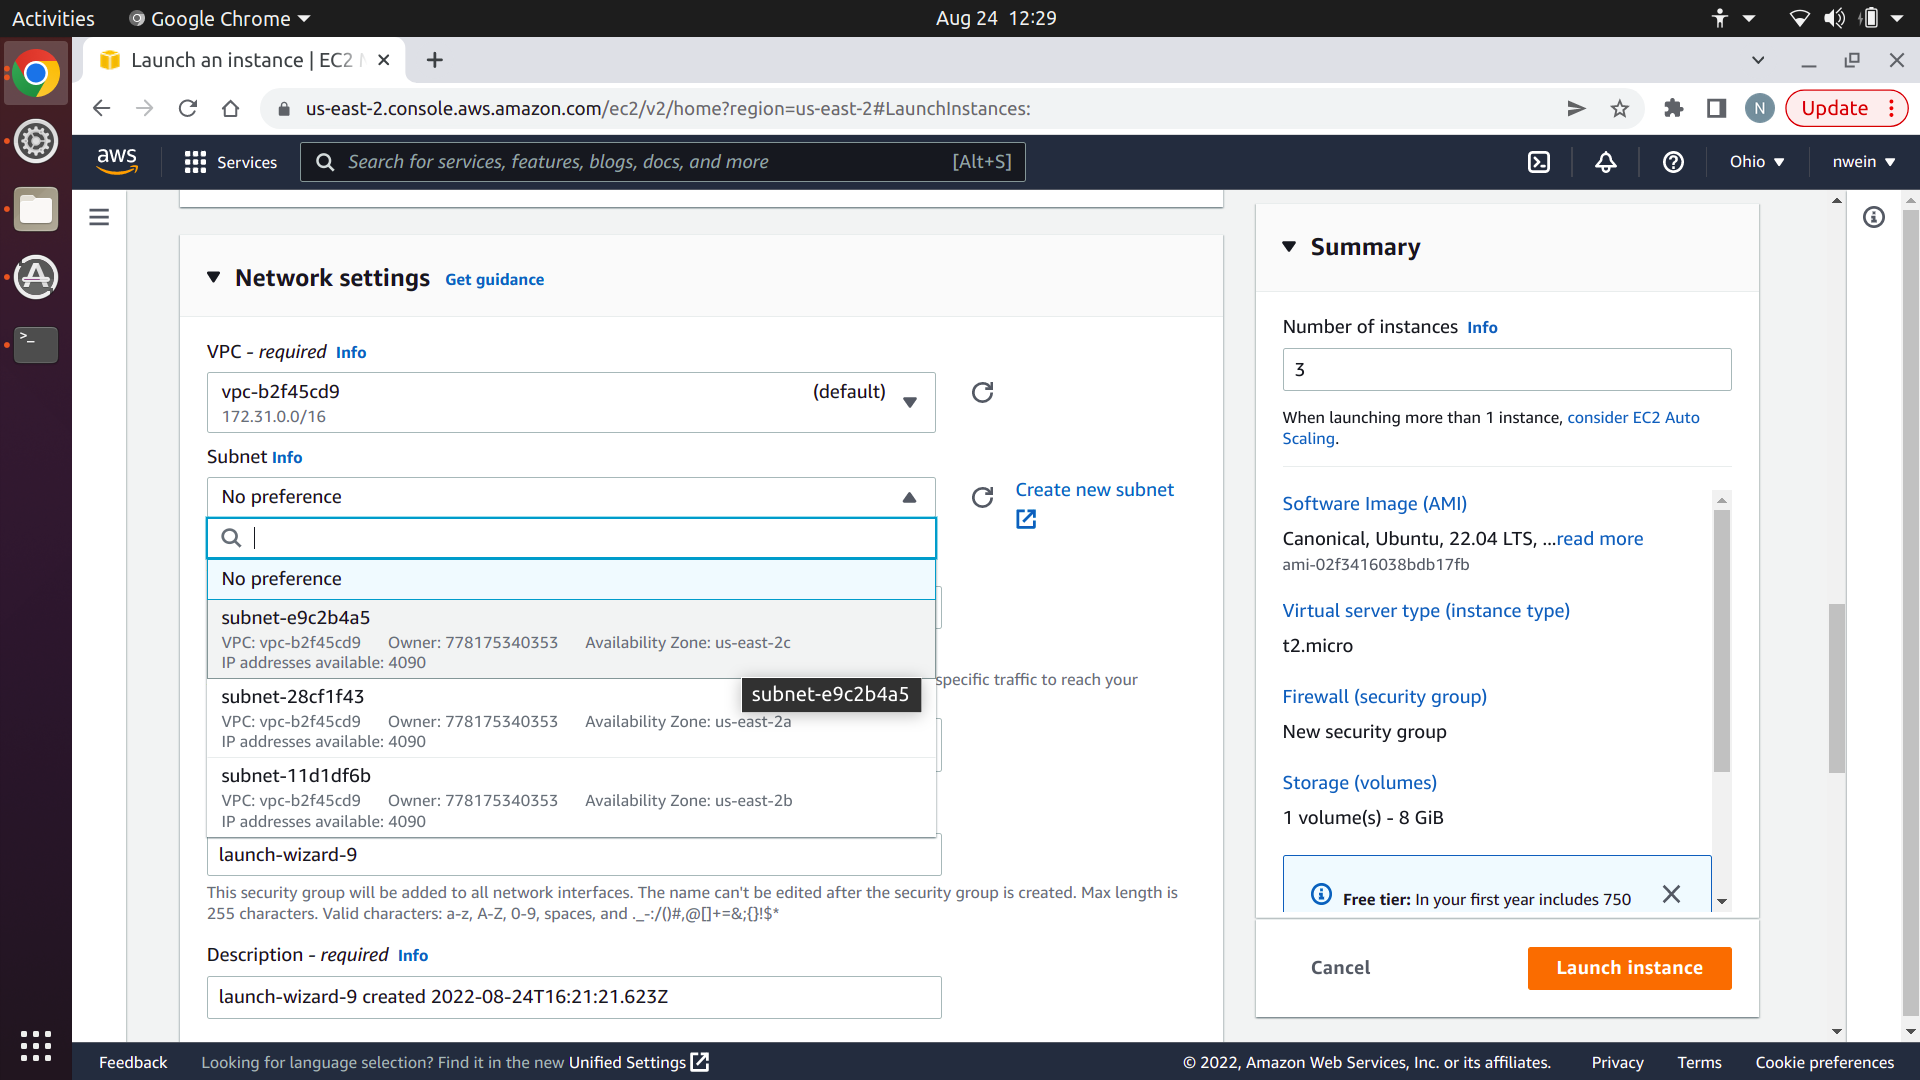
Make sure that the VPC is set to the same one that you used for your EFS file system and your security group. It should be the default. Set the subnet to one of the default options that appears in the drop-down. It doesn’t matter for our purposes which one you choose: you just need to choose one instead of selecting “No preference.”
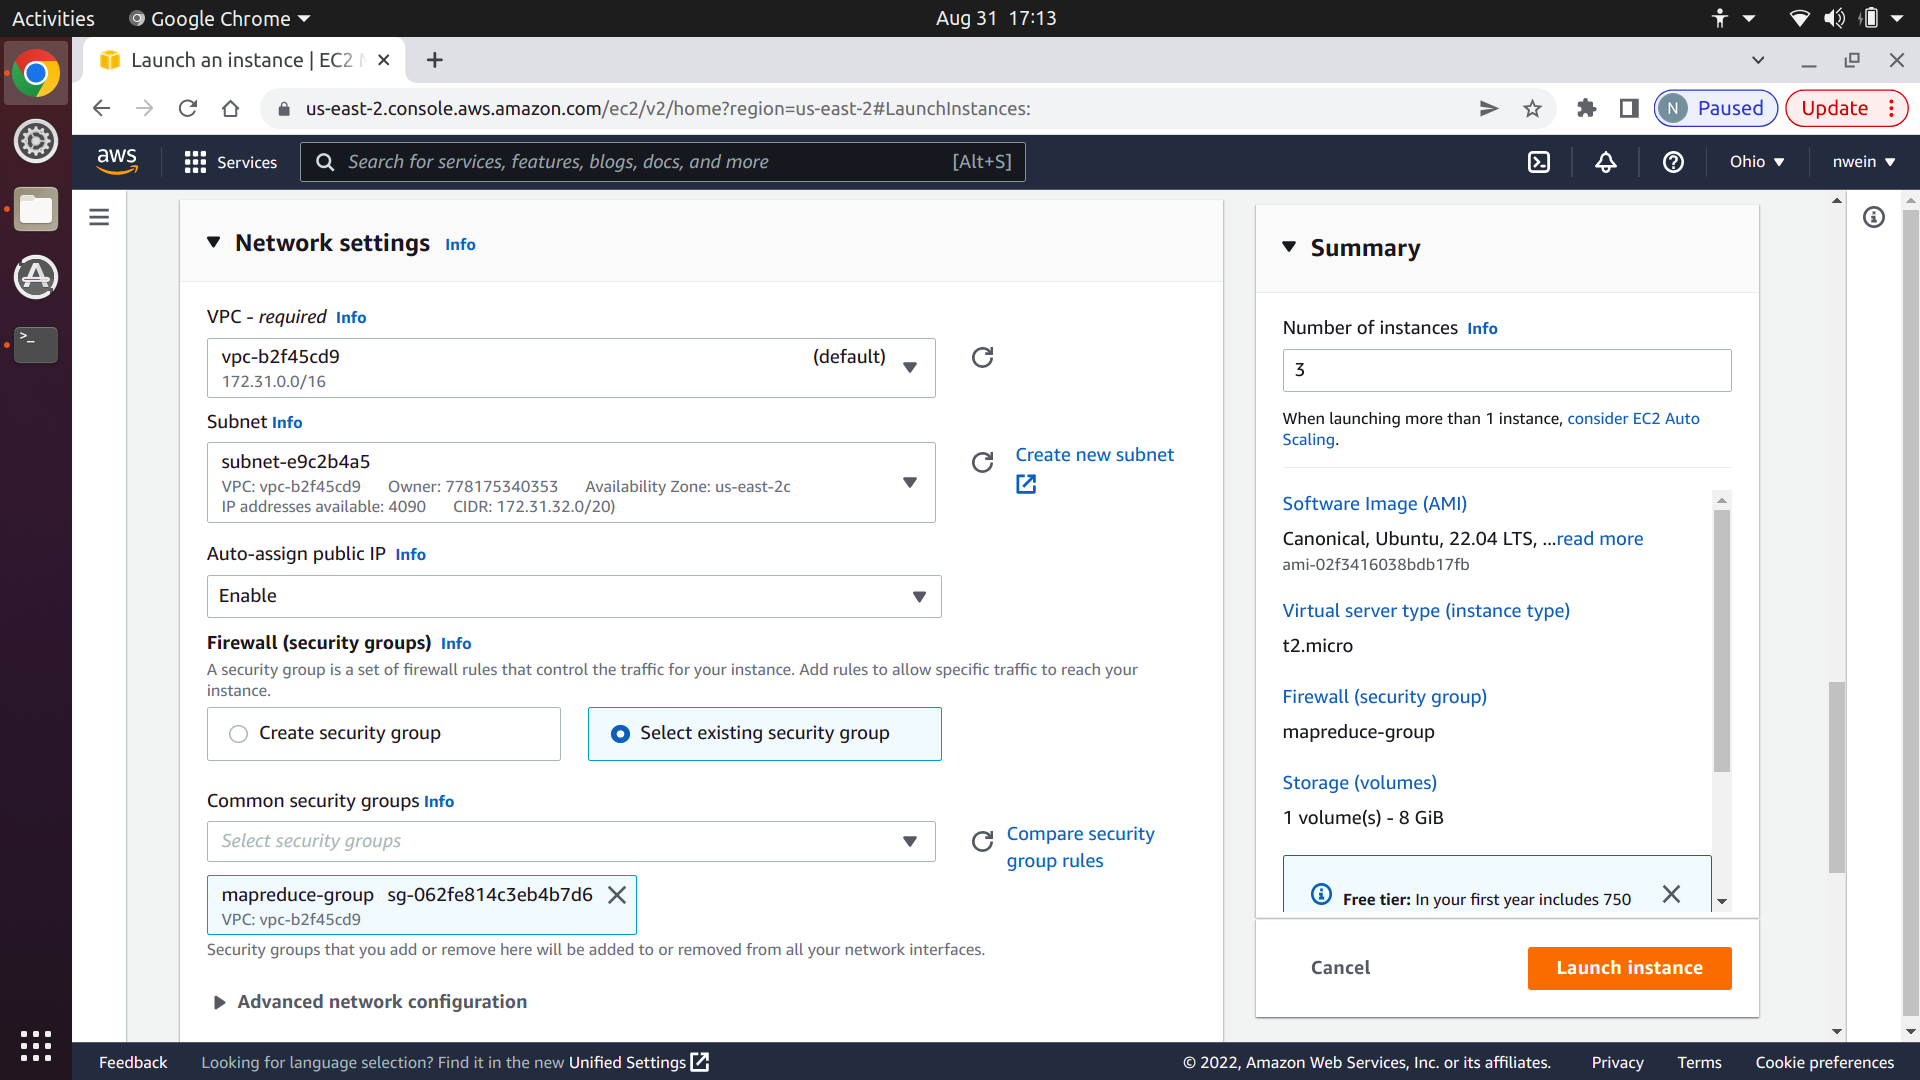
Click “Select existing security group,” and under “Common security groups,” choose the one you created earlier.
Lastly, at the bottom of “Configure storage,” click “Edit” next to “0 x File systems.”
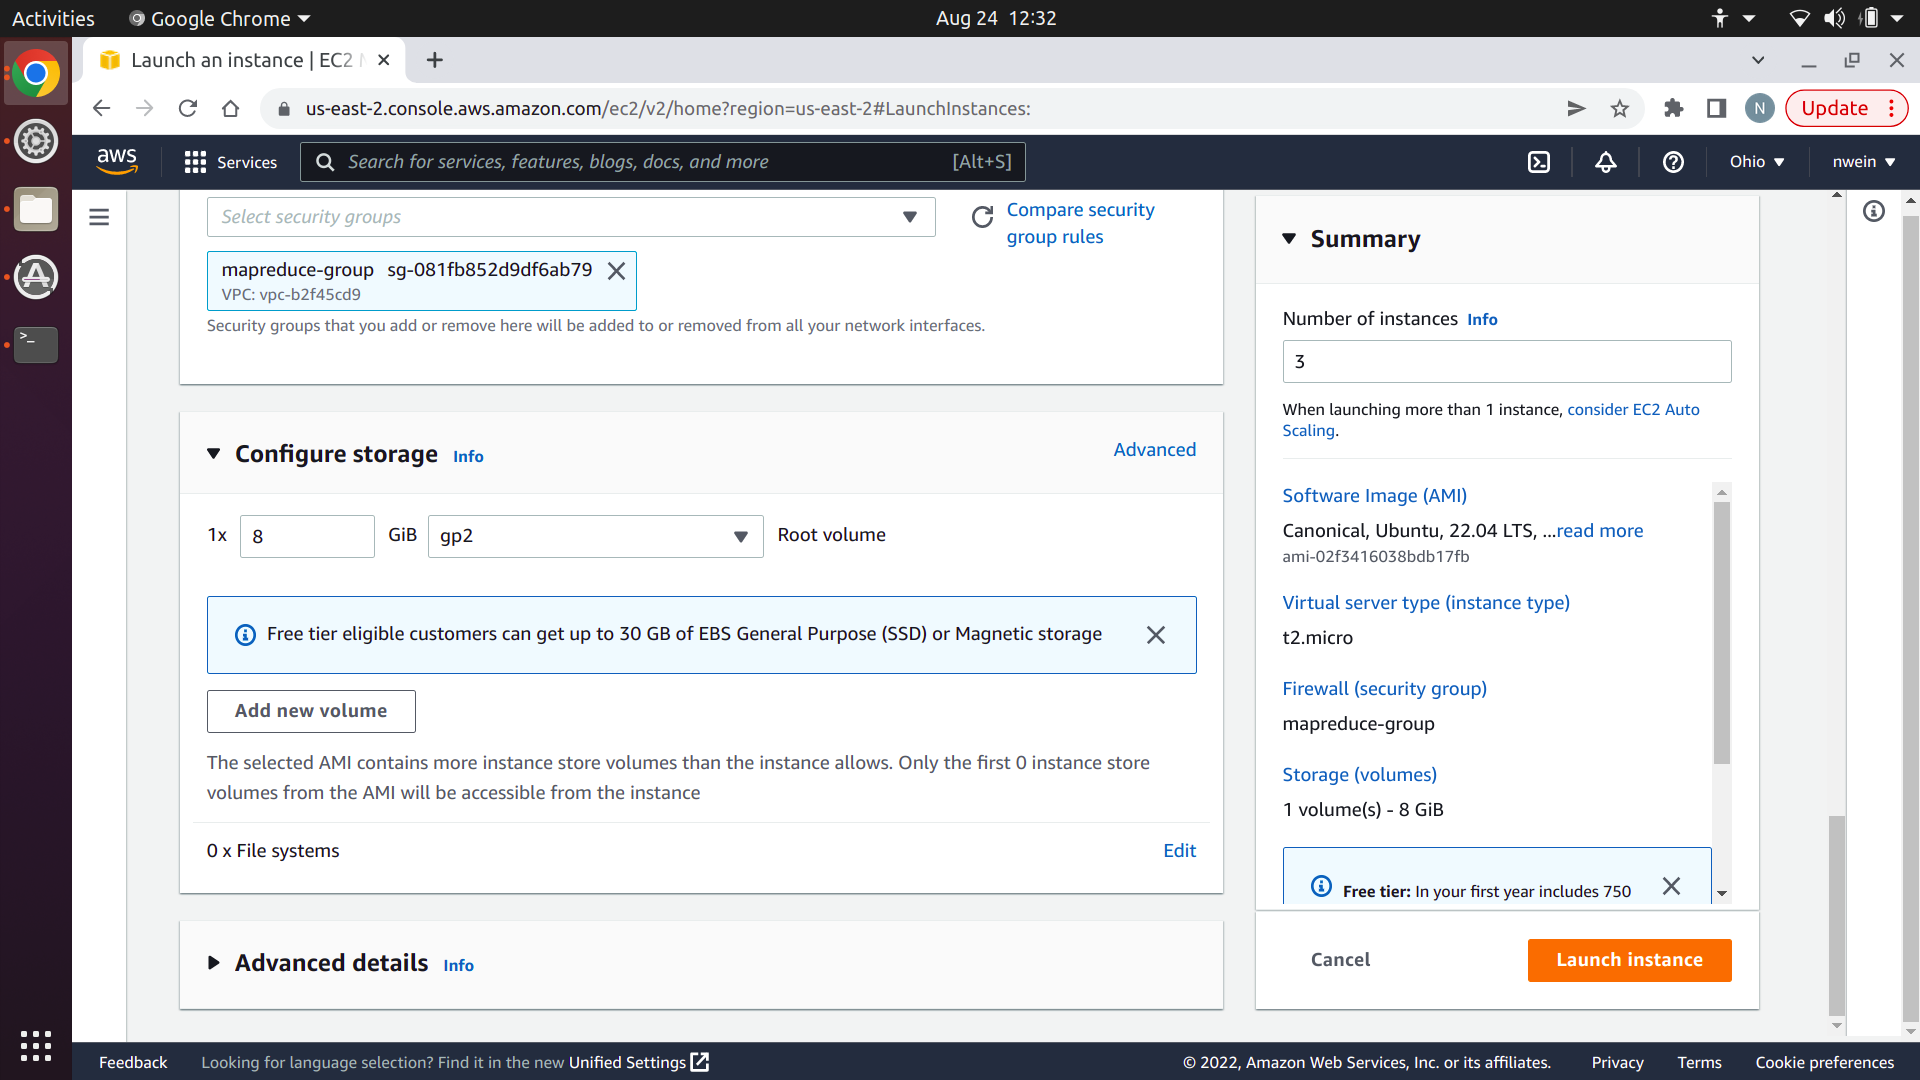
Select “EFS” and click “Add shared file system.”
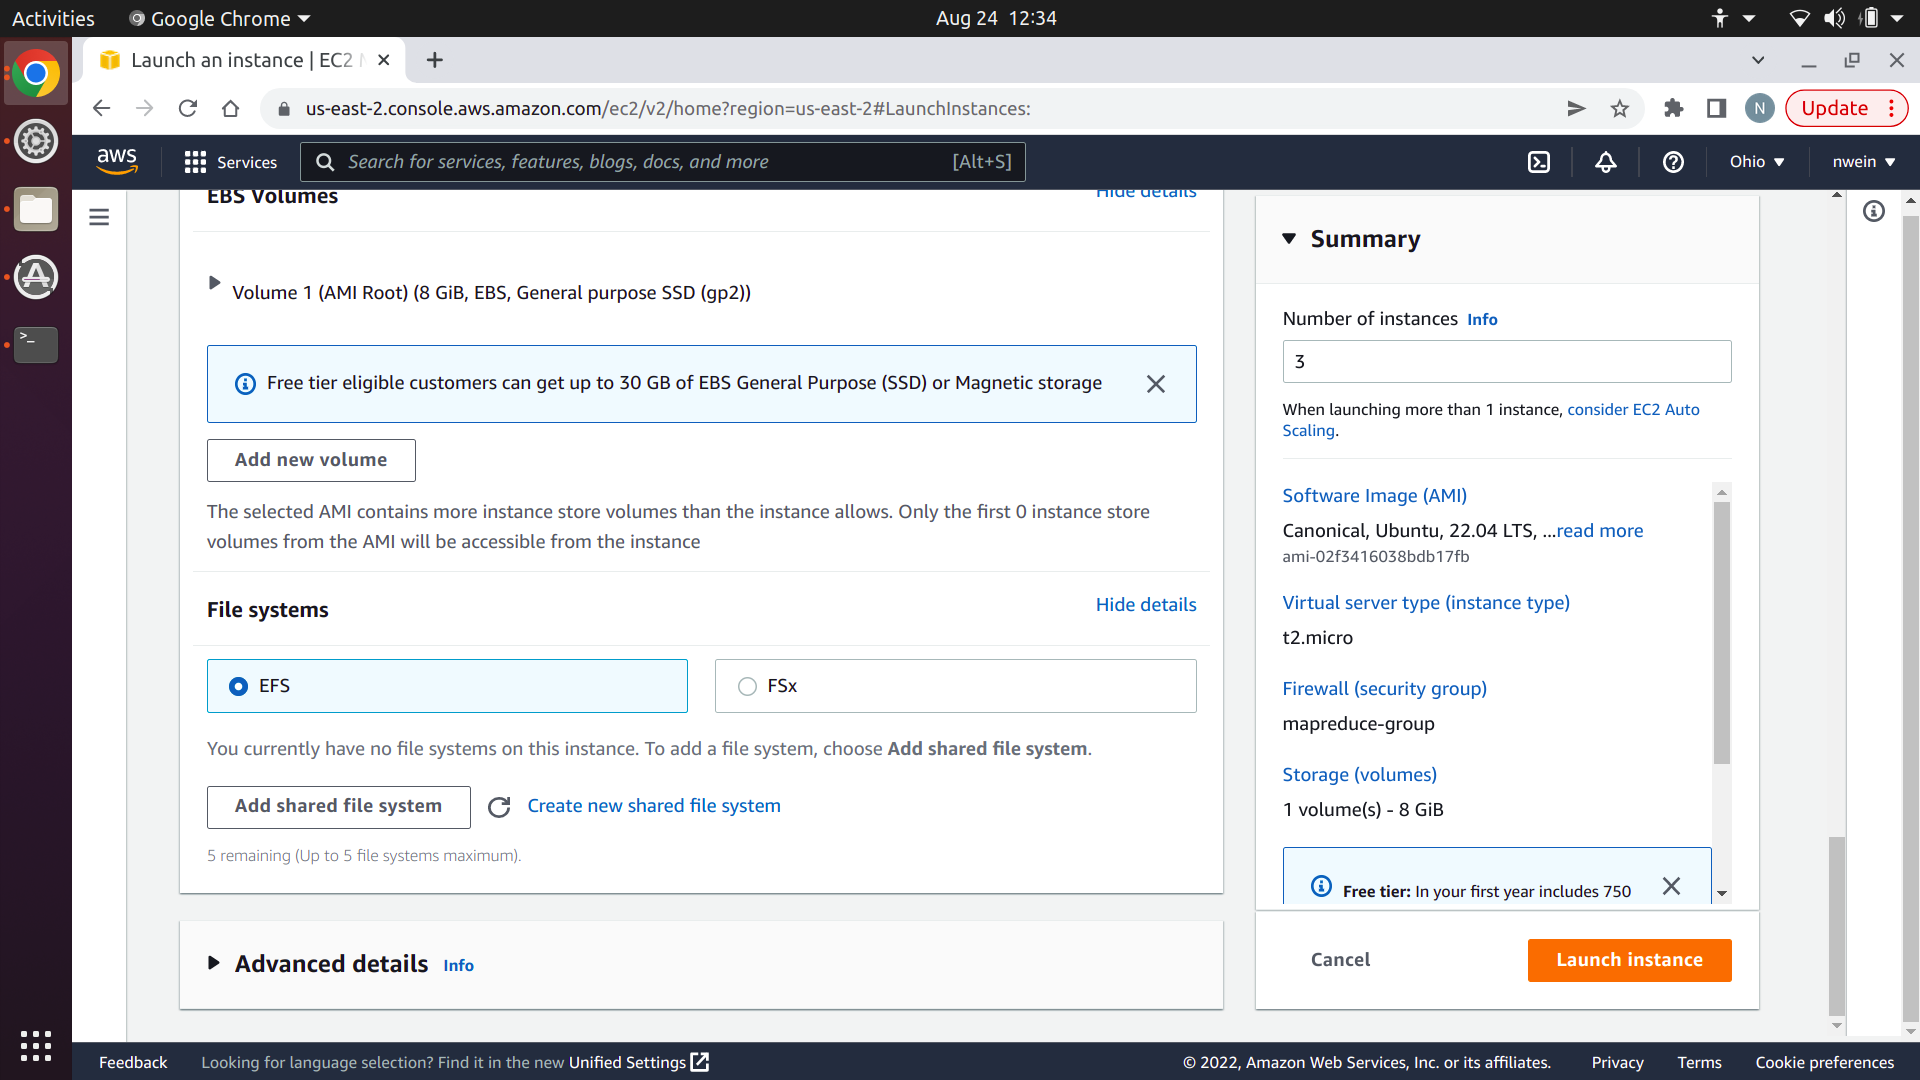
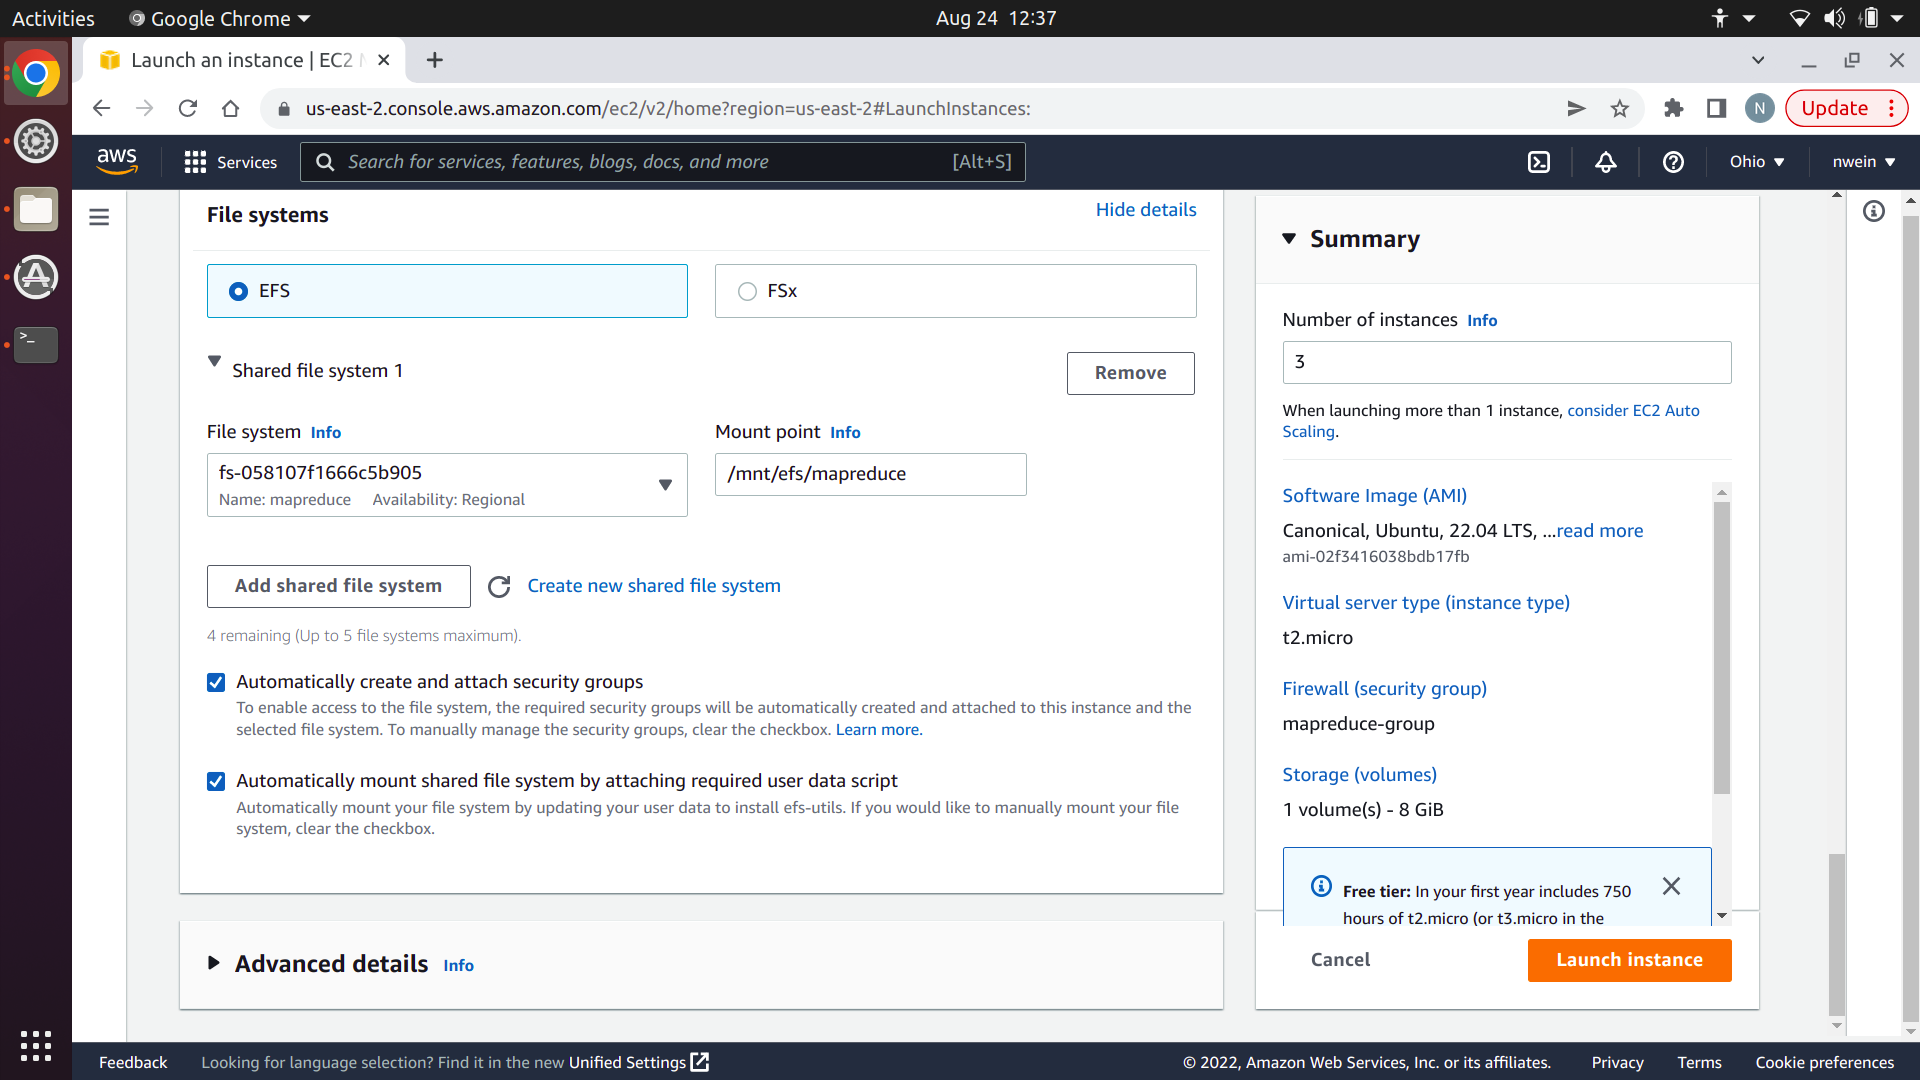
Select the file system you created at the beginning of this tutorial. Set the mount point to /mnt/efs/mapreduce. This is the directory on the EC2 instances where you’ll access the shared file system. Keep both checkboxes checked, and click “Launch instance.”
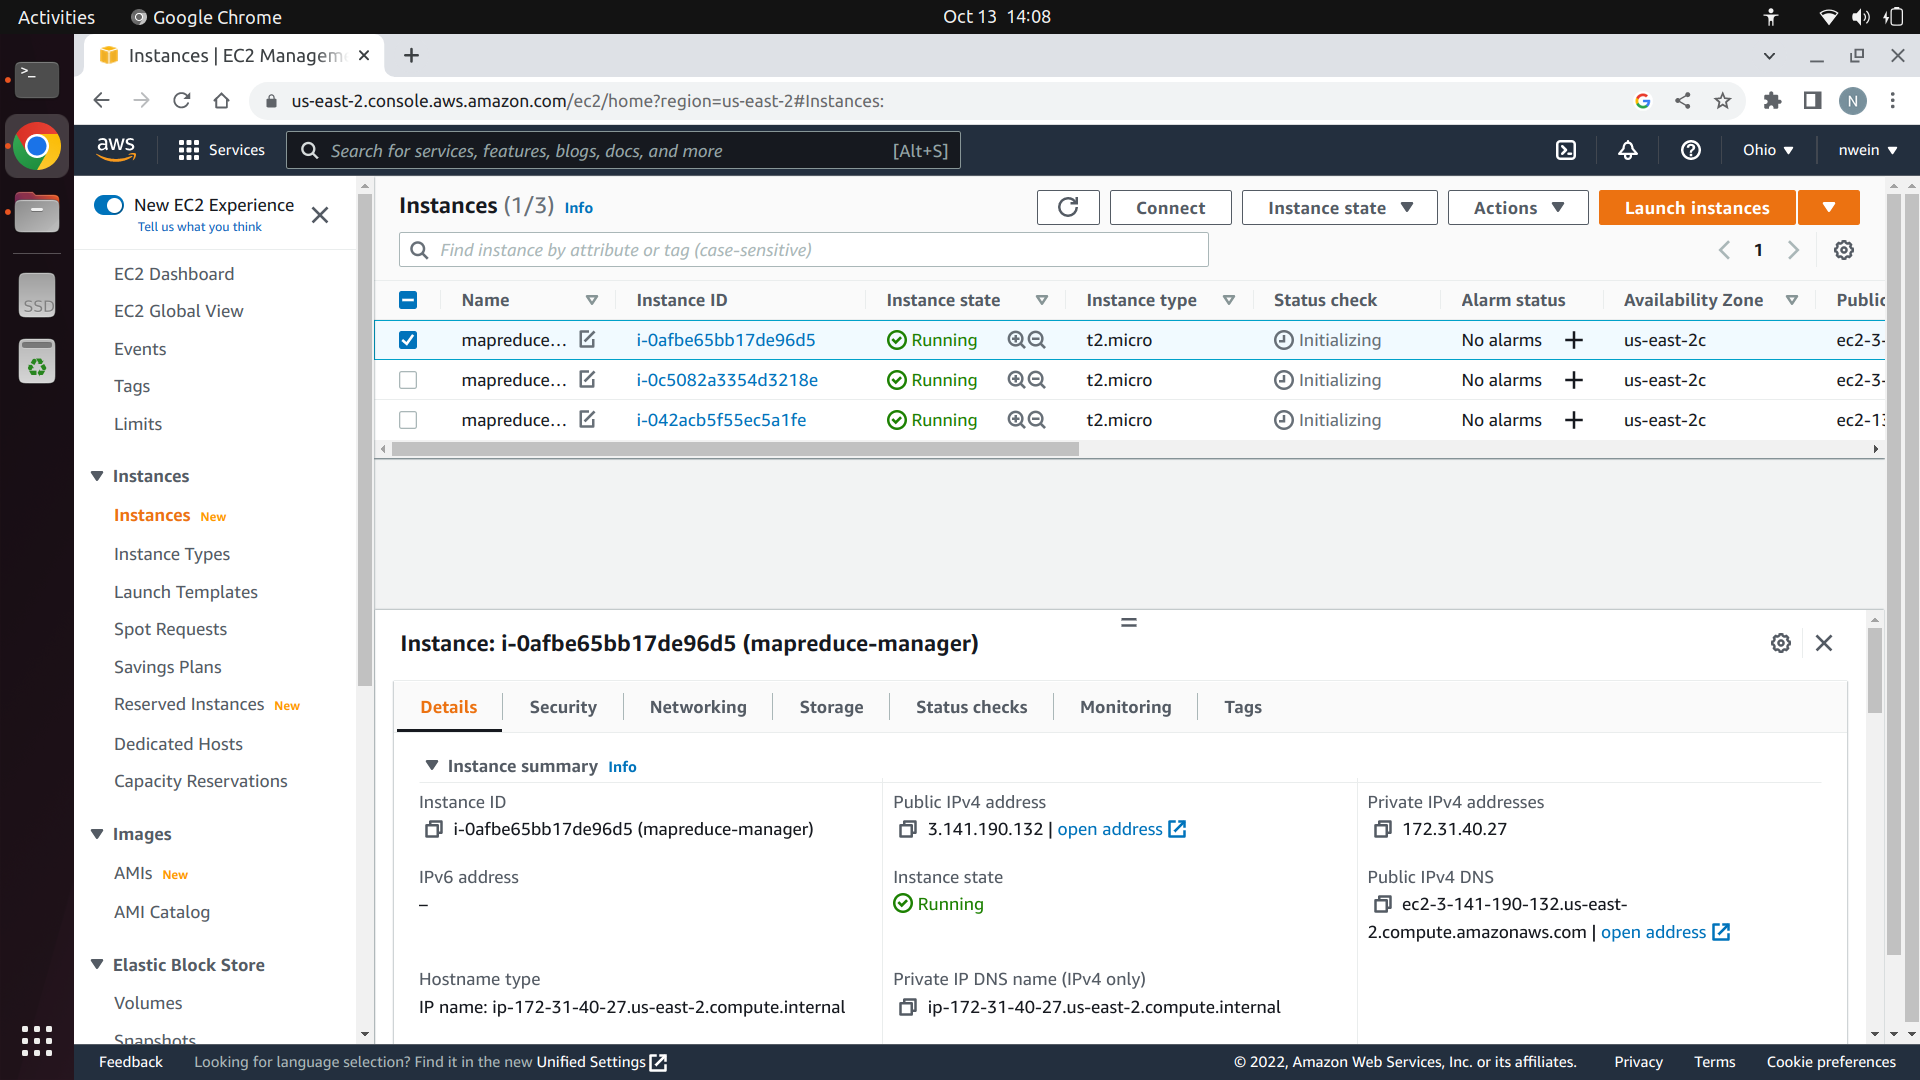
Go back to the “Instances” page and change the names of the instances using the icon that appears next to the name so that it’s clearer which instance does what. You should have one Manager and two Workers. Wait until their status is “Running.”
Make a note of the private IP address of each EC2 instance. Your Manager and Workers will use private IP addresses to communicate with each other.
Install MapReduce server
Follow the project 2 AWS tutorial for instructions on how to SSH into each of your EC2 instances. After you’ve SSH’ed into them, make sure Python3 and Python3 virtual environment tools are installed.
$ sudo apt-get install python3 python3-venv
On each EC2 instance, create an empty directory called p4-mapreduce and create a virtual environment inside of it. Activate the virtual environment.
ubuntu@ip-172-31-36-242:~$ pwd
/home/ubuntu
$ mkdir p4-mapreduce
$ python3 -m venv env
$ source env/bin/activate
On your own machine, install build, which we’ll use to build a distribution of your mapreduce package that we can easily deploy.
(env) noah@noahs-laptop:~/EECS485/p4-mapreduce$ pwd
/home/noah/EECS485/p4-mapreduce
(env) $ pip install build
(env) $ python -m build
That last command created a new directory called dist and packaged all of your code inside. The file ending in .whl is a wheel, or binary distribution. While still in your local machine, copy the wheel to your EC2 instances.
$ scp -i {YOUR_SSH_KEY} dist/mapreduce-1.0.0-py3-none-any.whl ubuntu@{PUBLIC_DNS_ADDRESS}:~/p4-mapreduce
Now in your EC2 instances, install your package with pip.
(env) $ pwd
/home/ubuntu/p4-mapreduce
(env) $ pip install mapreduce-1.0.0-py3-none-any.whl
Do this for all three EC2 instances.
Start up Manager and Workers
In the EC2 instance that you’ve chosen to use as a Manager, run:
$ nohup mapreduce-manager \
    --host {PRIVATE_MANAGER_IP_ADDRESS} \
    --port 6000 \
    --logfile="manager_log.txt" \
    --shared_dir "/mnt/efs/mapreduce" &
Then run this in the other two EC2 instances:
$ nohup mapreduce-worker \
    --host {PRIVATE_WORKER_IP_ADDRESS} \
    --port 6001 \
    --manager-host {PRIVATE_MANAGER_IP_ADDRESS} \
    --manager-port 6000 \
    --logfile="worker_log.txt" &
Note that the Manager is using port 6000 and the Workers are using port 6001. This is fine, since we exposed these ports for TCP and UDP using our security group; if we used another port here, a virtual firewall would block communication.
Also note that the Manager and Workers are communicating using private IP addresses. Each EC2 instance is in the same Virtual Private Cloud (VPC), so they can recognize each other by private IP addresses.
The nohup command ensures that the Manager and Worker processes won’t exit when the terminal closes.
Lastly, note that we’ve instructed the Manager to create its temporary directory inside our EFS file system.
Submit a job
Now we can finally submit a job!
The Workers all need access to the input files and executables, so we’ll add them to the shared file system. On any one of the EC2 instances, run this to make it possible to copy into the mounted file system remotely:
$ sudo chown -R ubuntu:ubuntu /mnt/efs/mapreduce
Then run this from your local machine:
$ pwd
/home/noah/p4-mapreduce
$ scp -r -i {YOUR_SSH_KEY} tests/testdata/input ubuntu@{PUBLIC_DNS_ADDRESS}:/mnt/efs/mapreduce
$ scp -i {YOUR_SSH_KEY} tests/testdata/exec/wc_map.sh ubuntu@{PUBLIC_DNS_ADDRESS}:/mnt/efs/mapreduce
$ scp -i {YOUR_SSH_KEY} tests/testdata/exec/wc_reduce.sh ubuntu@{PUBLIC_DNS_ADDRESS}:/mnt/efs/mapreduce
It doesn’t matter which EC2 instance you copy the files into, since the target directory is shared between all three instances.
From your local machine, run this:
$ mapreduce-submit \
    --host {MANAGER_PUBLIC_IP_ADDRESS} \
    --port 6000 \
    --input /mnt/efs/mapreduce/input \
    --output /mnt/efs/mapreduce/output \
    --mapper /mnt/efs/mapreduce/wc_map.sh \
    --reducer /mnt/efs/mapreduce/wc_reduce.sh
Note that we’re using the Manager’s public IP address this time, not its private one. Your local machine is from outside of the EC2 instance’s network, so it can’t recognize the private IP address.
The job should be completed remotely by your three EC2 instances. After it’s finished, run this from your local machine:
$ scp -r -i {YOUR_SSH_KEY} ubuntu@{YOUR_PUBLIC_DNS_ADDRESS}:/mnt/efs/mapreduce/output ./
The output from the job is in your current directory on your local machine.
Congratulations on using a distributed system!
Acknowledgments
Original document written by Noah Weingarden nwein@umich.edu and Andrew DeOrio awdeorio@umich.edu.
This document is licensed under a Creative Commons Attribution-NonCommercial 4.0 License. You’re free to copy and share this document, but not to sell it. You may not share source code provided with this document.