chat485
React/JS Tutorial
This tutorial will walk you through a simple React/JS application that fetches from a REST API. The app will display the list of chat models advertised by the backend.
Pitfall: This tutorial is meant to be a supplement to the official React docs. Be sure to read them!
Prerequisites
You should have these configuration files from the starter files.
$ ls
package-lock.json  package.json  webpack.config.js  ...
You should have a minimally functional REST API from the Flask REST API Tutorial.
$ source env/bin/activate
$ flask --app chat485 --debug run --host 0.0.0.0 --port 8000
$ curl http://localhost:8000/api/v1/models
{
  "data": [
    {"id": "echo-1"},
    {"id": "llama3.2:3b"}
  ]
}
Install tool chain
We’ll install these tools:
- Command line JavaScript interpreter
node - Package manager
npm - Third-party JavaScript libraries and frameworks like
React - Module bundler
webpack - Compiler
babel - Linter
eslint - Formatter
prettier - End-to-end testing framework
Cypress
Node.js
Install the Node.js JavaScript interpreter and NPM package manager. The latest LTS version or higher is required for EECS 485.
macOS
Your versions may be different.
$ brew install node
$ node --version
v19.8.1
$ npm --version
9.5.1
Linux/WSL
Uninstall older versions of Node, then install the latest version from a third-party package repository maintained by NodeSource.
$ sudo apt remove nodejs
$ sudo apt autoremove
$ sudo apt update
$ sudo apt install -y ca-certificates curl gnupg
$ sudo mkdir -p /etc/apt/keyrings
$ curl -fsSL https://deb.nodesource.com/gpgkey/nodesource-repo.gpg.key | sudo gpg --dearmor -o /etc/apt/keyrings/nodesource.gpg
$ NODE_MAJOR=26
$ echo "deb [signed-by=/etc/apt/keyrings/nodesource.gpg] https://deb.nodesource.com/node_$NODE_MAJOR.x nodistro main" | sudo tee /etc/apt/sources.list.d/nodesource.list
$ sudo apt update
$ sudo apt install nodejs -y
$ node --version
v20.7.0
$ npm --version
10.1.0
JavaScript packages
Install third-party packages like React. Package manager npm reads package-lock.json and package.json and installs into ./node_modules/. You can ignore warnings about funding and vulnerabilities.
$ npm ci .
...
added 758 packages, and audited 759 packages in 4s
WSL Pitfall: npm may be slow or produce errors on network file shares. WSL uses a network file share between the Linux and Windows file systems. Use a folder that’s not a network file share.
| Bad | Good |
|---|---|
/mnt/c/Users/awdeorio/ |
/home/awdeorio/ |
Models List App
This example is an app that displays the list of available chat models using React. The app fetches data from a REST API and displays it to the user.
Before continuing, read the React quick start.
Files
Start by creating an empty JavaScript package for our web app.
$ mkdir -p chat485/js/
$ mkdir -p chat485/static/
$ touch chat485/js/main.jsx
$ touch chat485/js/models.jsx
$ touch chat485/static/index.html
Your files should look like this. It’s OK if you have other files copied from earlier work.
$ tree chat485/
chat485/
├── js
│   ├── main.jsx
│   └── models.jsx
└── static
    └── index.html
index.html
Edit or create a static HTML file, chat485/static/index.html. Flask serves it directly from /.
Add an empty div with an id of reactEntry to your top level HTML file. Later, we’ll write JavaScript code to add DOM nodes at this entry point.
Then load the bundle.js, which will contain JavaScript code for the app we’re about to write.
<!DOCTYPE html>
<html lang="en">
  <head>
    <title>Chat485</title>
    <meta charset="UTF-8">
  </head>
  <body>
    <div id="reactEntry">
      Loading ...
    </div>
    <!-- Load JavaScript -->
    <script src="/static/js/bundle.js"></script>
  </body>
</html>
Notice that the HTML code asks for bundle.js, which is the output of our module bundler and compiler. The inputs to the bundler and compiler are the JavaScript files in chat485/js/. The output is a single JavaScript file that is completely self-contained with no dependencies, chat485/static/js/bundle.js.
main.jsx
The main.jsx file imports React libraries and our custom Models component, then connects it to the reactEntry div from index.html.
import { StrictMode } from "react";
import { createRoot } from "react-dom/client";
import Models from "./models";

// Create a root
const root = createRoot(document.getElementById("reactEntry"));

// Insert the Models component into the DOM.  Only call root.render() once.
root.render(
  <StrictMode>
    <Models url="/api/v1/models" />
  </StrictMode>,
);
In this example, we render one component, Models. In your project, you will render many, but still use only one createRoot() and root.render() call with a parent component that manages child components. See this section of the React Docs and Thinking in React docs.
Wrapping your React application in <StrictMode> helps catch bugs by triggering extra re-renders and Effects checks during development. See here for documentation.
models.jsx
The models.jsx file contains a React component called Models that displays the list of chat models advertised by the backend.
import { useState, useEffect } from "react";

// The parameter of this function is an object with a string called url inside it.
// url is a prop for the Models component.
export default function Models({ url }) {
  /* Display the list of available chat models. */

  const [models, setModels] = useState([]);

  useEffect(() => {
    // Declare a boolean flag that we can use to cancel the API request.
    let ignoreStaleRequest = false;

    // Call REST API to get the list of models
    fetch(url, { credentials: "same-origin" })
      .then((response) => {
        if (!response.ok) throw Error(response.statusText);
        return response.json();
      })
      .then((data) => {
        // If ignoreStaleRequest was set to true, we want to ignore the results of
        // the request.  Otherwise, update the state to trigger a new render.
        if (!ignoreStaleRequest) {
          setModels(data.data);
        }
      })
      .catch((error) => console.log(error));

    return () => {
      // This is a cleanup function that runs whenever the Models component
      // unmounts or re-renders.  If a Models is about to unmount or re-render, we
      // should avoid updating state.
      ignoreStaleRequest = true;
    };
  }, [url]);

  // Render the list of model ids
  return (
    <div className="models">
      <h1>Available models</h1>
      <ul>
        {models.map((model) => (
          <li key={model.id}>{model.id}</li>
        ))}
      </ul>
    </div>
  );
}
Props
The Models component is a pure function, always returning the same output for the same input.
Inputs are passed as props, which are function parameters. Props are read-only and immutable, so components cannot change their props. The Models component takes a single prop, url.
The output is a tree of DOM nodes described by JSX syntax. JSX is a JavaScript extension that compiles into JavaScript code for creating DOM nodes.
export default function Models({ url }) {
  // ...

  return (
    <div className="models">
      <h1>Available models</h1>
      <ul>
        {models.map((model) => (
          <li key={model.id}>{model.id}</li>
        ))}
      </ul>
    </div>
  );
}
Please read the Describing the UI chapter of the React Docs to learn more about using JSX to render React components.
State
For mutable values (values that change), we use state. When state changes, the component re-renders, the DOM changes, and the user can see the updated page.
The Models component holds one value that changes over time: the list of models returned by the REST API. Initially, the list is empty.
Both state and props can appear in the output.
export default function Models({ url }) {
  const [models, setModels] = useState([]);

  // ...

  return (
    <div className="models">
      <h1>Available models</h1>
      <ul>
        {models.map((model) => (
          <li key={model.id}>{model.id}</li>
        ))}
      </ul>
    </div>
  );
}
In the next section, we’ll use setModels() to modify state with values from a REST API.
Please read the Adding Interactivity chapter of the React Docs to learn more about state.
Fetch from a REST API
For this example, the Models component will fetch from a REST API that returns model details like this. The REST API for your project may include more detail!
{
  "data": [
    {"id": "echo-1"},
    {"id": "llama3.2:3b"}
  ]
}
After calling the above REST API with fetch(), setModels() updates state, triggering a re-render.
export default function Models({ url }) {
  const [models, setModels] = useState([]);

  useEffect(() => {
    // Call REST API to get the list of models
    fetch(url, { credentials: "same-origin" })
      .then((response) => {
        if (!response.ok) throw Error(response.statusText);
        return response.json();
      })
      .then((data) => {
          setModels(data.data);
        })
      .catch((error) => console.log(error));

      // ...
  }, [url]);
}
The fetch() function is called inside an anonymous function passed to useEffect(). This anonymous function is called by React after the component renders. See our explanation of Data Fetching in React with useEffect for an in-depth explanation.
The line }, [url]); contains useEffect’s dependency array, which controls when the effect runs. If you don’t pass in an array, it will run on every render. If you pass in an empty array, it will run only after the first render. And, if you include variables in the array, it will run after the first render and whenever those variables change.
Please read the Synchronizing With Effects section of the React Docs to learn more about side-effects.
Build and run
Run the module bundler webpack, which puts together our code with third-party library code. It also uses babel to compile modern JavaScript to a version supported by older web browsers.
The inputs are the JSX files in chat485/js/ and the JavaScript packages in node_modules/. The output is a single file chat485/static/js/bundle.js. The configuration is in webpack.config.js.
$ npx webpack
...
webpack 5.6.0 compiled successfully in 2290 ms
Run your Flask web server.
$ flask --app chat485 --debug run --host 0.0.0.0 --port 8000
Browse to http://localhost:8000/, and you will see a heading “Available models” followed by a bullet list with echo-1 and llama3.2:3b. If you have configured optional model providers (see Optional: Model providers in the spec), they will appear in the list too.
Developer Tools
In this section, we’ll discuss using eslint and prettier to enforce coding style and a web browser extension that helps debug React applications.
eslint
We use eslint to enforce JavaScript coding standards with recommended rules from ESLint, React, and other plugins. The configuration is in the eslint.config.js provided with the starter files.
$ npx eslint chat485/js/models.jsx  # Check one file
$ npx eslint chat485/js/  # Check all files
prettier
We use prettier to enforce default formatting rules. You can also have prettier fix formatting automatically.
$ npx prettier --check chat485/js  # Check
$ npx prettier --write chat485/js  # Fix
React Developer Tools
React Developer Tools is a web browser extension that adds a “Components” tab to the developer tools. It lets you browse your React components organized in a way that looks a lot like your JSX code, rather than the complex DOM that results from your source code. See the React/JS Debugging Tutorial for an example of how to use this tool.
Browser refresh and JavaScript
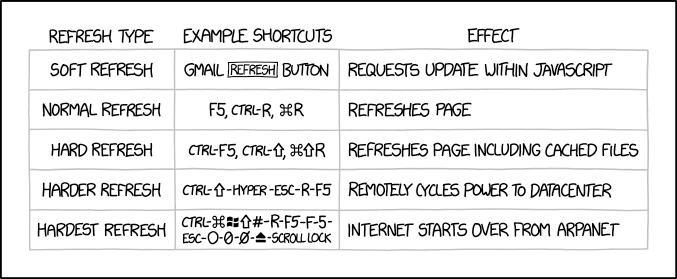
JavaScript source code is sometimes cached by the web browser. If you change the source code, you need to tell your browser to clear the cache and reload the JavaScript using the hard refresh. The commands for a hard refresh are different based on your OS and browser, so take a look at how to hard refresh with your system. If you are using Chrome, you can also disable caching by going to the network tab of the web inspector developer tool and clicking the checkbox that says “Disable cache”. This comic “explains” (credit: xkcd.com).
Acknowledgments
Original document written by Andrew DeOrio awdeorio@umich.edu.
This document is licensed under a Creative Commons Attribution-NonCommercial 4.0 License. You’re free to copy and share this document, but not to sell it. You may not share source code provided with this document.