p2-insta485-serverside
EECS485 P2: Server-side Dynamic Pages
Due 8:00pm ET July 17, 2026. This is a group project to be completed in groups of two to three.
Change Log
Initial Release for SU26
Introduction
An Instagram clone implemented with server-side dynamic pages. This is the second of an EECS 485 three project sequence: a static site generator from templates, server-side dynamic pages, and client-side dynamic pages.
Build an interactive website using server-side dynamic pages. Reuse the templates from project 1, rendering them on-demand when a user loads a page. New features include creating, updating, and deleting users, posts, comments, and likes.
The learning goals of this project include server-side dynamic pages, CRUD (Create, Read, Update, Delete), sessions, and basic SQL database usage.
Here’s a preview of what your finished project will look like. A database-backed interactive website will work (mostly) like the real Instagram.
$ ./bin/insta485run
 * Serving Flask app "insta485"
 * Running on http://127.0.0.1:8000/ (Press CTRL+C to quit)
Then you will navigate to http://localhost:8000 and see working, multi-user, interactive website that you created.
This project adds lots of features. For example, users can add likes and comments.
GAI help bot
We are providing a generative AI help bot, Webby, trained on the Project 2 spec, tutorials, and EECS 485 course material. We hope that it will be helpful, but the bot is experimental and it may provide inaccurate or incomplete information. This project spec is the final authority.
Access Webby here.
Setup
If your group has already followed the setup tutorials, you can skip to Fresh install.
Group registration
Please register your group on the Autograder. The office hours queue will give first priority to groups asking a question for the first time in a day.
AWS account and instance
You will use Amazon Web Services (AWS) to deploy your project. AWS account setup may take up to 24 hours, so get started now. Create an account, Start EC2 instance, and configure the instance. Don’t deploy yet. Only one group member needs to set up an AWS account. AWS Tutorial.
Project folder
Create a folder for this project. Your folder location might be different.
$ pwd
/Users/awdeorio/src/eecs485/p2-insta485-serverside
Pitfall: Avoid paths that contain spaces. Spaces cause problems with some command line tools.
| Bad Example | Good Example |
|---|---|
EECS 485/Project 2 Insta485 Server-side |
eecs485/p2-insta485-serverside |
WSL Pitfall: Avoid project directories starting with /mnt/c/. This shared directory is slow.
| Bad Example | Good Example |
|---|---|
/mnt/c/ ... |
/home/awdeorio/ ... |
Version control
Set up version control using the Version control tutorial.
Be sure to check out the Version control for a team tutorial.
Only one group member needs to create the remote repository.
After you’re done, you should have a local repository with a “clean” status and your local repository should be connected to a remote GitHub repository.
$ pwd
/Users/awdeorio/src/eecs485/p2-insta485-serverside
$ git status
On branch main
Your branch is up-to-date with 'origin/main'.

nothing to commit, working tree clean
$ git remote -v
origin	https://github.com/awdeorio/p2-insta485-serverside.git (fetch)
origin	https://github.com/awdeorio/p2-insta485-serverside.git (push)
You should have a .gitignore file (instructions).
$ pwd
/Users/awdeorio/src/eecs485/p2-insta485-serverside
$ head .gitignore
This is a sample .gitignore file that's useful for EECS 485 projects.
...
Starter files
Download and unpack the starter files. Only one group member needs to download and unpack the starter files and the rest of the group can clone the repository.
$ pwd
/Users/awdeorio/src/eecs485/p2-insta485-serverside
$ wget https://eecs485staff.github.io/p2-insta485-serverside/starter_files.tar.gz
$ tar -xvzf starter_files.tar.gz
Move the starter files to your project directory and remove the original starter_files/ directory.
$ pwd
/Users/awdeorio/src/eecs485/p2-insta485-serverside
$ mv starter_files/* .
$ rm -rf starter_files starter_files.tar.gz
You should see these files.
$ tree -I 'env|__pycache__|*.egg-info'
.
├── requirements.txt
├── pyproject.toml
├── sql
│   └── uploads
        ...
│       └── e1a7c5c32973862ee15173b0259e3efdb6a391af.jpg
└── tests
    ....
    └── util.py
requirements.txt |
Python package dependencies matching autograder |
pyproject.toml |
Insta485 Python package configuration |
sql/uploads/ |
Sample image uploads |
tests/ |
Public unit tests |
Before making any changes to the clean starter files, it’s a good idea to make a commit to your Git repository.
Python virtual environment
Each group member should create a Python virtual environment inside of the project directory using the Project 1 Python Virtual Environment Tutorial.
You should now have Python tools and third party packages installed locally. Your versions and exact libraries might be different.
$ pwd
/Users/awdeorio/src/eecs485/p2-insta485-serverside
$ ls
env
$ source env/bin/activate
$ which python
/Users/awdeorio/src/eecs485/p2-insta485-serverside/env/bin/python
$ which pip
/Users/awdeorio/src/eecs485/p2-insta485-serverside/env/bin/pip
$ pip list
Package            Version
------------------ ---------
astroid            2.4.2
...
zipp               3.1.0
Install utilities
All group members need to install these utilities.
Linux and Windows Subsystem for Linux
$ sudo apt-get install sqlite3 curl
MacOS
$ brew install sqlite3 curl
Fresh install
These instructions are useful if your group has already followed the setup tutorials.
Check out a fresh copy of the code and change directory.
$ git clone <your git URL here>
$ cd p2-insta485-serverside/
Create a virtual environment, activate it, and install Python packages.
$ python3 -m venv env
$ source env/bin/activate
$ pip install -r requirements.txt
Remember to activate your virtual environment every time you open a new terminal.
$ source env/bin/activate
macOS: Install sqlite3 and curl.
$ brew install sqlite3 curl
WSL/Linux: Install sqlite3 and curl.
$ sudo apt-get install sqlite3 curl
Stop here if your group is working on the Database
Run this command if your group has completed setup for Server-side Insta485.
$ pip install -e .
Database
If you’re new to SQL, take a look at the w3Schools SQL Intro.
Start by completing the SQLite Tutorial.
After the tutorial, you should have the sqlite3 command line utility installed. Your version might be different.
$ sqlite3 --version
3.29.0 2019-07-10 17:32:03 fc82b73eaac8b36950e527f12c4b5dc1e147e6f4ad2217ae43ad82882a88bfa6
You should have these files.
$ pwd
/Users/awdeorio/src/eecs485/p2-insta485-serverside
$ tree sql
sql
├── data.sql
├── schema.sql
└── uploads
    ...
    └── e1a7c5c32973862ee15173b0259e3efdb6a391af.jpg
insta485db script
As part of the SQLite Tutorial Database management shell script section, you should have written insta485db.
Your script should work like this example. Your output might be slightly different, but it should create the same files.
$ pwd
/Users/awdeorio/src/eecs485/p2-insta485-serverside
$ ./bin/insta485db reset
+ rm -rf var/insta485.sqlite3 var/uploads
+ mkdir -p var/uploads
+ sqlite3 var/insta485.sqlite3 < sql/schema.sql
+ sqlite3 var/insta485.sqlite3 < sql/data.sql
+ cp sql/uploads/* var/uploads/
$ tree var
var
├── insta485.sqlite3
└── uploads
    ...
    └── e1a7c5c32973862ee15173b0259e3efdb6a391af.jpg
Schema
Update schema.sql, which will create 5 tables: users, posts, following, comments and likes. The following list describes the tables and columns
userstableusername, at most 20 chars, primary keyfullname, at most 40 charsemail, at most 40 charsfilename, at most 64 charspassword, at most 256 chars,created,DATETIMEtype, automatically set by SQL engine to current date/time.
poststablepostid, integer, primary key, automatically incremented withAUTOINCREMENTfilename, at most 64 charsowner, at most 20 chars, foreign key tousers.created,DATETIMEtype, automatically set by SQL engine to current date/time.- Rows in the
poststable should be removed automatically when the owner is deleted.
followingtablefollower, at most 20 chars, foreign key tousers.followee, at most 20 chars, foreign key tousers.- The tuple (
follower,followee) form a primary key created,DATETIMEtype, automatically set by SQL engine to current date/time.- Rows in the
followingtable should be removed automatically when a user corresponding tofollowerorfolloweeis deleted. - The following relation is
followerfollowsfollowee.
commentstablecommentid, integer, primary key, automatically incremented withAUTOINCREMENTowner, at most 20 chars, foreign key touserstablepostid, integer, foreign key topoststabletext, at most 1024 charscreated,DATETIMEtype, automatically set by SQL engine to current date/time.- Rows in the
commentstable should be removed automatically when a user corresponding toowneror a post corresponding topostidis deleted.
likestablelikeid, integer, primary key, automatically incremented withAUTOINCREMENTowner, at most 20 chars, foreign key touserspostid, integer, foreign key topostscreated,DATETIMEtype, automatically set by SQL engine to current date/time.- Rows in the
likestable should be removed automatically when a user corresponding toowneror a post corresponding topostidis deleted.
Pro-tip: Every column outlined above is required for the insta485 database (see NOT NULL ). PRIMARY KEY and DEFAULT attributes automatically imply the NOT NULL constraint.
Pro-tip: Use ON DELETE CASCADE to automatically remove data from a table when corresponding data from another table is deleted. This applies to the likes table, comments table, following table and posts table.
Data
Update sql/data.sql to add all initial data. You can find a complete dump of the initial data in insta485db-dump.txt. Your timestamps should be automatically created by the SQL engine based on the current date/time - they will be different.
Paste the hashed (“encrypted”) passwords directly into data.sql. They look like this, sha512$34e94a05$7eaca2b4, explained later. The plain text password for awdeorio is chickens and for the rest of the users it’s password.
Testing
Install the libraries needed to run the database tests.
$ source env/bin/activate  # Make sure virtual environment is activated
$ pip install pytest
Run the public autograder testcases on your database schema and data.
$ pytest -v tests/test_database_public.py
...
========================== 2 passed in 1.76 seconds ===========================
Make sure these tests pass before moving on. The other unit tests rely on a fully functionally bin/insta485db script.
You should now submit your work to the autograder. Ignore errors about files that don’t exist when making the tarball.
Server-side Insta485
This project includes the same pages as project 1. The pages also include buttons to follow, unfollow, like, unlike and comment. We’ll also add pages for user account administration.
List of URLs from project 1. Keep these URLs in project 2.
/screenshot/users/<user_url_slug>/screenshot1 screenshot2/users/<user_url_slug>/followers/screenshot/users/<user_url_slug>/following/screenshot/posts/<postid_url_slug>/screenshot1 screenshot2/explore/screenshot
List of new URLs in project 2.
/accounts/?target=URLImmediate redirect. No screenshot./accounts/login/screenshot (no user logged in)/accounts/logout/Immediate redirect. No screenshot./accounts/create/screenshot (no user logged in)/accounts/delete/screenshot/accounts/edit/screenshot/accounts/password/screenshot/accounts/auth/Empty response. No screenshot./uploads/<filename>Serve image. No screenshot./likes/?target=URLImmediate redirect. No screenshot./comments/?target=URLImmediate redirect. No screenshot./posts/?target=URLImmediate redirect. No screenshot./following/?target=URLImmediate redirect. No screenshot.
Setup
Complete the Flask Tutorial if you have not already.
You should now have a directory containing an insta485 Python module.
$ tree insta485 -I '__pycache__'
insta485
├── __init__.py
├── config.py
├── model.py
├── static
│   └── css
│   │   └── style.css
├── templates
│   └── index.html
└── views
    ├── __init__.py
    └── index.py
insta485run script
The insta485run script starts a development server and you can browse to http://localhost:8000/ where you’ll see your “hello world” app. The Flask Tutorial Run Script section describes this script.
$ ./bin/insta485run
All pages
Include a link to the main page /.
If logged in, include a link to /explore/.
If logged in, include a link to /users/<user_url_slug>/ where user_url_slug is the logged in user.
You don’t need to worry about being logged in at first if you don’t want to: You can run some tests with authentication disabled.
However, after login is implemented, every page should automatically redirect the user to the login page /accounts/login/ if they aren’t logged in (unless they’re already on the login page or the create account page).
Pro-tip: When linking to pages or static files look into flask’s url_for() function.
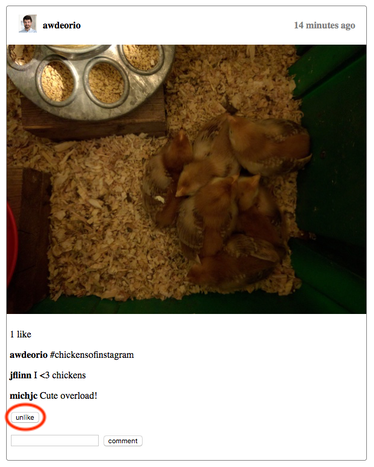
Index GET /
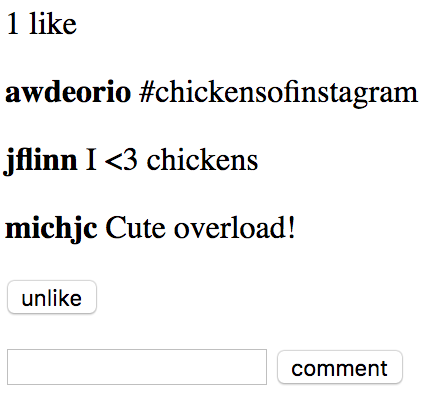
The index page should include all posts from the logged in user and all other users that the logged in user is following. The most recent post should be at the top. For each post:
- Link to the post detail page
/posts/<postid_url_slug>/by clicking on the timestamp. - Link to the owner’s page
/users/<user_url_slug>/by clicking on their username or profile picture. - Time since the post was created in human-readable format using the
humanizefunction in thearrowpackage. - Number of likes, using correct English
- Comments, with owner’s username, oldest at the top
- Link to the comment owner’s page
/users/<user_url_slug>/by clicking on their username.
- Link to the comment owner’s page
- “like” or “unlike” button, pick the logical one
- Comment input and submission button
To get started, hardcode the logged in user to be awdeorio. Later when you implement login, read the username of the logged in user from the session cookie.
Pitfall: Returning the most recent posts can be tricky because database initialization creates many posts at nearly the same instant. Thus, ordering by timestamp can result in ties. Instead, use the fact that post ID is incremented automatically if set up properly in your schema.
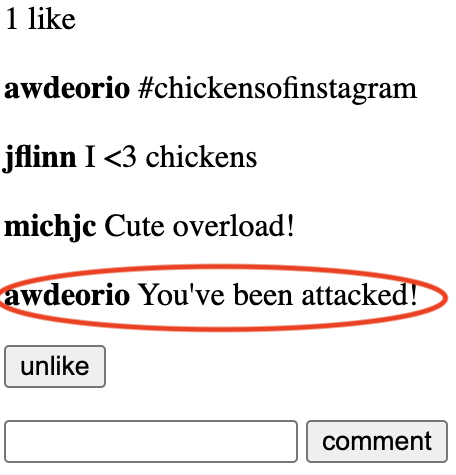
The form below makes a POST request to /likes/?target=URL, which you will implement later. For the rest of the forms, there are corresponding POST routes also mentioned later in the spec.
Form for “like” button
<!-- DO NOT CHANGE THIS (aside from where we say 'FIXME') -->
<form action="<FIXME_LIKES_URL_HERE>?target=<FIXME_CURRENT_PAGE_URL_HERE>" method="post" enctype="multipart/form-data">
  <input type="hidden" name="operation" value="like"/>
  <input type="hidden" name="postid" value="<FIXME_POST_ID_HERE>"/>
  <input type="submit" name="like" value="like"/>
</form>
Form for “unlike” button
<!-- DO NOT CHANGE THIS (aside from where we say 'FIXME') -->
<form action="<FIXME_LIKES_URL_HERE>?target=<FIXME_CURRENT_PAGE_URL_HERE>" method="post" enctype="multipart/form-data">
  <input type="hidden" name="operation" value="unlike"/>
  <input type="hidden" name="postid" value="<FIXME_POST_ID_HERE>"/>
  <input type="submit" name="unlike" value="unlike"/>
</form>
Form for “comment” button
<!-- DO NOT CHANGE THIS (aside from where we say 'FIXME') -->
<form action="<FIXME_COMMENTS_URL_HERE>?target=<FIXME_CURRENT_PAGE_URL_HERE>" method="post" enctype="multipart/form-data">
  <input type="hidden" name="operation" value="create"/>
  <input type="hidden" name="postid" value="<FIXME_POST_ID_HERE>"/>
  <input type="text" name="text" required/>
  <input type="submit" name="comment" value="comment"/>
</form>
Run the unit tests for the index page. The --noauth flag skips user login. Remove the --noauth flag after login is implemented.
$ pytest -v --noauth tests/test_index.py
When running the testcases, you would see the following DeprecationWarning. This warning is expected and will not impact your score on the autograder. The arrow package is using a deprecated function in its current release.
.../env/lib/python3.12/site-packages/arrow/arrow.py:1150:
DeprecationWarning: datetime.datetime.utcnow() is deprecated and scheduled for removal in a future version. Use
timezone-aware objects to represent datetimes in UTC: datetime.datetime.now(datetime.UTC).

 utc = dt_datetime.utcnow().replace(tzinfo=dateutil_tz.tzutc())
GET /uploads/<filename>
A user with the direct link to an uploaded file, /uploads/<filename>, should only be able to see that file if logged in.
Do the following once login is implemented.
If an unauthenticated user attempts to access an uploaded file, abort(403), regardless of whether the file exists.
If an authenticated user attempts to access a file that does not exist, abort(404).
Pro-tip: In order to serve images correctly, look into flask’s send_from_directory() function.
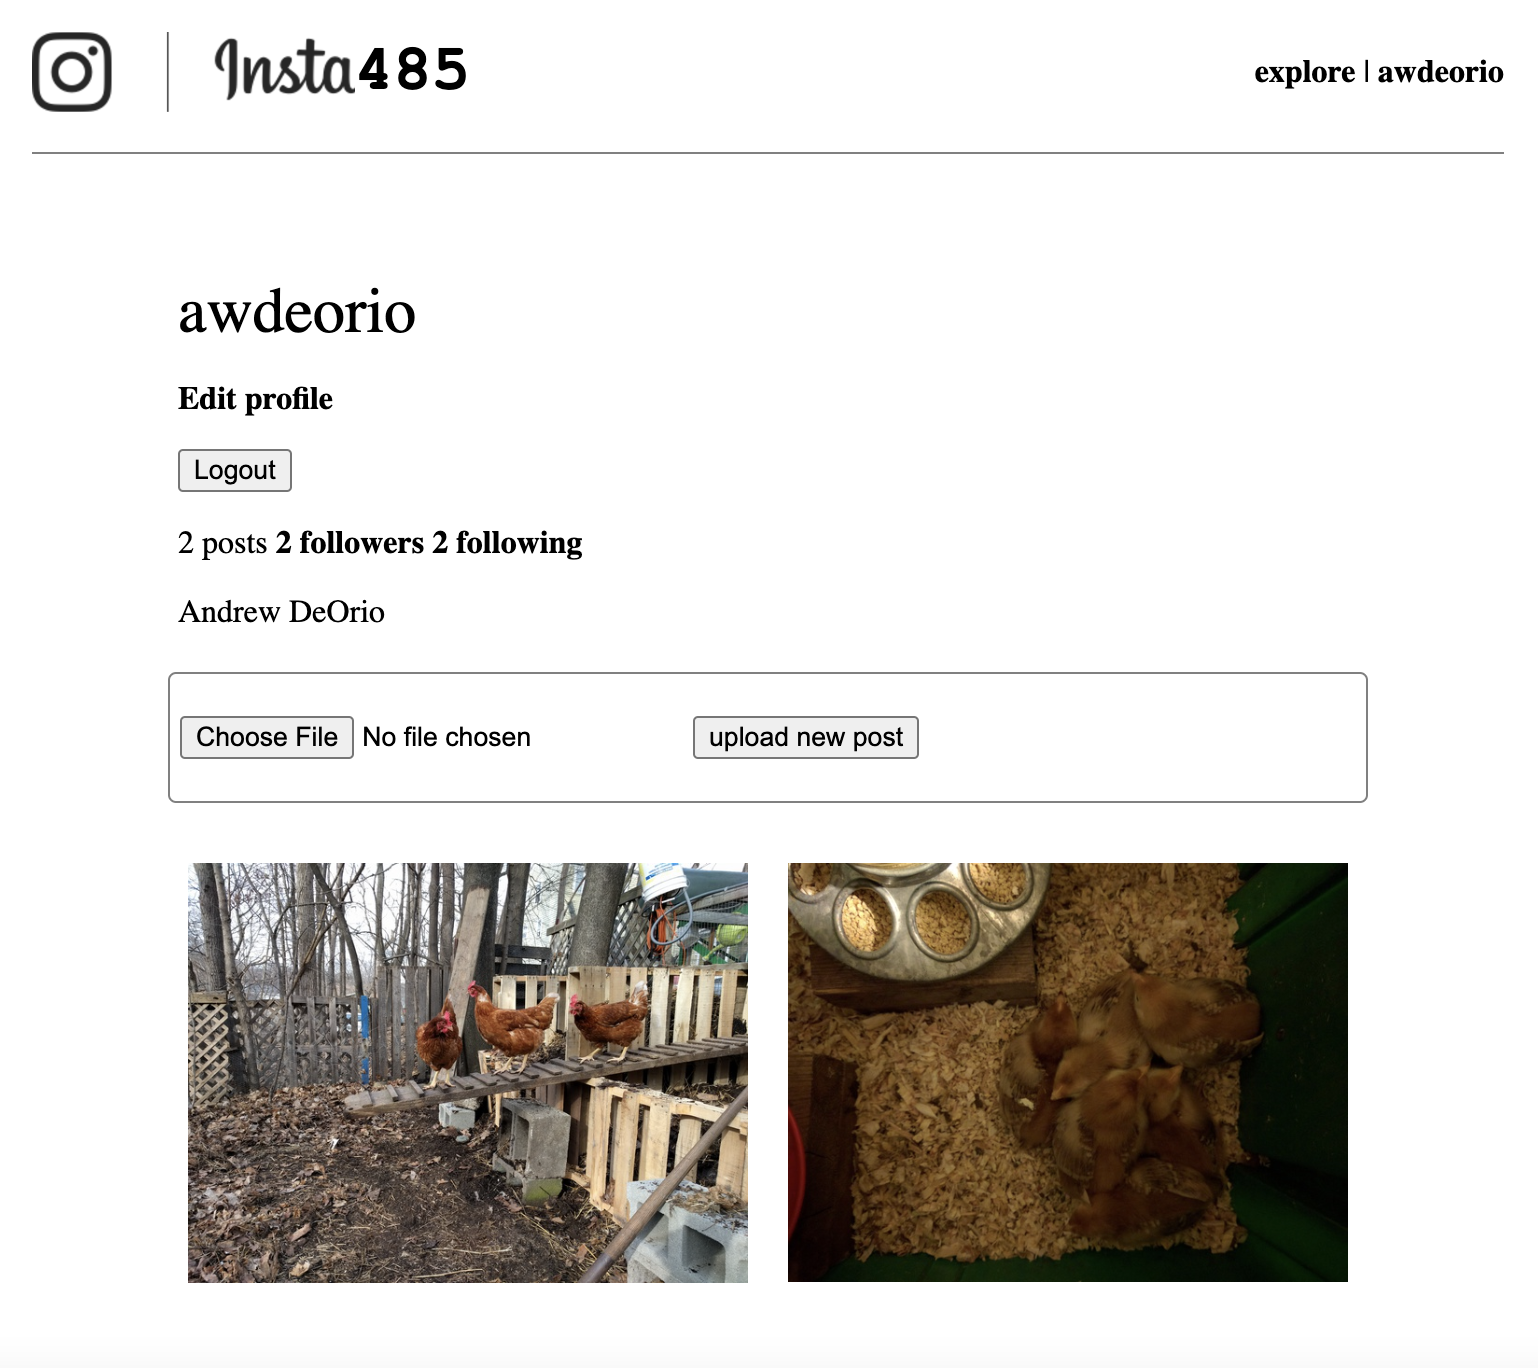
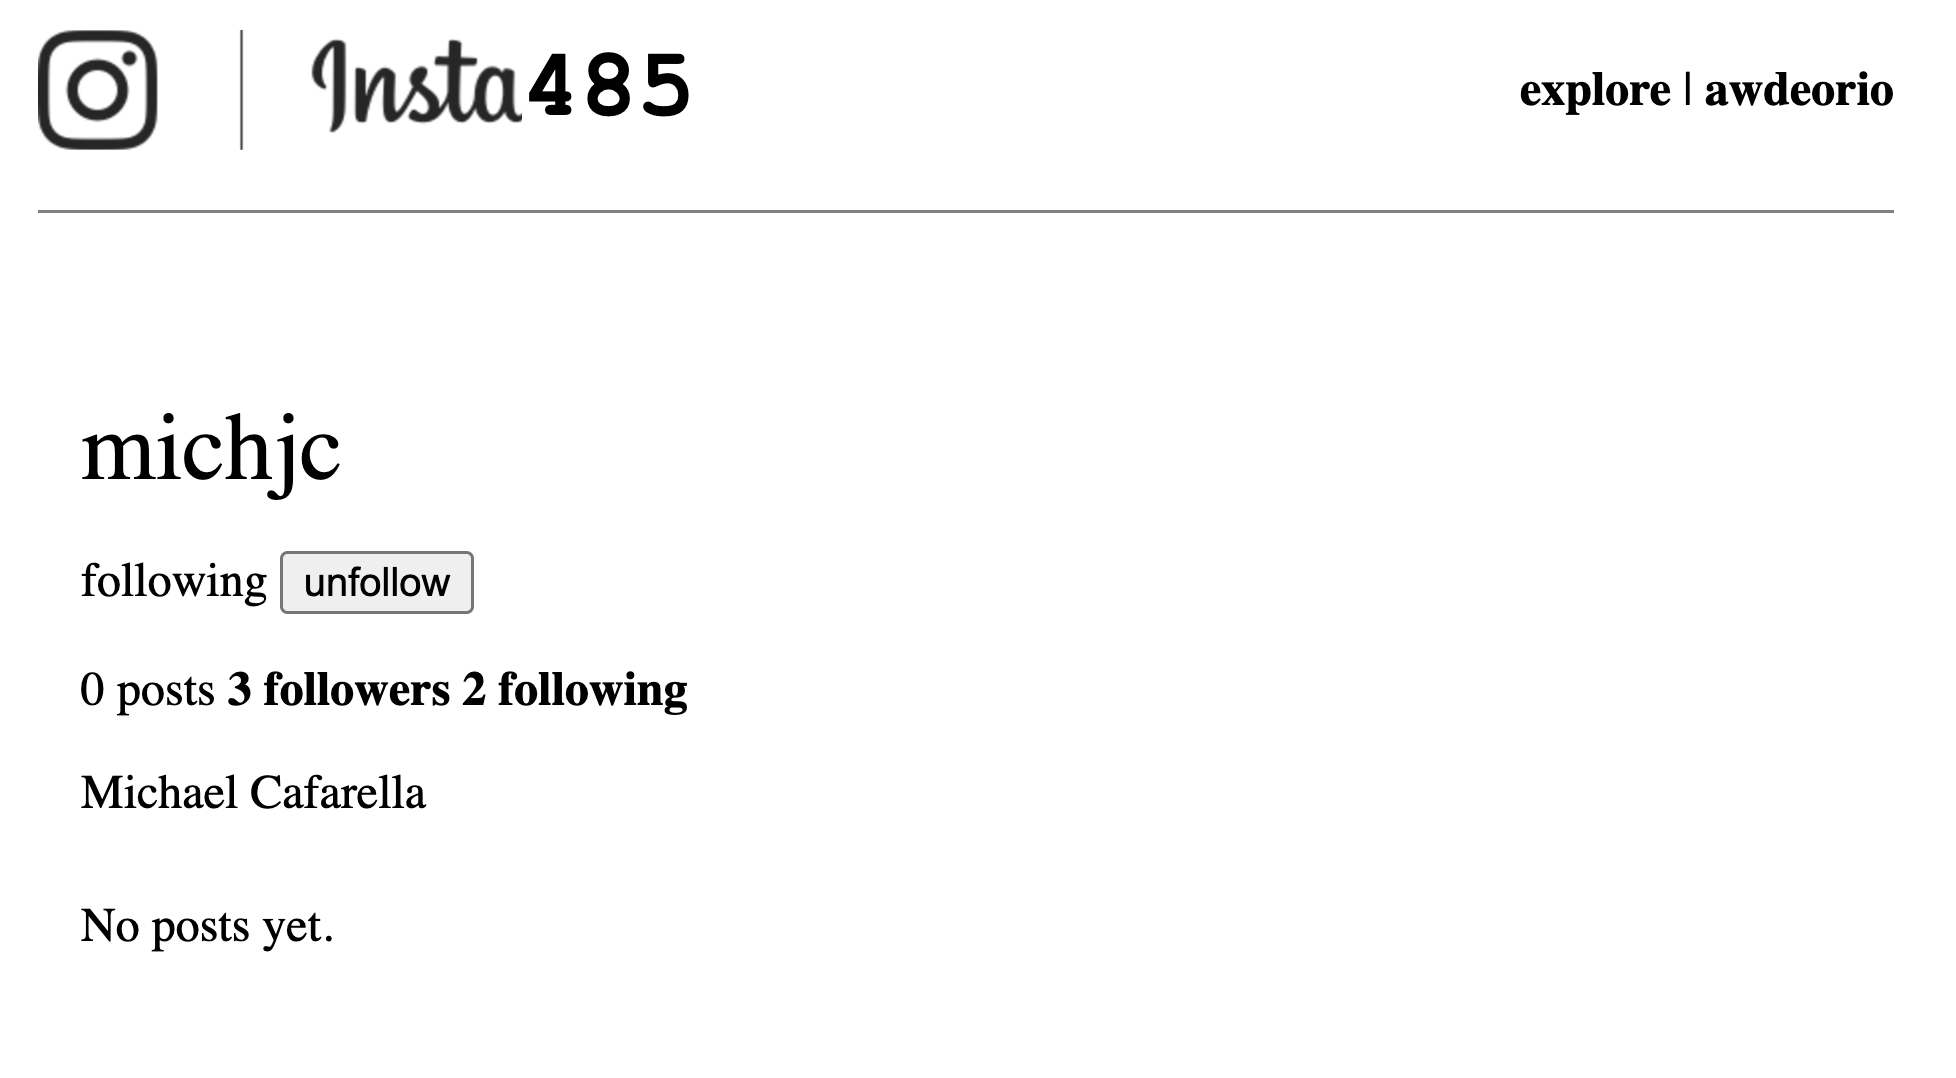
GET /users/<user_url_slug>/
screenshot1 screenshot2 screenshot3
Be sure to include
- username (
user_url_slug) - Relationship
- “following” if the logged in user is following
user_url_slug. Also include an “unfollow” button. - “not following” if the logged in user is not following
user_url_slug. Also include a “follow” button. - Blank if logged in user ==
user_url_slug
- “following” if the logged in user is following
- Number of posts, with correct English
- Number of followers, with correct English
- Link to
/users/<user_url_slug>/followers/
- Link to
- Number following
- Link to
/users/<user_url_slug>/following/
- Link to
- Name
- A small image for each post
- Clicking on the image links to
/posts/<postid_url_slug>/
- Clicking on the image links to
If the user has 0 posts, display “No posts yet.”
For a user’s own page, also include
- Link to
/accounts/edit/ - HTML form that POSTs to
/accounts/logout/ - File upload form for creating a new post that POSTS to
/posts/
If someone tries to access a user_url_slug that does not exist in the database, then abort(404).
Form for follow button
<!-- DO NOT CHANGE THIS (aside from where we say 'FIXME') -->
<form action="<FIXME_FOLLOWING_URL_HERE>?target=<FIXME_CURRENT_PAGE_URL_HERE>" method="post" enctype="multipart/form-data">
  <input type="submit" name="follow" value="follow"/>
  <input type="hidden" name="username" value="<FIXME_USERNAME_HERE>"/>
  <input type="hidden" name="operation" value="follow"/>
</form>
Form for unfollow button
<!-- DO NOT CHANGE THIS (aside from where we say 'FIXME') -->
<form action="<FIXME_FOLLOWING_URL_HERE>?target=<FIXME_CURRENT_PAGE_URL_HERE>" method="post" enctype="multipart/form-data">
  <input type="submit" name="unfollow" value="unfollow"/>
  <input type="hidden" name="username" value="<FIXME_USERNAME_HERE>"/>
  <input type="hidden" name="operation" value="unfollow"/>
</form>
Form for logout
<!-- DO NOT CHANGE THIS (aside from where we say 'FIXME') -->
<form action="<FIXME_LOGOUT_PAGE_URL_HERE>" method="post" enctype="multipart/form-data">
  <input type="submit" name="logout" value="Logout"/>
</form>
Form for file upload
<!-- DO NOT CHANGE THIS (aside from where we say 'FIXME') -->
<form action="<FIXME_POSTS_URL_HERE>?target=<FIXME_CURRENT_PAGE_URL_HERE>" method="post" enctype="multipart/form-data">
  <input type="file" name="file" accept="image/*" required/>
  <input type="submit" name="create_post" value="upload new post"/>
  <input type="hidden" name="operation" value="create"/>
</form>
Run a unit test for the user page.
$ pytest -v --noauth tests/test_user_public.py::test_awdeorio
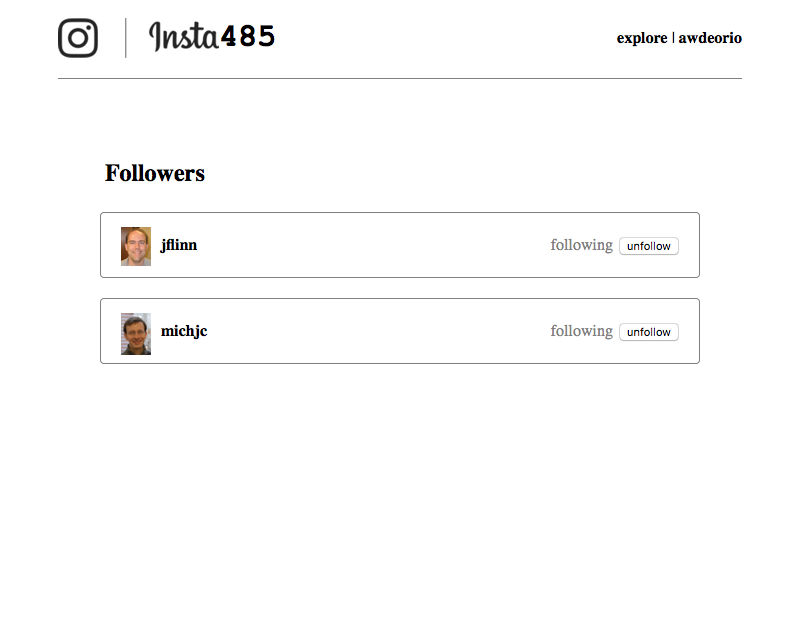
GET /users/<user_url_slug>/followers/
List the users that are following user_url_slug. For each, include:
- Icon
- Username, with link to
/users/<username>/ - Relationship to logged in user
- “following” if logged in user is following username. Also, an “unfollow” button. See above for HTML form.
- “not following” if logged in user is not following username. Also, a “follow” button. See above for HTML form.
- Blank if logged in user == username
If someone tries to access a user_url_slug that does not exist in the database, then abort(404).
Run a unit test for the followers page.
$ pytest -v --noauth tests/test_followers_public.py::test_awdeorio_followers
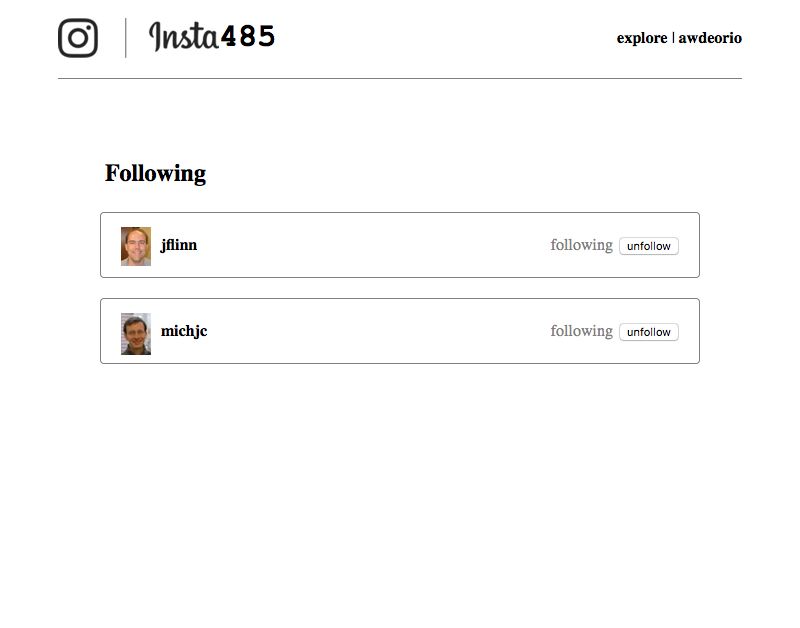
GET /users/<user_url_slug>/following/
List the users that user_url_slug is following. For each, include:
- Icon
- Username, with link to
/users/<username>/ - Relationship to logged in user
- “following” if logged in user is following username. Also, an “unfollow” button. See above for HTML form.
- “not following” if logged in user is not following username. Also, a “follow” button. See above for HTML form.
- Blank if logged in user == username
If someone tries to access a user_url_slug that does not exist in the database, then abort(404).
Run a unit test for the following page.
$ pytest -v --noauth tests/test_following.py::test_awdeorio
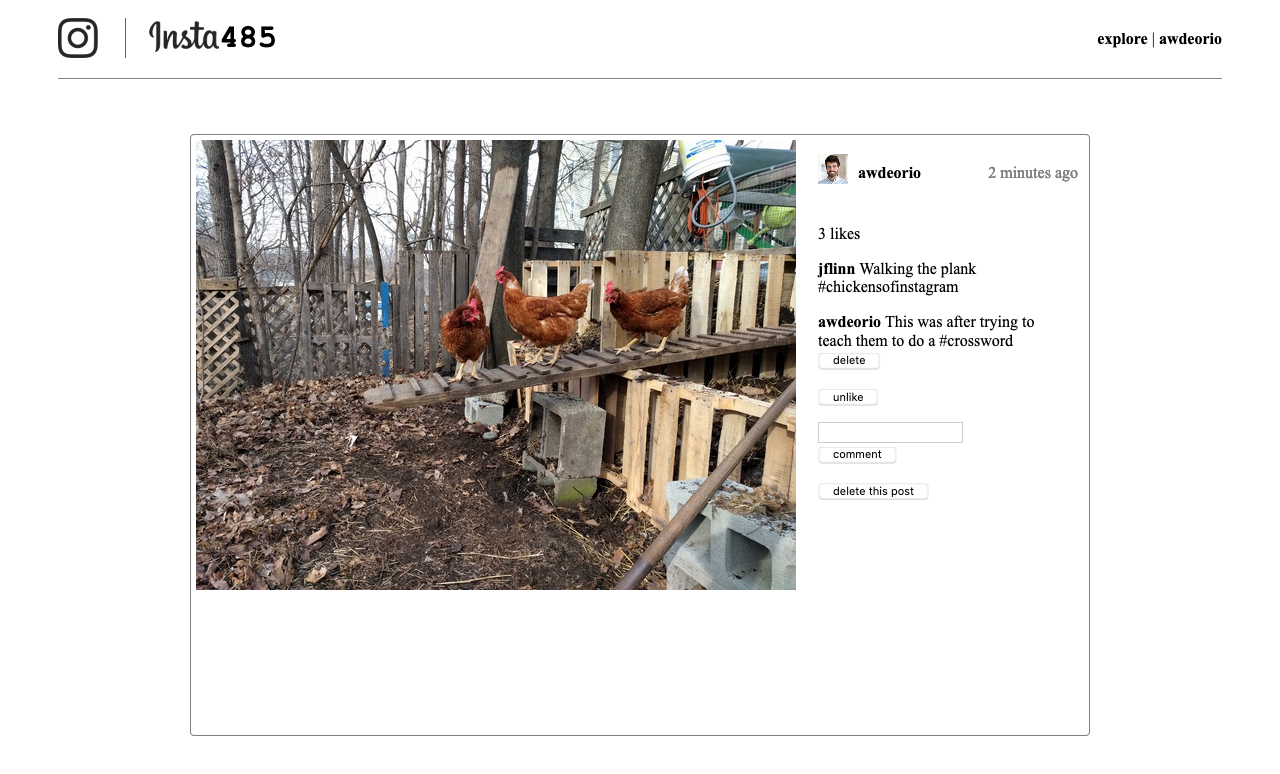
GET /posts/<postid_url_slug>/
This page shows one post. Include the same information for this one post as is shown on the main page /.
If someone tries to access a postid_url_slug that does not exist in the database, then abort(404).
Include a “delete” button next to each comment owned by the logged in user.
<!-- DO NOT CHANGE THIS (aside from where we say 'FIXME') -->
<form action="<FIXME_COMMENTS_URL_HERE>?target=<FIXME_CURRENT_PAGE_URL_HERE>" method="post" enctype="multipart/form-data">
  <input type="hidden" name="operation" value="delete"/>
  <input type="hidden" name="commentid" value="<FIXME_COMMENT_ID_HERE>"/>
  <input type="submit" name="uncomment" value="delete"/>
</form>
Include a “delete this post” button if the post is owned by the logged in user.`
<!-- DO NOT CHANGE THIS (aside from where we say 'FIXME') -->
<form action="<FIXME_POSTS_URL_HERE>?target=<FIXME_LOGGED_IN_USER_PAGE_URL_HERE>" method="post" enctype="multipart/form-data">
  <input type="hidden" name="operation" value="delete"/>
  <input type="hidden" name="postid" value="<FIXME_POST_ID_HERE>"/>
  <input type="submit" name="delete" value="delete this post"/>
</form>
Run unit tests for the post page.
$ pytest -v --noauth tests/test_post_public.py::test_postid_1 \
                     tests/test_post_public.py::test_postid_2
GET /explore/
This page lists all users that the logged in user is not following and includes:
- Icon
- Username with link to
/users/<user_url_slug>/ - “follow” button
- See follow form in
GET /users/<user_url_slug>/for HTML.
- See follow form in
Run unit tests for the explore page.
$ pytest -v --noauth tests/test_explore.py::test_awdeorio_default
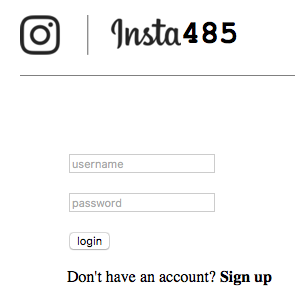
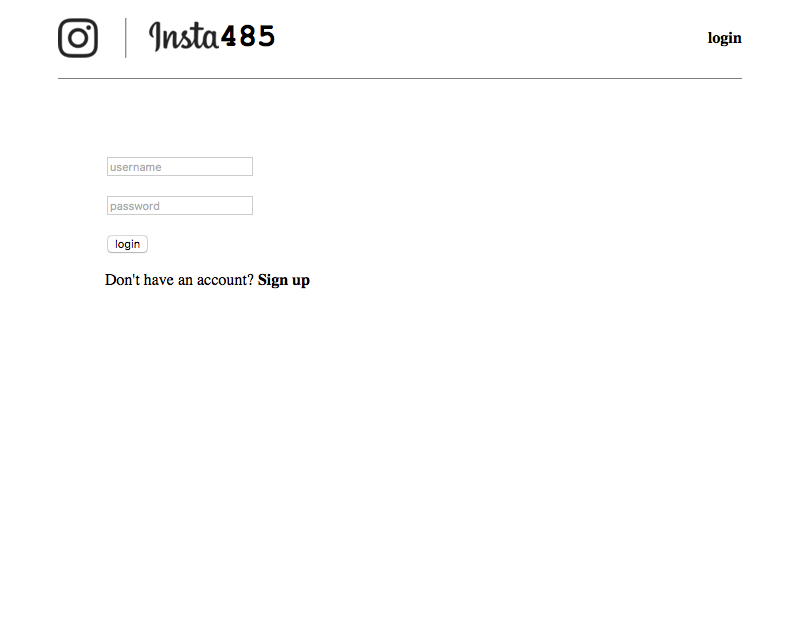
GET /accounts/login/
If logged in, redirect to /.
Otherwise, include username and password inputs and a login button.
Also include a link to /accounts/create/ in the page.
Use this HTML form code. Feel free to style it and include placeholders.
<!-- DO NOT CHANGE THIS (aside from styling) -->
<form action="<FIXME_ACCOUNTS_URL_HERE>?target=<FIXME_INDEX_URL_HERE>" method="post" enctype="multipart/form-data">
  <input type="text" name="username" required/>
  <input type="password" name="password" required/>
  <input type="submit" value="login"/>
  <input type="hidden" name="operation" value="login"/>
</form>
Run a unit test for the login page.
$ pytest -v tests/test_login_logout.py::test_login_page_content
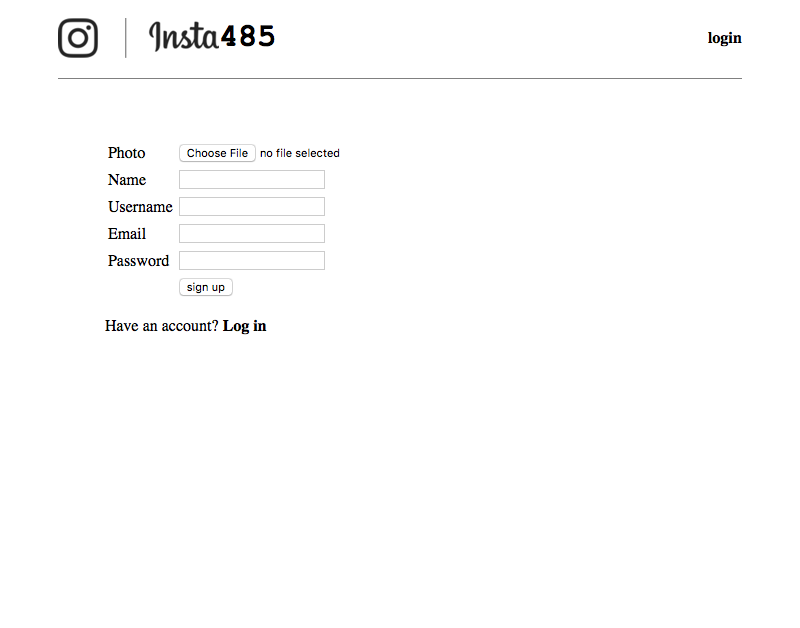
GET /accounts/create/
If a user is already logged in, redirect to /accounts/edit/.
Also include two links to /accounts/login/ in the page, one in the top Navigation section and one after the sign up button.
HTML form. Style as you like.
<!-- DO NOT CHANGE THIS (aside from styling) -->
<form action="<FIXME_ACCOUNTS_URL_HERE>?target=<FIXME_INDEX_URL_HERE>" method="post" enctype="multipart/form-data">
  <input type="file" name="file" required/>
  <input type="text" name="fullname" required/>
  <input type="text" name="username" required/>
  <input type="text" name="email" required/>
  <input type="password" name="password" required/>
  <input type="submit" name="signup" value="sign up"/>
  <input type="hidden" name="operation" value="create"/>
</form>
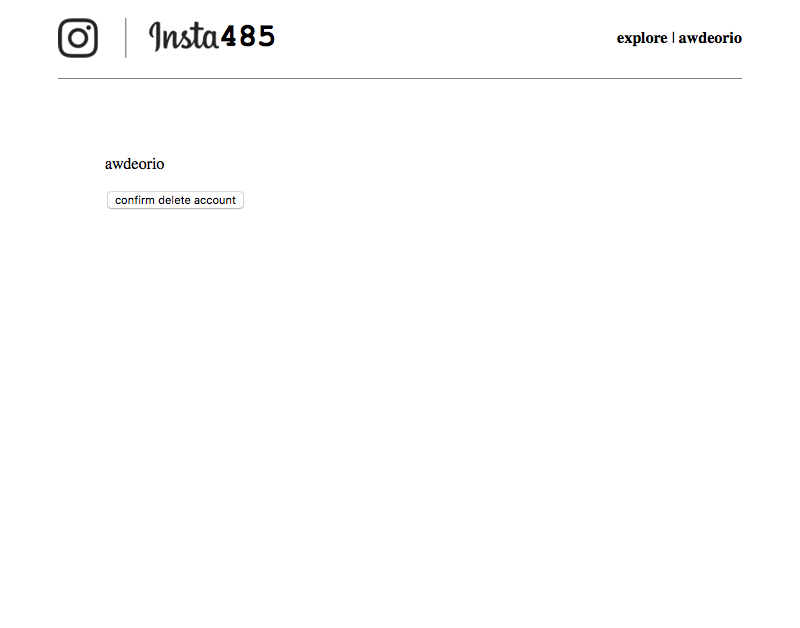
GET /accounts/delete/
Confirmation page includes username and this form:
<!-- DO NOT CHANGE THIS -->
<form action="<FIXME_ACCOUNTS_URL_HERE>?target=<FIXME_ACCOUNTS_CREATE_HERE>" method="post" enctype="multipart/form-data">
  <input type="submit" name="delete" value="confirm delete account"/>
  <input type="hidden" name="operation" value="delete"/>
</form>
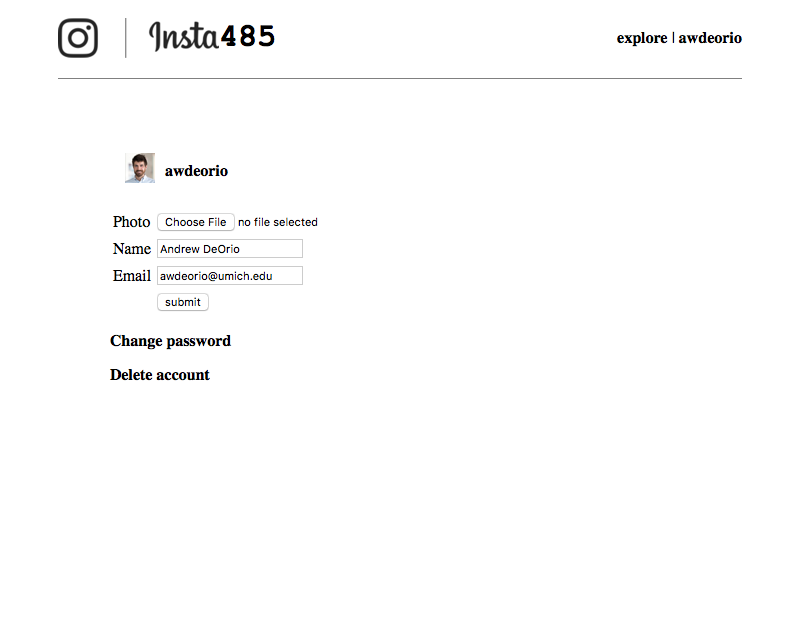
GET /accounts/edit/
Include user’s current photo and username. Include a form with photo upload, name and email. Name and email are automatically filled in with previous value. Username can not be edited.
Link to /accounts/password/.
Link to /accounts/delete/.
Use this form:
<!-- DO NOT CHANGE THIS (aside from where we say 'FIXME') -->
<form action="<FIXME_ACCOUNTS_URL_HERE>?target=<FIXME_CURRENT_URL_HERE>" method="post" enctype="multipart/form-data">
  <input type="file" name="file" accept="image/*"/>
  <input type="text" name="fullname" value="<FIXME_FULL_NAME_HERE>" required/>
  <input type="text" name="email" value="<FIXME_EMAIL_HERE>" required/>
  <input type="submit" name="update" value="submit"/>
  <input type="hidden" name="operation" value="edit_account"/>
</form>
GET /accounts/password/
Include this form:
<!-- DO NOT CHANGE THIS -->
<form action="<FIXME_ACCOUNTS_URL_HERE>?target=<FIXME_EDIT_ACCOUNT_URL_HERE>" method="post" enctype="multipart/form-data">
  <input type="password" name="password" required/>
  <input type="password" name="new_password1" required/>
  <input type="password" name="new_password2" required/>
  <input type="submit" name="update_password" value="submit"/>
  <input type="hidden" name="operation" value="update_password"/>
</form>
Link to /accounts/edit/.
GET /accounts/auth/
Return a 200 status code with no content (i.e. an empty response) if the user is logged in. abort(403) if the user is not logged in. This route is only used when you deploy the app to AWS.
POST /likes/?target=URL
This endpoint only accepts POST requests. Create or delete a like and immediately redirect to URL.
Setup
To get started, add a function stub for the /likes/ route to one of the Python files in your views module. Also make sure you have logging set up at the top of the file.
LOGGER = flask.logging.create_logger(insta485.app)

@insta485.app.route("/likes/", methods=["POST"])
def update_likes():
  LOGGER.debug("operation = %s", flask.request.form["operation"])
  LOGGER.debug("postid = %s", flask.request.form["postid"])
  # TODO: Update the database
  # TODO: Redirect the client with flask.redirect()
  # PITFALL: Do not call render_template()
Make sure your server is running.
$ ./bin/insta485run
Click the first unlike button on awdeorio’s feed. Requests to this endpoint are made by the form for “like” or “unlike” button on the index page.
You should see the logs from update_likes() in the terminal.
[2024-09-04 12:42:09,897] DEBUG in likes: operation = unlike
[2024-09-04 12:42:09,897] DEBUG in likes: postid = 3
127.0.0.1 - - [04/Sep/2024 12:42:09] "POST /likes/ HTTP/1.1" 302 -
Specification
Use the operation and postid values from the POST request form content.
If operation is like, create a like for postid. If operation is unlike, delete a like for postid.
Then, redirect to URL. If the value of ?target is not set, redirect to /.
If someone tries to like a post they have already liked or unlike a post they have not liked, then abort(409)
Pro-tip: Any additional arguments passed to the url_for() function are appended to the URL as query parameters.
>>> flask.url_for("my_function", my_key="my_value")
/my_endpoint?my_key=my_value
You can also use url_for() in a jinja2 template HTML file.
Run a unit test for the likes POST request.
$ pytest -v --noauth tests/test_post_public.py::test_like_unlike
POST /comments/?target=URL
This endpoint only accepts POST requests. Create or delete a comment on a post and immediately redirect to URL.
Use the operation, postid, commentid and text values from the POST request form content.
If operation is create, then create a new comment on postid with the content text. If operation is delete, then delete comment with ID commentid.
If a user tries to create an empty comment, then abort(400). 400 is the HTTP code indicating a Bad Request.
If a user tries to delete a comment that they do not own, then abort(403).
If the value of ?target is not set, redirect to /.
Run unit tests for the comments POST request.
$ pytest -v --noauth tests/test_post_public.py::test_comment \
                     tests/test_post_public.py::test_delete_comment
POST /posts/?target=URL
This endpoint only accepts POST requests. Create or delete a post and immediately redirect to URL.
Use the operation and postid values from the POST response form content.
If operation is create, save the image file to disk and redirect to URL.
If a user tries to create a post with an empty file, then abort(400).
If operation is delete, delete the image file for postid from the filesystem. Delete everything in the database related to this post. Redirect to URL.
If the value of ?target is not set, redirect to /users/<logname>/.
If a user tries to delete a post that they do not own, then abort(403).
UUID filenames
Use a universally unique identifier (UUID) for the filename when creating a post. A few reasons for UUID filenames are
- Avoid two uploads with the same name overwriting each other,
- Avoid filenames with characters that the filesystem doesn’t support.
Here’s how to compute filenames in your Flask app:
import pathlib
import uuid
import insta485

# Unpack flask object
fileobj = flask.request.files["file"]
filename = fileobj.filename

# Compute base name (filename without directory).  We use a UUID to avoid
# clashes with existing files, and ensure that the name is compatible with the
# filesystem. For best practive, we ensure uniform file extensions (e.g.
# lowercase).
stem = uuid.uuid4().hex
suffix = pathlib.Path(filename).suffix.lower()
uuid_basename = f"{stem}{suffix}"

# Save to disk
path = insta485.app.config["UPLOAD_FOLDER"]/uuid_basename
fileobj.save(path)
For example, if you upload the file awdeorio.JPG, the computed filename for this file would look something like fa0869c36f504c3fafd21d428185b387.jpg. Since UUID’s are generated randomly, your UUID will be different. Notice the lowercase file extension.
Run unit tests for the posts POST request.
$ pytest -v --noauth tests/test_user_public.py::test_upload \
                     tests/test_post_public.py::test_delete_post
POST /following/?target=URL
This endpoint only accepts POST requests. Follows or unfollows a user and
immediately redirect to URL.
Use the operation and username values from the POST request form content.
If operation is follow, then make user logname follow user username.
If operation is unfollow, then make user logname unfollow user username.
If a user tries to follow a user that they already follow or unfollow a user that they do not follow, then abort(409).
If the value of ?target is not set, redirect to /.
Run unit tests for the following POST request.
$ pytest -v --noauth tests/test_follow_unfollow.py
POST /accounts/logout/
This endpoint only accepts POST requests.
Log out user. Immediately redirect to /accounts/login/.
POST /accounts/?target=URL
This endpoint only accepts POST requests. Perform various account
operations and immediately redirect to URL.
Use the operation value from the POST request form content to determine
the type of action to take.
If the value of ?target is not set, redirect to /.
Operation: login
Use username and password from the POST request form content to log the
user in.
If the username or password fields are empty, abort(400).
If username and password authentication fails, abort(403).
Set a session cookie. Reminder: only store minimal information in a session cookie!
Flask implements sessions. Look at the Flask docs for a usage example. Note that you should have already set up the secret key in the insta485/config.py file.
Redirect to URL.
Run a unit test for operation: login.
$ pytest -v tests/test_login_logout.py::test_login
Operation: create
Use username, password, fullname, email and file from the POST request form content to create the user. See above for file upload and naming procedure.
If any of the above fields are empty, abort(400).
If a user tries to create an account with an existing username in the database, abort(409). 409 is the HTTP code indicating a Conflict Error.
Log the user in and redirect to URL.
Password storage
A password entry in the database contains the algorithm, salt and password hash separated by $. Use the sha512 algorithm like this:
import uuid
import hashlib
algorithm = 'sha512'
salt = uuid.uuid4().hex
hash_obj = hashlib.new(algorithm)
password_salted = salt + password
hash_obj.update(password_salted.encode('utf-8'))
password_hash = hash_obj.hexdigest()
password_db_string = "$".join([algorithm, salt, password_hash])
print(password_db_string)
Run a unit test for operation: create.
$ pytest -v tests/test_accounts_public.py::test_accounts_create
Operation: delete
If the user is not logged in, abort(403).
Delete all post files created by this user. Delete user icon file. Delete all related entries in all tables.
Pro-tip: Set up database tables properly with primary/foreign key relationships and ON DELETE CASCADE will do this automatically.
Upon successful submission, clear the user’s session, and redirect to URL.
Run a unit test for operation: delete.
$ pytest -v --noauth tests/test_accounts_public.py::test_accounts_delete
Operation: edit_account
If the user is not logged in, abort(403).
Use fullname, email and file from the POST request form content to edit the user account.
If the fullname or email fields are empty, abort(400).
If no photo file is included, update only the user’s name and email.
If a photo file is included, then the server will update the user’s photo, name and email. Delete the old photo from the filesystem. See above for file upload and naming procedure.
Upon successful submission, redirect to URL.
Run a unit test for operation: edit_account.
$ pytest -v tests/test_accounts_public.py::test_accounts_edit
Operation: update_password
If the user is not logged in, abort(403).
Use password, new_password1 and new_password2 from the POST request form content to update the user’s password.
If any of the above fields are empty, abort(400).
Verify password against the user’s password hash in the database. If verification fails, abort(403).
Verify both new passwords match. If verification fails, abort(401).
Update hashed password entry in database. See above for the password storage procedure.
Redirect to URL.
Run a unit test for operation: update_password.
$ pytest -v tests/test_accounts_public.py::test_accounts_password
All pages
Now that login is implemented, head back to the pages with hardcoded logged in user awdeorio and read the username of the logged in user from the session cookie instead. Make sure that every page automatically redirects the user to the login page if they’re not logged in (unless they’re already on the login page or create account page.)
Run unit tests for a different logged in user, michjc. This should help you sanity check that you’ve removed all hardcoded instances of awdeorio as the logged in user.
$ pytest -v tests/test_michjc.py
Run a unit test for SQL injection attack.
$ pytest -v tests/test_login_logout.py::test_sql_injection
Access control
The server should reject POST requests to delete entities not owned by the logged in user. For example, only the logged in user should be able to delete their own posts and comments. To reject a request with a permissions error, use flask.abort(403). Users should be able to comment and like posts of users that they are not following.
The following examples assume you have a (mostly) working Insta485 project with a freshly reset database.
Using curl
Curl is a command line tool for making HTTP requests. You can make the same requests that browser would make from the CLI.
Use curl to log in to Insta485. This command issues a POST request to /accounts/ with a username and password. The -F KEY=VALUE sends a key-value pair just like a web form. The --cookie-jar cookies.txt will save the cookies set by the website to the file cookies.txt.
$ curl -X POST http://localhost:8000/accounts/ \
  -F username=awdeorio \
  -F password=chickens \
  -F operation=login \
  --cookie-jar cookies.txt
Always use HTTPS for user login pages. Never use HTTP, which transfers a password in plaintext where a network eavesdropper could read it. For simplicity, this project uses HTTP only.
View the index / page by issuing a GET request, sending the cookies set by the previous login (--cookie cookies.txt).
$ curl --cookie cookies.txt http://localhost:8000/
... <index.html page content here>
Delete a post by issuing a POST request.
$ curl -X POST http://localhost:8000/posts/ \
  -F postid=1 \
  -F operation=delete \
  --cookie cookies.txt
Malicious example
Even though the “Delete post” button is hidden on posts that the logged in user doesn’t own, any user can use a tool like curl to send a POST request to try to delete an Insta485 post.
Try to delete a post created by jflinn using awdeorio’s cookies. We get a 403 Forbidden error. This is a good thing!
$ curl -X POST http://localhost:8000/posts/ \
  -F postid=2 \
  -F operation=delete \
  --cookie cookies.txt
...
<title>403 Forbidden</title>
...
A 403 Forbidden error should also be returned when a malicious user attempts to delete another person’s comment. If testing after implementing CSRF protection, this will result in a 400 Bad Request error.
Cross Site Request Forgery (CSRF)
Protect your POST Forms from CSRF attacks like this phishing email. Make sure your server is running and you’re logged in first.
The link adds a malicious comment to Insta485. (Note: behavior can vary with different browsers.)
Flask-WTF is a Flask extension that integrates WTForms and provides built-in CSRF protection for your entire application. For detailed implementation examples and best practices, see the Flask-WTF CSRF docs.
Include a hidden CSRF token in every Form by adding:
<input type="hidden" name="csrf_token" value="<FIXME_CSRF_TOKEN_HERE>">
For example the Form for “like” button becomes:
<form action="<FIXME_LIKES_URL_HERE>?target=<FIXME_CURRENT_PAGE_URL_HERE>" method="post" enctype="multipart/form-data">
  <input type="hidden" name="csrf_token" value="<FIXME_CSRF_TOKEN_HERE>">
  <input type="hidden" name="operation" value="like"/>
  <input type="hidden" name="postid" value="<FIXME_POST_ID_HERE>"/>
  <input type="submit" name="like" value="like"/>
</form>
You’ll also need to add a couple lines of Python code and configuration. For example, don’t forget to add this line:
flask_wtf.csrf.CSRFProtect(app)
Run the CSRF unit tests.
$ pytest -v tests/test_csrf.py
Testing
This section will show how to run style and unit tests.
Code style
All Python code must be PEP8 compliant, comments must be PEP257 compliant, and code must pass a pylint static analysis.
$ pycodestyle insta485
$ pydocstyle insta485
$ pylint insta485
Compliant HTML
Automatically generated HTML must be W3C HTML5 compliant. To test dynamically generated pages, the test_style.py::test_html test case renders each page and saves it to a file. Then, it runs html5validator on the files.
$ pytest -vvs tests/test_style.py::test_html
Unit tests
Run all unit tests. Everything should pass except for the deploy test and some of the script tests.
$ pytest -v
insta485test script
Write another script called bin/insta485test that does this:
- Stop on errors and prints commands
- Run
pycodestyle insta485 - Run
pydocstyle insta485 - Run
pylint insta485 - Run all unit tests using
pytest -v tests
Don’t forget to check for shell script pitfalls.
$ file bin/*
bin/insta485db:        Bourne-Again shell script text executable, ASCII text
bin/insta485run:       Bourne-Again shell script text executable, ASCII text
bin/insta485test:      Bourne-Again shell script text executable, ASCII text
You should now submit your work to the autograder. Ignore errors about files that don’t exist when making the tarball.
Deploy to AWS
You should have already created an AWS account and instance (instructions). Resume the AWS Tutorial with Install Nginx and Install Flask App.
After you have deployed your site, download the main page along with a log. Do this from your local development machine, not while SSH’d into your EC2 instance.
$ pwd
/Users/awdeorio/src/eecs485/p2-insta485-serverside
$ hostname
awdeorio-laptop  # NOT AWS
$ curl -v <Public DNS (IPv4)>/accounts/login/ > deployed_insta485.html 2> deployed_insta485.log
Be sure to verify that the output in deployed_insta485.log doesn’t include errors like “Couldn’t connect to server”. If it does contain an error like this, it means curl couldn’t successfully connect with your flask app. Also be sure to check that the curl command points to your AWS instance URL and not to localhost.
Be sure to verify that the output in deployed_insta485.html looks like a successfully rendered login page and does not contain any errors.
Shutting down AWS instance
Be sure to shut down your instance when you’re done with it (Stop EC2 Instance Instructions).
Submitting and grading
One team member should register your group on the autograder using the create new invitation feature.
Submit a tarball to the autograder, which is linked from https://eecs485.org. Include the --disable-copyfile flag only on macOS.
$ tar \
  --disable-copyfile \
  --exclude '*__pycache__*' \
  -czvf submit.tar.gz \
  bin \
  insta485 \
  sql \
  deployed_insta485.html \
  deployed_insta485.log
The autograder will run pip install -e YOUR_SOLUTION. The exact library versions in the requirements.txt provided with the starter files is cached on the autograder, so be sure not to add extra library dependencies to requirements.txt or pyproject.toml.
Direct link to the W26 Project 2 autograder: https://autograder.io/web/project/3697.
Rubric
This is an approximate rubric.
| Deliverable | Value |
|---|---|
| Handcoded SQL | 10% |
| Python and HTML style | 10% |
| Scripts | 10% |
insta485 (public) |
30% |
insta485 (private) |
35% |
| AWS deployment | 5% |
Things we won’t test
The autograder focuses on the functionality of your solution. These are some specific optional aspects of the project that we won’t evaluate.
- CSS styling
- Labeled form inputs, e.g.,
<p>Name: <input type="text" name="fullname"/></p> - User-submitted data validation not mentioned in this spec. For example, a password that contains only whitespace.
- Situations not mentioned in this spec. Make any decision that you might reasonable expect on a real website. However, use
flask.abort()only for errors.
FAQ
Do trailing slashes in URLs matter?
Yes. Use them everywhere. See the “Unique URLs / Redirection Behavior” section in the Flask quickstart.
Static files (like .jpg) should not have a trailing slash at the end. Use trailing slashes everywhere else.
Should I change HTML forms?
You can add HTML to style forms any way you choose. Don’t change the number, type or names of the inputs. This is because the autograder will make POST requests.
How should I link to my routes in HTML?
Use the flask.url_for function. Read documentation about this function online.
Can I disable any code style checks?
Do not disable any code style check from any code style tool (pycodestyle, pydocstyle, pylint). There are two exceptions listed here.
In insta485/__init__.py, the Flask framework requires an import at the bottom of the file (reference). We’re going to tell pylint and pycodestyle to ignore this coding style violation.
import insta485.views  # noqa: E402  pylint: disable=wrong-import-position
import insta485.model  # noqa: E402  pylint: disable=wrong-import-position
In insta485/__init__.py, the Flask framework uses an object that is used throughout the module. Although its value never changes, it is not a constant in the classic sense. We’re going to tell pylint to ignore this coding style violation.
app = flask.Flask(__name__) # pylint: disable=invalid-name
Why do I keep getting 404 Not Found?
A common reason to get 404 Not Found errors is if you forget to include the routes in your solution’s insta485/views/__init__.py file. Here’s a snippet of the instructor solution.
from insta485.views.index import show_index
from insta485.views.user import show_user
# ...
Acknowledgments
Original document written by Andrew DeOrio awdeorio@umich.edu. Workflow restructure and incremental unit testing (noauth) by Akanksha Girdhar agirdhar@umich.edu.
This document is licensed under a Creative Commons Attribution-NonCommercial 4.0 License. You’re free to copy and share this document, but not to sell it. You may not share source code provided with this document.