EECS 485 Lab
EECS 485 Lab 11: Scaling Server-Side Dynamic Pages with PaaS (Part 1)
Goals
By the end of this lab, you should:
- Separate development and production configurations for Project 3
Prerequisites
- Web apps run locally in a debug server with
./bin/insta485run - P3 code is completed
Restarting this tutorial
To restart this tutorial, you will need to revert your code changes.
Revert code changes
WARNING This will undo ALL changes in the current branch!
$ pwd
/Users/awdeorio/src/eecs485/p3-insta485-clientside/
$ git checkout aws-uniqname
M       ...
Already on 'aws-uniqname'
Your branch is up to date with 'origin/aws-uniqname'.
$ git branch # Verify that you are on the aws-uniqname branch
* aws-uniqname
  main
$ git reset --hard # Reverts all code changes back to your previous commit
HEAD is now at ... [previous commit message]
Dev and Prod Configuration
A development environment is for code development and debug. It usually runs on one computer, like the developer’s laptop. For example, flask run is a development server. A production environment is for end users, and usually involves many specialized and scalable programs running on many computers in a data center.
In the context of Project 3, here are some things we need to separate for dev and prod:
- Secret key for encrypting cookies
- Python packages in
requirements.txt - JavaScript build configuration in
webpack.config.js
Before we get started on any code, make sure you are on the aws-uniqname branch.
$ git status
On branch main
Your branch is up to date with 'origin/main'.

nothing to commit, working tree clean
$ git checkout aws-uniqname
...
$ git status
On branch aws-uniqname
nothing to commit, working tree clean
Separating Flask Configurations
As mentioned previously, we want to eventually separate out the secret keys for encrypting cookies for our environments. However, there are some commonalities between our environments such as the app root directory, database directory, upload folder, etc.. Since it is probably not the best idea to duplicate code, we will create 3 Flask config files: 1 common config that will be used regardless of the environment, 1 dev config, and 1 prod config.
In your project 3 insta485/ directory, create a new file called your config_common.py and add the following code. All the configuration settings in this file are common between the prod and dev environments.
"""
Insta485 common configuration.
Andrew DeOrio <awdeorio@umich.edu>
"""
import pathlib


# Root of this application, useful if it doesn't occupy an entire domain
APPLICATION_ROOT = '/'

# Cookies
SESSION_COOKIE_NAME = 'login'

# File upload limitations
ALLOWED_EXTENSIONS = set(['png', 'jpg', 'jpeg', 'gif'])
MAX_CONTENT_LENGTH = 16 * 1024 * 1024

# Local file upload to var/uploads/
INSTA485_ROOT = pathlib.Path(__file__).resolve().parent.parent
UPLOAD_FOLDER = INSTA485_ROOT/"var/uploads"

# Database configuration
DATABASE_FILENAME = INSTA485_ROOT/"var/insta485.sqlite3"
Create another file config_dev.py, which will hold all of the configuration settings specific to the dev environment, and add the following code. One thing to note is that it is alright to hardcode your secret key in development because only you (and/or your team) will be able to see it and you are also the only person using the application during development. Use your own SECRET_KEY that you previously generated.
"""
Insta485 development configuration.
Andrew DeOrio <awdeorio@umich.edu>
"""

# Secret key for encrypting cookies.  Never hardcode this in production!
SECRET_KEY = (
    b'FIXME'
)

# Development Database Config
POSTGRESQL_DATABASE_HOST = "localhost"
POSTGRESQL_DATABASE_PORT = 5432
POSTGRESQL_DATABASE_USER = 'FIXME_OS_OR_WSL_USERNAME'
POSTGRESQL_DATABASE_PASSWORD = None
POSTGRESQL_DATABASE_DB = "insta485"
Create another file config_prod.py, which will hold all of the configuration settings specific to the prod environment, and add the following code. Note that it is extremely dangerous to leave your secret key as plaintext in your source code in production. If an attacker is able to gain access to the source code, then they might be able to create a backdoor channel and gain access to your application. Instead, the secret key should be set as an environment variable that is passed into the code, which is the solution we will be using in this lab. Or better yet, your secret should be stored in a service like AWS Secrets Manager and be fetched when needed.
Note: Even though we are adding in the AWS resource configs, you do not need to re-enable the resources just yet. We will re-enable everything in Lab 12.
Make sure to use your own AWS database host.
"""
Production configuration.
Andrew DeOrio <awdeorio@umich.edu>
"""
import os

# Secret key for encrypting cookies.  It's bad practice to save this in the
# source code, so in production, the secret key should be set as an environment
# variable.
SECRET_KEY = os.environ.get("FLASK_SECRET_KEY")
if not SECRET_KEY:
    raise ValueError("No FLASK_SECRET_KEY environment variable.")
POSTGRESQL_DATABASE_PASSWORD = os.environ.get("POSTGRESQL_DATABASE_PASSWORD")
if not POSTGRESQL_DATABASE_PASSWORD:
    raise ValueError("No POSTGRESQL_DATABASE_PASSWORD environment variable.")

# Production Database Config

# Use your own AWS database host
POSTGRESQL_DATABASE_HOST = "FIXME_AWS_RDS_HOSTNAME"
POSTGRESQL_DATABASE_PORT = 5432
POSTGRESQL_DATABASE_USER = "insta485"
POSTGRESQL_DATABASE_DB = "insta485"

# AWS S3 static files
# https://flask-s3.readthedocs.io/en/latest/
FLASKS3_DEBUG = True
FLASKS3_ACTIVE = True
FLASKS3_BUCKET_NAME = 'FIXME_S3_STATIC_BUCKET_NAME'
FLASKS3_REGION = "us-east-2"
FLASKS3_FORCE_MIMETYPE = True
FLASKS3_USE_HTTPS = False
FLASKS3_CDN_DOMAIN = 'FIXME_CDN_DOMAIN_NAME'

# AWS S3 file upload
AWS_S3_UPLOAD_BUCKET = 'FIXME_S3_UPLOADS_BUCKET_NAME'
AWS_S3_UPLOAD_REGION = "us-east-2"
AWS_S3_UPLOAD_FOLDER = "uploads"
Delete your old config.py as we will not need it anymore.
$ rm config.py
Lastly, we need to tell the Flask application to use these different configurations based on the environment. Replace the code in your __init__.py with the following.
"""
Insta485 package initializer.
Andrew DeOrio <awdeorio@umich.edu>
"""
import flask
import flask_s3

# app is a single object used by all the code modules in this package
app = flask.Flask(__name__)  # pylint: disable=invalid-name

# Read settings from config module (insta485/config.py)
app.config.from_object('insta485.config_common')

# Overlay production or development settings.  Set the environment variable
# FLASK_ENV=development for a development environment.  The default is
# production.
if app.config["ENV"] == "development":
    app.config.from_object('insta485.config_dev')
else:
    app.config.from_object('insta485.config_prod')

# Overlay settings read from a Python file whose path is set in the environment
# variable INSTA485_SETTINGS. Setting this environment variable is optional.
# Docs: http://flask.pocoo.org/docs/latest/config/
#
# EXAMPLE:
# $ export INSTA485_SETTINGS=secret_key_config.py
app.config.from_envvar('INSTA485_SETTINGS', silent=True)

s3 = flask_s3.FlaskS3(app)

# Tell our app about views and model.  This is dangerously close to a
# circular import, which is naughty, but Flask was designed that way.
# (Reference http://flask.pocoo.org/docs/0.12/patterns/packages/)  We're
# going to tell pylint and pycodestyle to ignore this coding style violation.
import insta485.api  # noqa: E402  pylint: disable=wrong-import-position
import insta485.views  # noqa: E402  pylint: disable=wrong-import-position
import insta485.model  # noqa: E402  pylint: disable=wrong-import-position
Sanity Check.
$ pwd
/Users/awdeorio/src/eecs485/p3-insta485-clientside/insta485
$ tree --matchdirs -I '__pycache__|api|js|static|templates|views|model.py'
.
├── __init__.py
├── config_common.py
├── config_dev.py
└── config_prod.py
Separating Webpack Configuration
Similar to the Flask configurations, we will have 3 configurations for Webpack: 1 common, 1 development, and 1 production. If you want to learn more information about best practices and utilities for building a production application, take a look at the Webpack production documentation.
Some of the commonalities between our production and development Webpack configurations include the React entrypoint and the output directory. In your project 3 root directory, create a file named webpack.common.js and add the following code. We will later merge this common config with both the dev and prod configs.
// Webpack configuration shared by development and production builds
//
// Webpack Docs:
// https://webpack.js.org/guides/production/

const path = require('path');

module.exports = {
  entry: './insta485/js/main.jsx',
  output: {
    path: path.join(__dirname, '/insta485/static/js/'),
  },
  module: {
    rules: [
      {
        // Test for js or jsx files
        test: /\.jsx?$/,
        loader: 'babel-loader',
        options: {
          presets: ['@babel/preset-env', '@babel/preset-react'],
        },
      },
    ],
  },
  resolve: {
    extensions: ['.js', '.jsx'],
  },
};
Create a file named webpack.dev.js and add the following code. This code will merge in the common configuration we just defined and also set the output filename to bundle.dev.js, which should look very similar to the configuration you had in project 3.
// Webpack development configuration
//
// Webpack Docs:
// https://webpack.js.org/guides/production/

const merge = require('webpack-merge');
const common = require('./webpack.common.js');

module.exports = merge(common, {
  output: {
    filename: 'bundle.dev.js',
  },
  devtool: 'inline-source-map',
  mode: 'development',
});
The goal of having a separate Webpack configuration for production is to reduce the bundle size in prod using a minifier. To achieve this, create a file named webpack.prod.js and add the following code.
// Webpack production configuration
//
// Webpack Docs:
// https://webpack.js.org/guides/production/

const merge = require('webpack-merge');
const UglifyJSPlugin = require('uglifyjs-webpack-plugin');
const common = require('./webpack.common.js');

module.exports = merge(common, {
  output: {
    filename: 'bundle.min.js',
  },
  plugins: [
    new UglifyJSPlugin({
      sourceMap: true,
    }),
  ],
  mode: 'production',
});
Delete your old webpack.config.js as we do not need it anymore.
$ rm webpack.config.js
Replace the contents of your package.json.
{
  "name": "insta485",
  "version": "0.1.0",
  "description": "insta485 front end",
  "main": "insta485/js/main.jsx",
  "author": "awdeorio",
  "license": "MIT",
  "repository": {},
  "devDependencies": {
      "@babel/core": "7.10.3",
      "@babel/preset-env": "7.10.3",
      "@babel/preset-react": "7.10.1",
      "babel-eslint": "10.1.0",
      "babel-loader": "8.1.0",
      "eslint": "7.2.0",
      "eslint-config-airbnb": "18.2.0",
      "eslint-plugin-import": "2.21.2",
      "eslint-plugin-jsx-a11y": "6.3.1",
      "eslint-plugin-react": "7.20.0",
      "eslint-plugin-react-hooks": "4.0.4",
      "jsonlint": "1.6.3",
      "webpack": "4.44.2",
      "webpack-merge": "^4.2.2",
      "webpack-cli": "3.3.12",
      "uglifyjs-webpack-plugin": "^2.2.0"
  },
  "dependencies": {
      "moment": "2.27.0",
      "prop-types": "15.7.2",
      "react": "16.13.1",
      "react-dom": "16.13.1",
      "react-infinite-scroll-component": "5.0.5"
  }
}
Install the updated JS dependencies.
$ npm install .
Since we want to use a different bundle for the prod and dev environments, we also need to tell Flask to use the correct bundle based on the environment. If you look at your /insta485/templates/index.html, the source for the JavaScript code is always /js/bundle.js. However, now if we are in the dev environment we want to use /js/bundle.dev.js and if we are in the prod environment we want to use /js/bundle.min.js. In your /insta485/templates/index.html replace the code in the <script> tag specifying the bundle source with the following code.
<script
  type="text/javascript"
  {% if config['ENV'] == 'production' %}
  src="{{ url_for('static', filename='js/bundle.min.js') }}"
  {% else %}
  src="{{ url_for('static', filename='js/bundle.dev.js') }}"
  {% endif %}
></script>
Sanity Check
$ pwd
/Users/awdeorio/src/eecs485/p3-insta485-clientside
$ npx webpack --config webpack.dev.js
...
Hash: 8c778cb9bae0ff15e7f1
Version: webpack 4.43.0
Time: 8293ms
Built at: 08/19/2020 3:11:19 PM
        Asset      Size  Chunks             Chunk Names
bundle.dev.js  5.46 MiB    main  [emitted]  main
Entrypoint main = bundle.dev.js
[./insta485/js/comment-input.jsx] 5.68 KiB {main} [built]
...
$ ls insta485/static/js/
bundle.dev.js	... # Verify that bundle.dev.js exists
$ npx webpack --config webpack.prod.js
Hash: 4b88607644a9325ad858
Version: webpack 4.43.0
Time: 11916ms
Built at: 08/19/2020 3:46:41 PM
        Asset     Size  Chunks                    Chunk Names
bundle.min.js  500 KiB       0  [emitted]  [big]  main
Entrypoint main [big] = bundle.min.js
[145] (webpack)/buildin/module.js 552 bytes {0} [built]
...
$ ls insta485/static/js/
min.bundle.js ... # Verify that min.bundle.js exists
Writing Scripts to Run Each Environment
Now that we have all the Flask and Webpack configs separated, let’s write 2 Bash scripts to run each environment.
In your bin/ directory, replace the code in your insta485run script with the following.
#!/bin/bash
#
# insta485run
#
# Clean, build and start server
#
# Andrew DeOrio <awdeorio@umich.edu>

# Stop on errors, print commands
set -Eeuxo pipefail

# Create database if needed
if ! psql -lqt | grep -q insta485; then
    ./bin/insta485db create
fi

# Set up environment for Flask debug server
export FLASK_ENV=development
export FLASK_APP=insta485

# Compile in the background
npx webpack --config webpack.dev.js --watch &

# Run development server
flask run --port 8000
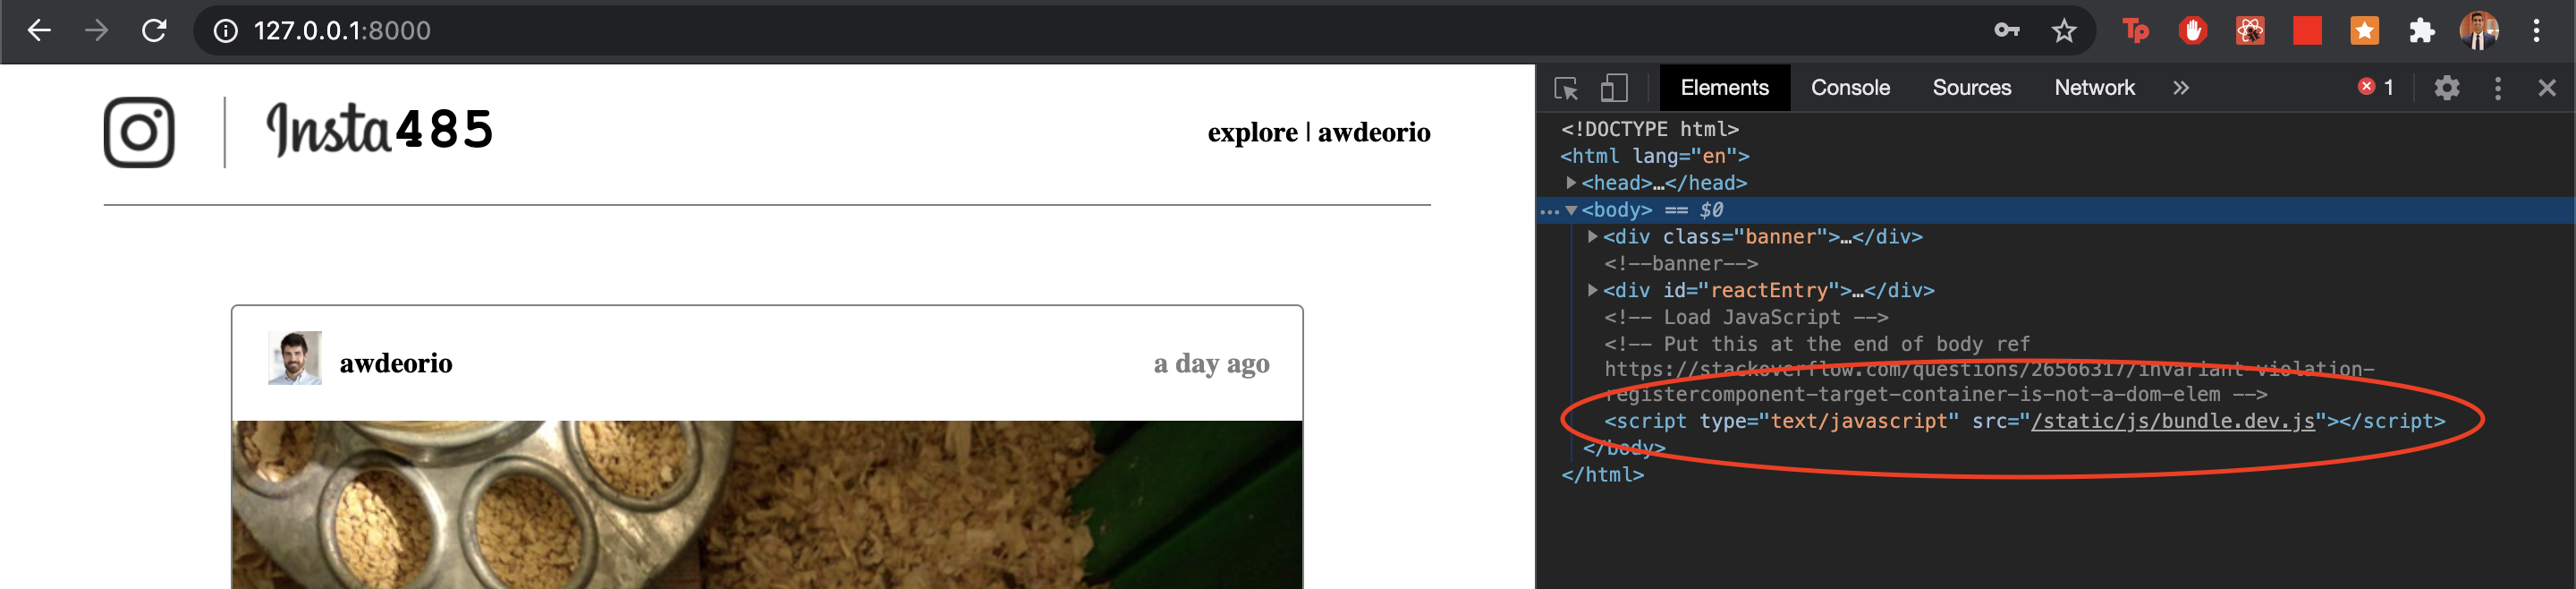
Run this script with ./bin/insta485run. If you navigate to the main feed page of your insta485 and view source, you should see that the source is bundle.dev.js.
In your bin/ directory, create a script named insta485run_prod and add the following code.
#!/bin/bash
#
# insta485run_prod
#
# Clean, build and start server
#
# Andrew DeOrio <awdeorio@umich.edu>

# Stop on errors, print commands
set -Eeuxo pipefail

# Create database if needed
if ! psql -lqt | grep -q insta485; then
    ./bin/insta485db create
fi

# Set up environment for Flask debug server
export FLASK_ENV=production
export FLASK_APP=insta485
export FLASK_SECRET_KEY=FIXME_FLASK_SECRET_KEY # Need to add this because of how we set up Flask prod config
export POSTGRESQL_DATABASE_PASSWORD=FIXME_RDS_PASSWORD #Use your own AWS database password

# Compile in the background
npx webpack --config webpack.prod.js --watch &

# Run development server
flask run --port 8000
Add execute priviledges to the script by running chmod +x bin/insta485run_prod from your p3 root directory. You will not be able to run this script unless you re-enable all of your AWS resources from the previous labs. However, we will use this script later in lab 12.
You have now successfully separated out your environments!
Completion Criteria
By the end of this lab, you should:
- Have separated your dev and prod configurations for both
webpackandFlaskCheck
$ pwd /Users/awdeorio/src/eecs485/p3-insta485-clientside/ $ tree insta485 --matchdirs -I '__pycache__|api|js|static|templates|views|model.py' . ├── __init__.py ├── config_common.py ├── config_dev.py └── config_prod.py $ tree -P "webpack.*" . ... ├── webpack.common.js ├── webpack.dev.js └── webpack.prod.js - Have separated your dev and prod run scripts
Check
$ pwd /Users/awdeorio/src/eecs485/p3-insta485-clientside/ $ tree bin/ bin/ ├── insta485db ├── insta485install ├── insta485run ├── insta485run_prod └── insta485test - Be able to run your dev script and verify that the src for the JS is
bundle.dev.json your index pageCheck
  $ pwd
  /Users/awdeorio/src/eecs485/p3-insta485-clientside/
  $ ./bin/insta485run # Verify that the src of the JavaScript on index page is `bundle.dev.js`
Lab Quiz
Complete the lab quiz by the due date.