EECS 485 Lab
Lab 2: Static Pages Tools
Goals
- Learn how to use basic browser tools
- Learn how to use command line tools to make web requests
- Learn how to deploy static pages to Amazon S3
Prerequisites
Create an AWS account following the tutorial here, only the “Create an account” section.
curl
curl is a command line HTTP client. httpie is another command line tool optimized for REST APIs.
Before we do some examples, make sure you have curl and httpie installed.
Install
Linux and Windows 10 Subsystem for Linux
$ sudo apt-get install curl httpie
MacOS
$ brew install curl httpie coreutils
All operating systems
Your versions might be different.
$ curl --version
curl 7.58.0 (x86_64-apple-darwin16.0) libcurl/7.54.0 SecureTransport zlib/1.2.8
$ http --version
1.0.3
Examples
Now let’s start making web requests with curl! Keep in mind that there are equivalent httpie commands that can make these web requests.
Example 1
Let’s start by making a simple GET request.
$ curl https://en.wikipedia.org/wiki/CURL > wiki.html
  OR
$ curl -X GET https://en.wikipedia.org/wiki/CURL > wiki.html
This request is the same as navigating to the Wikipedia page for curl in a browser. If you open wiki.html, you will find that it is the source code of the webpage. The -X flag followed by an HTTP method (i.e. GET, PUT, POST, etc.) specifies the type of request curl makes to the URL.
Example 2
We can also use the GET request method to pull images from the web. Make sure that you store the image. Below is an example pull request for an image on umich.edu.
$ curl https://umich.edu/includes/panels/gallery/images/block-m-maize.png > block-m-maize.png
Note: You can find this image url by inspecting the DOM using the built-in browser tools. You can perform GET requests on other links included in the HTML, such as CSS files.
Example 3
To see additional information about the GET request above, add the --verbose flag. With this flag, we can view the certificate verifications, data transfers, and other actions that curl must go through to get the HTML source of the Wikipedia page. We will learn about most of the info in this response throughout the semester, but the most relevent detail to us now is the response header. This header contains the HTTP network protocol used in the request (HTTP/2), the response code (200 OK), the length of the content (103640 bytes), and much more information about the response.
$ curl --verbose https://en.wikipedia.org/wiki/CURL > wiki.html
< HTTP/2 200
< date: Mon, 03 Aug 2020 15:52:17 GMT
< server: mw1372.eqiad.wmnet
< x-content-type-options: nosniff
< p3p: CP="See https://en.wikipedia.org/wiki/Special:CentralAutoLogin/P3P for more info."
< content-language: en
< vary: Accept-Encoding,Cookie,Authorization
< x-request-id: f6e1fa07-8bc5-41b3-a190-ae95349c934a
< last-modified: Mon, 03 Aug 2020 15:50:53 GMT
< content-type: text/html; charset=UTF-8
< age: 44054
< x-cache: cp1089 hit, cp1083 hit/14
< x-cache-status: hit-front
< server-timing: cache;desc="hit-front"
< strict-transport-security: max-age=106384710; includeSubDomains; preload
< x-client-ip: 24.128.149.46
< cache-control: private, s-maxage=0, max-age=0, must-revalidate
< accept-ranges: bytes
< content-length: 103640
Example 4
Now let’s try a different request method. A HEAD request allows you to view the metadata of a url, such as the last modified date and content type, without having to send a GET request to pull the entire webpage. This request method helps avoid time consuming GET requests. For instance, web browsers commonly cache (or save) information from web pages, such as images or HTML, onto your local computer’s hard drive. If you visited a website with a lot of images for the first time, your browser would save these on your hard drive. The next time you visited the site, your browser would send a HEAD request to the webpage and see that none of the images were updated. Then, it would not have to send a GET request and transfer all the images over the network, thus saving time.
To make a head request in curl, we just need to include the --head flag.
$ curl --head https://en.wikipedia.org/wiki/CURL
date: Thu, 13 Aug 2020 21:45:45 GMT
server: mw1403.eqiad.wmnet
x-content-type-options: nosniff
p3p: CP="See https://en.wikipedia.org/wiki/Special:CentralAutoLogin/P3P for more info."
content-language: en
vary: Accept-Encoding,Cookie,Authorization
x-request-id: d6afab5f-89f7-48ee-bd77-bafe539de07c
last-modified: Thu, 13 Aug 2020 21:40:57 GMT
content-type: text/html; charset=UTF-8
age: 649
x-cache: cp1089 miss, cp1079 hit/17
x-cache-status: hit-front
server-timing: cache;desc="hit-front"
strict-transport-security: max-age=106384710; includeSubDomains; preload
set-cookie: WMF-Last-Access=14-Aug-2020;Path=/;HttpOnly;secure;Expires=Tue, 15 Sep 2020 12:00:00 GMT
set-cookie: WMF-Last-Access-Global=14-Aug-2020;Path=/;Domain=.wikipedia.org;HttpOnly;secure;Expires=Tue, 15 Sep 2020 12:00:00 GMT
x-client-ip: ...
cache-control: private, s-maxage=0, max-age=0, must-revalidate
set-cookie: ...
accept-ranges: bytes
The response above is from August 13th, 2020. Has the page been changed since the above request was made?
If you would like to see more examples of how curl can be used, visit this website. Postman is another useful tool that provides a nice graphical user interface (GUI) to send HTTP requests.
Deploying Static Pages to Amazon S3
In this section, you will deploy static pages to AWS.
Let’s begin by creating two simple index HTML files for our static website. One will be the main page, and the other will be a general error page. Make any edits you want to these files and save them locally. The standard name for the main page is index.html, and the standard name for the error page is error.html.
index.html:
<!DOCTYPE html>
<html>
  <head>
    <title>Hello World</title>
  </head>
  <body>
    <h1>Hello World</h1>
    <p>Static pages hosted on Amazon S3</p>
  </body>
</html>
error.html:
<!DOCTYPE html>
<html>
  <head>
    <title>Error</title>
  </head>
  <body>
    <h1>Error</h1>
    <p>Something went wrong!</p>
  </body>
</html>
Let’s host this static content locally on our computer. In the same folder as your index file, run the following command.
$ python3 -m http.server
Serving HTTP on 127.0.0.1 port 00 (http://127.0.0.1:00/) ...
If you navigate to http://localhost:8000/, you should be able to see the rendered HTML of index.html. You can also run the following curl command. Note that localhost is short hand for the standard IP address 127.0.0.1.
$ curl http://localhost:8000/
<!DOCTYPE html>
<html>
  <head>
    <title>Hello World</title>
  </head>
  <body>
    <h1>Hello World</h1>
    <p>Static pages hosted on Amazon S3</p>
  </body>
</html>
While you do have a static website hosted, there is a lot of maintanence that goes into keeping your website up and running. Let’s use a service to simplify this process called Amazon S3, so that we can focus on delivering quality static content to our intended users.
Amazon Simple Storage Service (S3) is a service offered by Amazon Web Services (AWS) that provides object storage in the cloud. Watch this short video to learn more about Amazon S3.
Now, let’s deploy our first static website using Amazon S3! First, make sure you have signed up for AWS. Then, follow the steps below.
- Create a bucket to support request from the root domain.
- Navigate here.
- Click Create bucket.
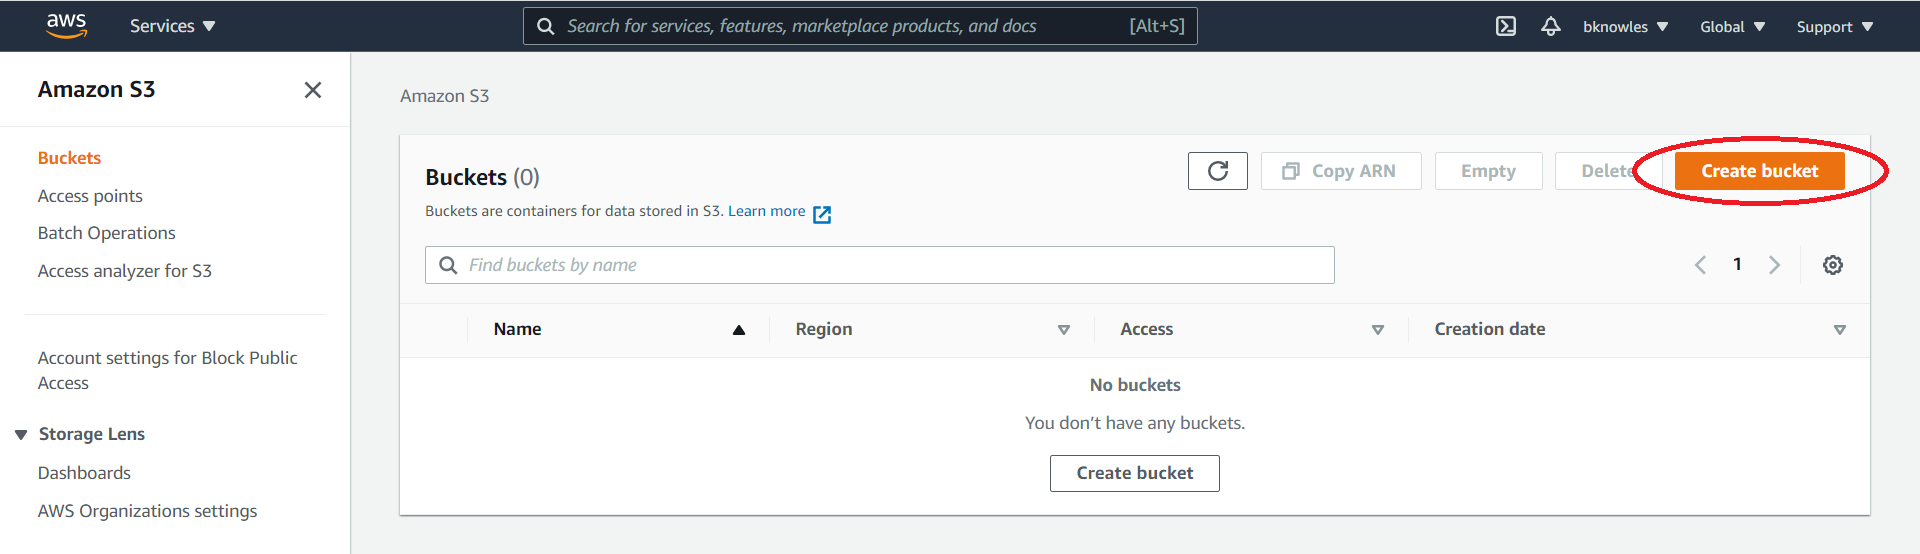
- Enter the root domain (e.g. uniqname.com with your uniqname) as the bucket name.
- The domain at
uniqname.commay already be owned by someone else. - You can check this by navigating to uniqname.com in your browser and seeing if there is a website at that URL.
- A more official way of checking this is using the
whoiscommand line utility.$ whois nobodyownsthisforsure.com ... No match for domain "NOBODYOWNSTHISFORSURE.COM".. - In general, if the domain is available, the output for the
whoiscommand will contain some reference to a match not being found. - If the domain is taken, select another domain name.
- The domain at
- Choose the region closest to you to minimize latency.
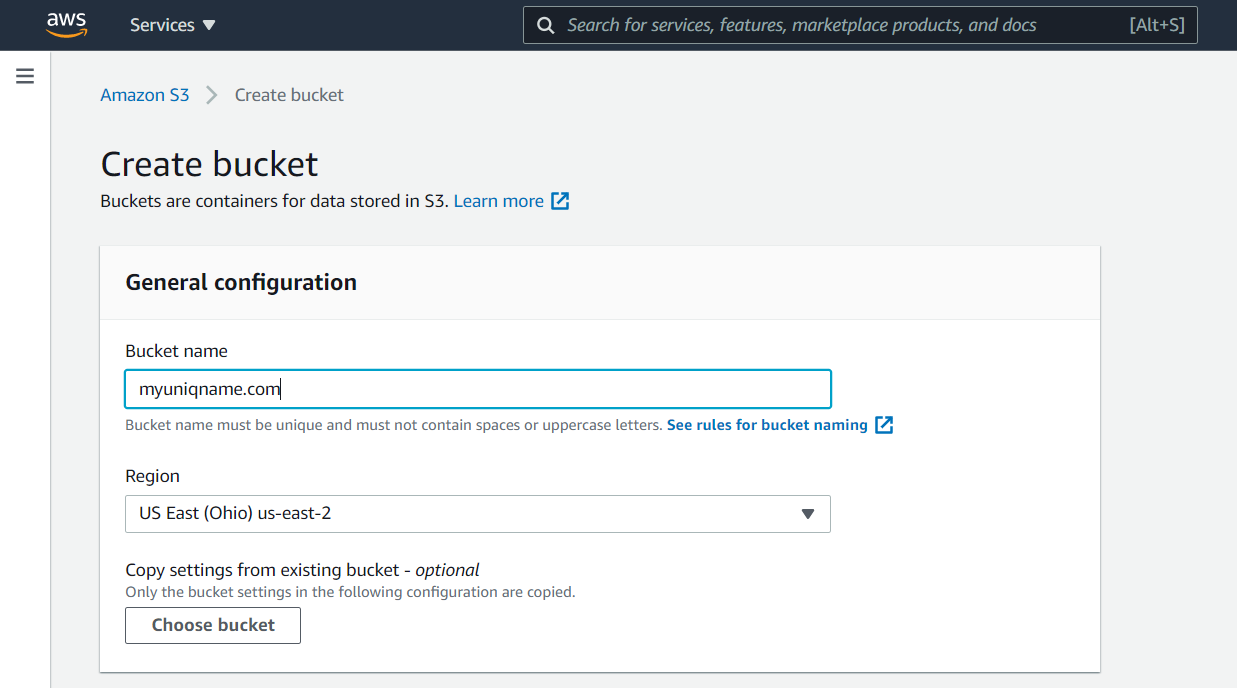
- Accept the default setting by selecting Create bucket at the bottom of the page.
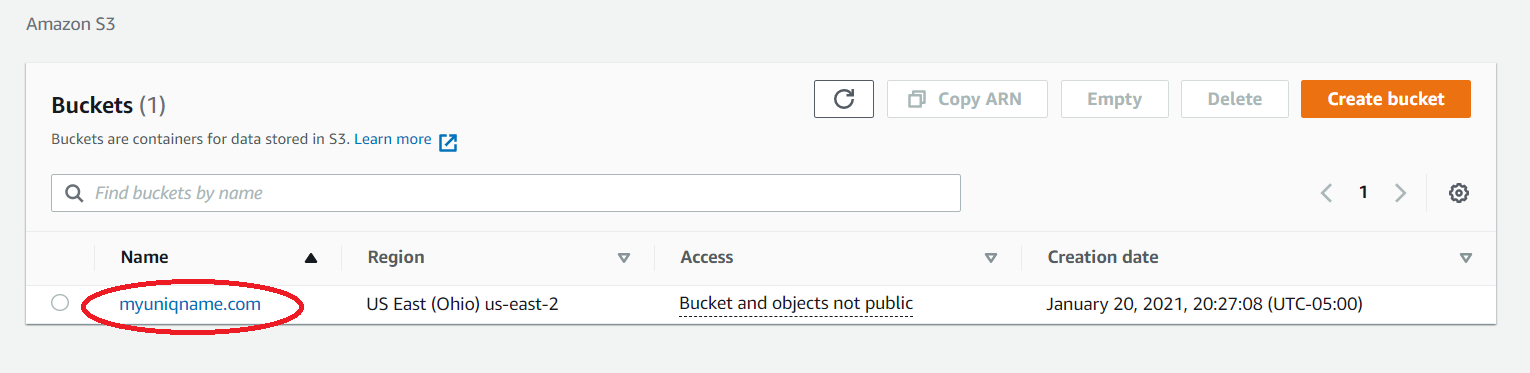
- Configure the root domain to host a static website.
- Click the root domain bucket under Name.
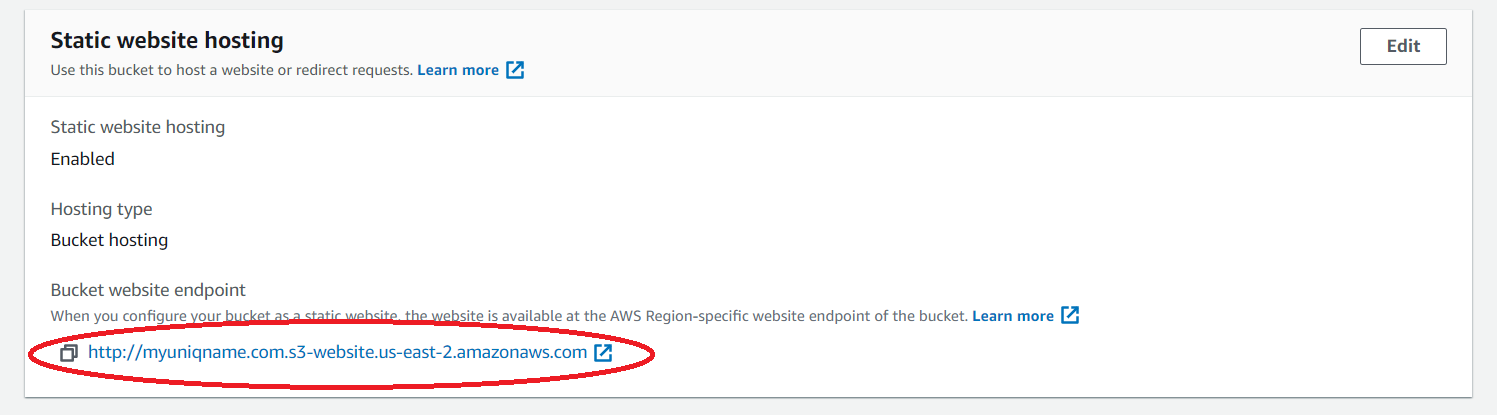
- Under the Properties tab, scroll down and select Edit on Static website hosting.
- Select the Enable option.
- Enter the name of the index document that you named your index file at the beginning (typically named
index.html). - Enter the name of the error document that you named your error file at the beginning (typically named
error.html).
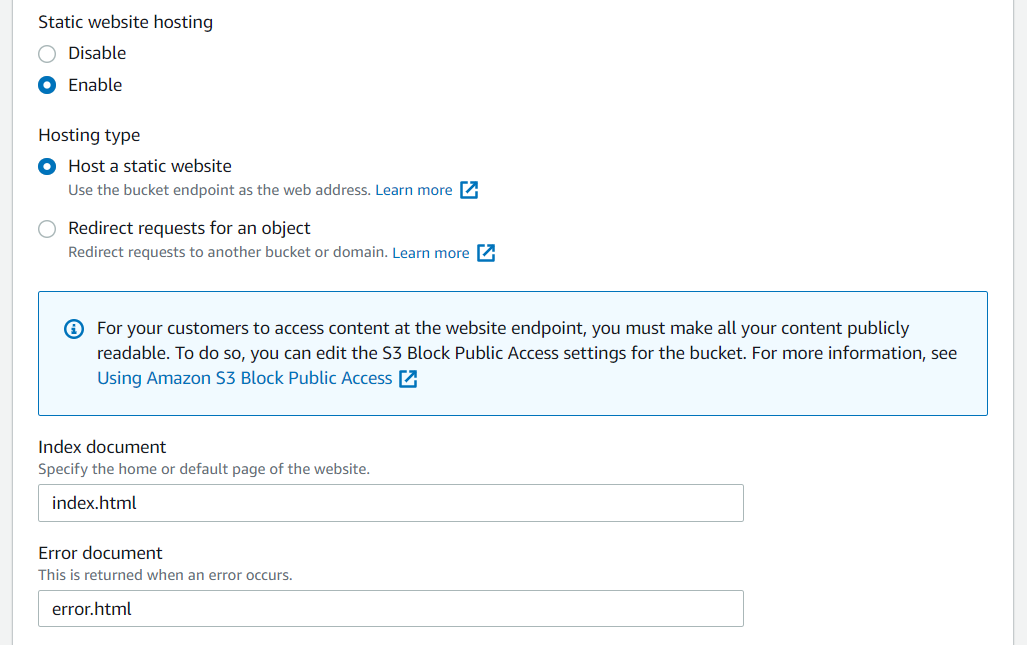
- Click Save changes at the bottom of the page, which will take you to back to the Properties tab for the root domain bucket.
- Take note of the Bucket website endpoint under Static website hosting at the bottom of the page. This endpoint will be used to access your static website.
- Configure logging for website traffic.
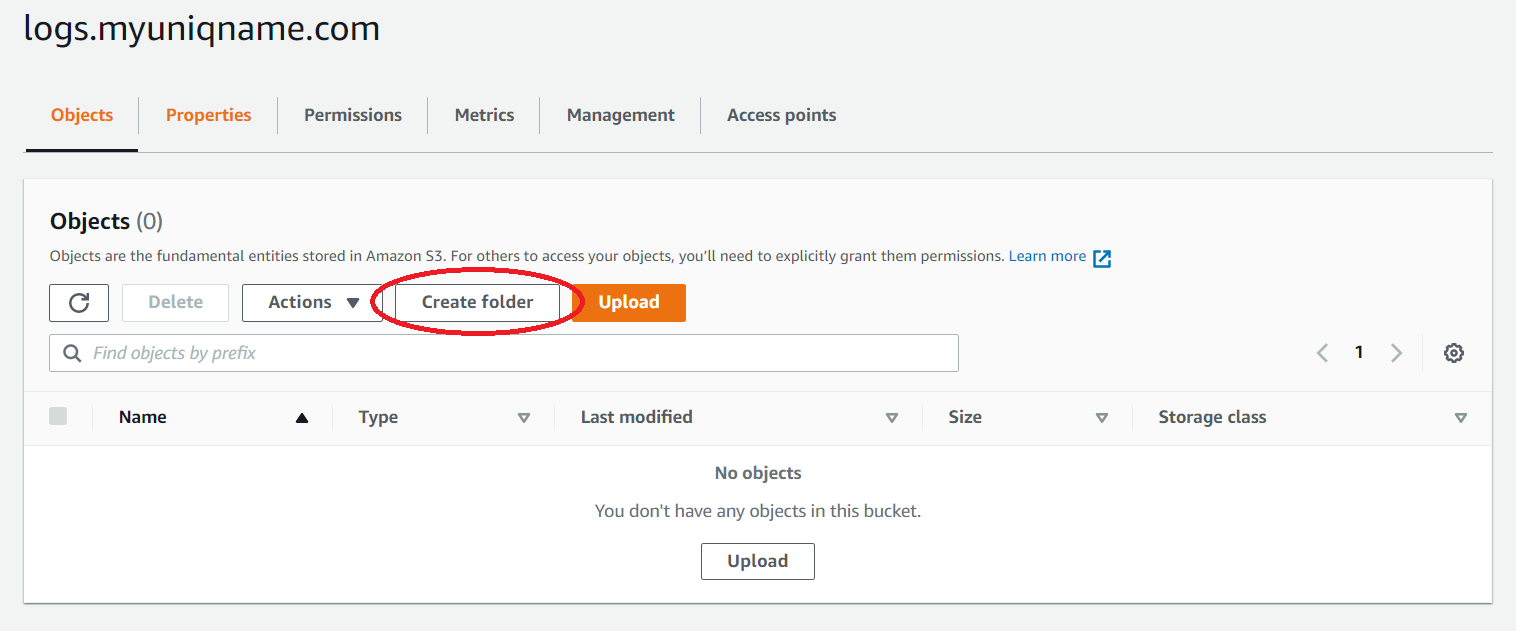
- First, create a bucket for
logs.uniqname.comthe same way as the previous bucket. - Within the bucket, create a folder for log files (for example,
logs). Keep the default settings when creating this folder.
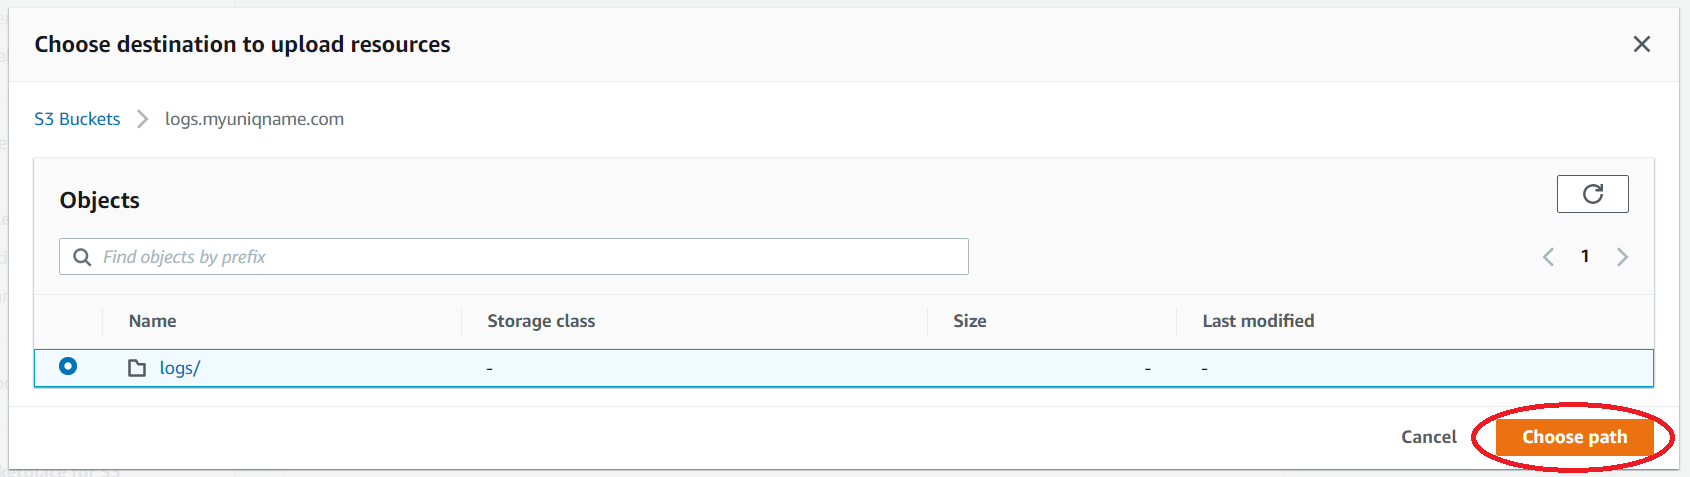
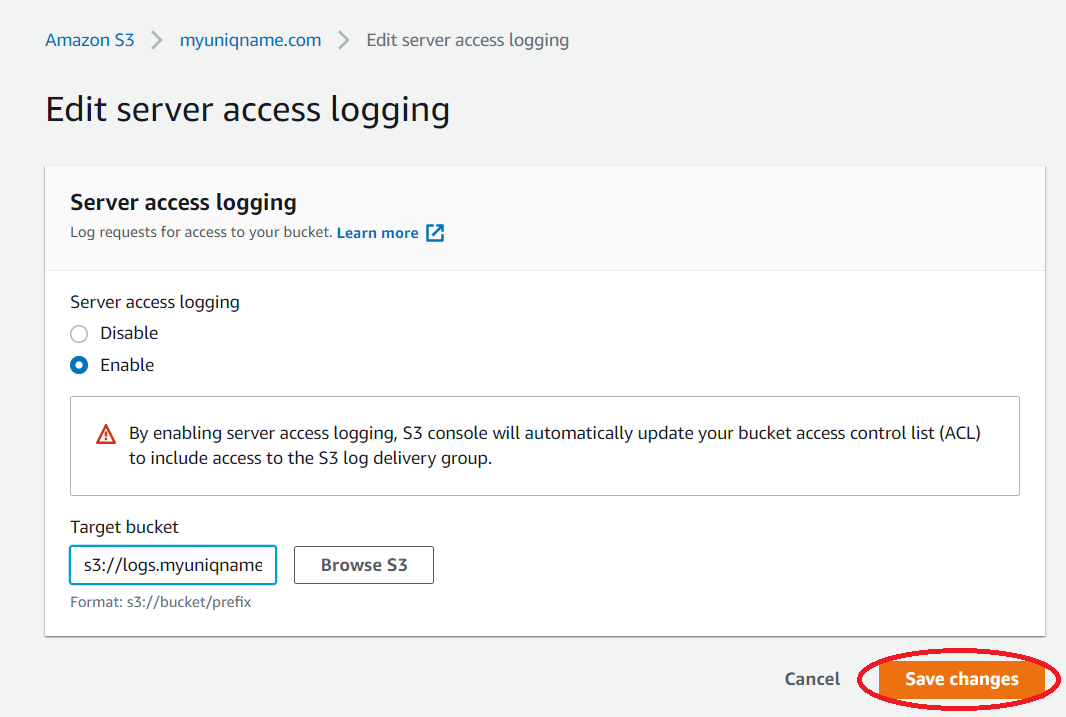
- Navigate to your root domain bucket’s Properties and click Edit on Server access logging.
- Select Enable.
- For the Target bucket, click Browse S3, click your logs.uniqname.com bucket under Name, and then select the
logsfolder you created. Then click Choose path.
- Click Save changes.
- First, create a bucket for
- Select the root domain bucket and upload your index file and error file.
- Navigate to Objects and click Upload.
- Click and drag
index.htmlanderror.htmlinto Files and folders. - Click Upload at the bottom of the page.
- Click Exit.
- Now that we have uploaded the static content (i.e.
index.html) to our bucket, we are ready to open up our site to the public. Public access is granted to buckets through access control lists (ACLs), bucket policies, access point policies, or all. In the next step, we will add a bucket policy that allows everyone on the internet to view your website. However, first we need to remove the default block to public access that prevents us from granting such policies.- Navigate to the Permissions tab under the root bucket and click Edit under Block public access (bucket settings).
- Uncheck the box for Block all public access and click Save changes.
- In the confirmation box, enter
confirm, and then click Confirm.
- Attach a public policy that grants public read access of your bucket to everyone on the internet.
- Navigate to the Permissions of your root bucket and click Edit on Bucket policy.
- Copy and paste the following bucket policy in the Policy editor.
- Update the uniqname to match your root domain, then click Save changes.
 {
  "Version": "2012-10-17",
  "Statement": [
      {
          "Sid": "PublicReadGetObject",
          "Effect": "Allow",
          "Principal": "*",
          "Action": [
              "s3:GetObject"
          ],
          "Resource": [
              "arn:aws:s3:::uniqname.com/*"
          ]
      }
  ]
 }
- Test your domain endpoint by navigating in your browser to the endpoint mentioned in step 2! It should look similar to the image below. You can check the
logsfolder to inspect the network traffic of your website (logs may take a few hours to populate).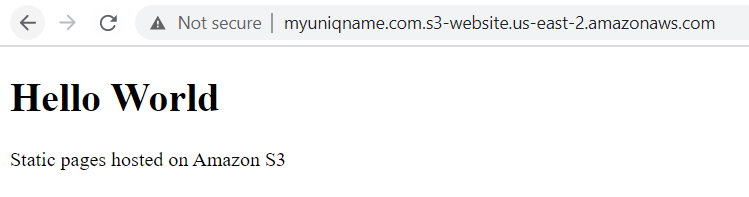
Clean up
Perform this clean up step so that you incur no charges on your AWS account. Since we will not be using this website later in the semester we can just delete the buckets.
- In the S3 console, navigate to your list of buckets.
- Select the root domain bucket, and click Empty.
- Enter
permanently deletein the Permanently delete all objects in bucket [name]? section and click Empty. - Click Exit and return to your list of buckets. Repeat steps 1-3 to empty your logs.uniqname.com bucket.
- Return again to your list of buckets. Delete your buckets one at a time by selecting a bucket, clicking Delete, entering the bucket name in the Delete bucket [name] section, and clicking Delete bucket.
Completion criteria
If you have done everything correctly, you should:
-
Be able to send HTTP requests with
curlusing any HTTP method as well as including a JSON body. Revisit thecurlexamples if you are still unclear on specific commands. -
Have deployed a static page to Amazon S3 and be able to access it through the endpoint provided.
Check
  $ curl http://uniqname.com.s3-website.us-east-2.amazonaws.com
  <!DOCTYPE html>
  <html>
  <head>
      <title>Hello World</title>
  </head>
  <body>
      <h1>Hello World</h1>
      <p>Static pages hosted on Amazon S3</p>
  </body>
  </html>
Lab Quiz
Complete the lab quiz by the due date.